.png)
Shipping Rules
Automation removes the need to perform manual, repetitive tasks by automating your shipping process and workflows. You can use these to set predefined rules that assign your preferred carrier for particular types of shipments.
Creating rules
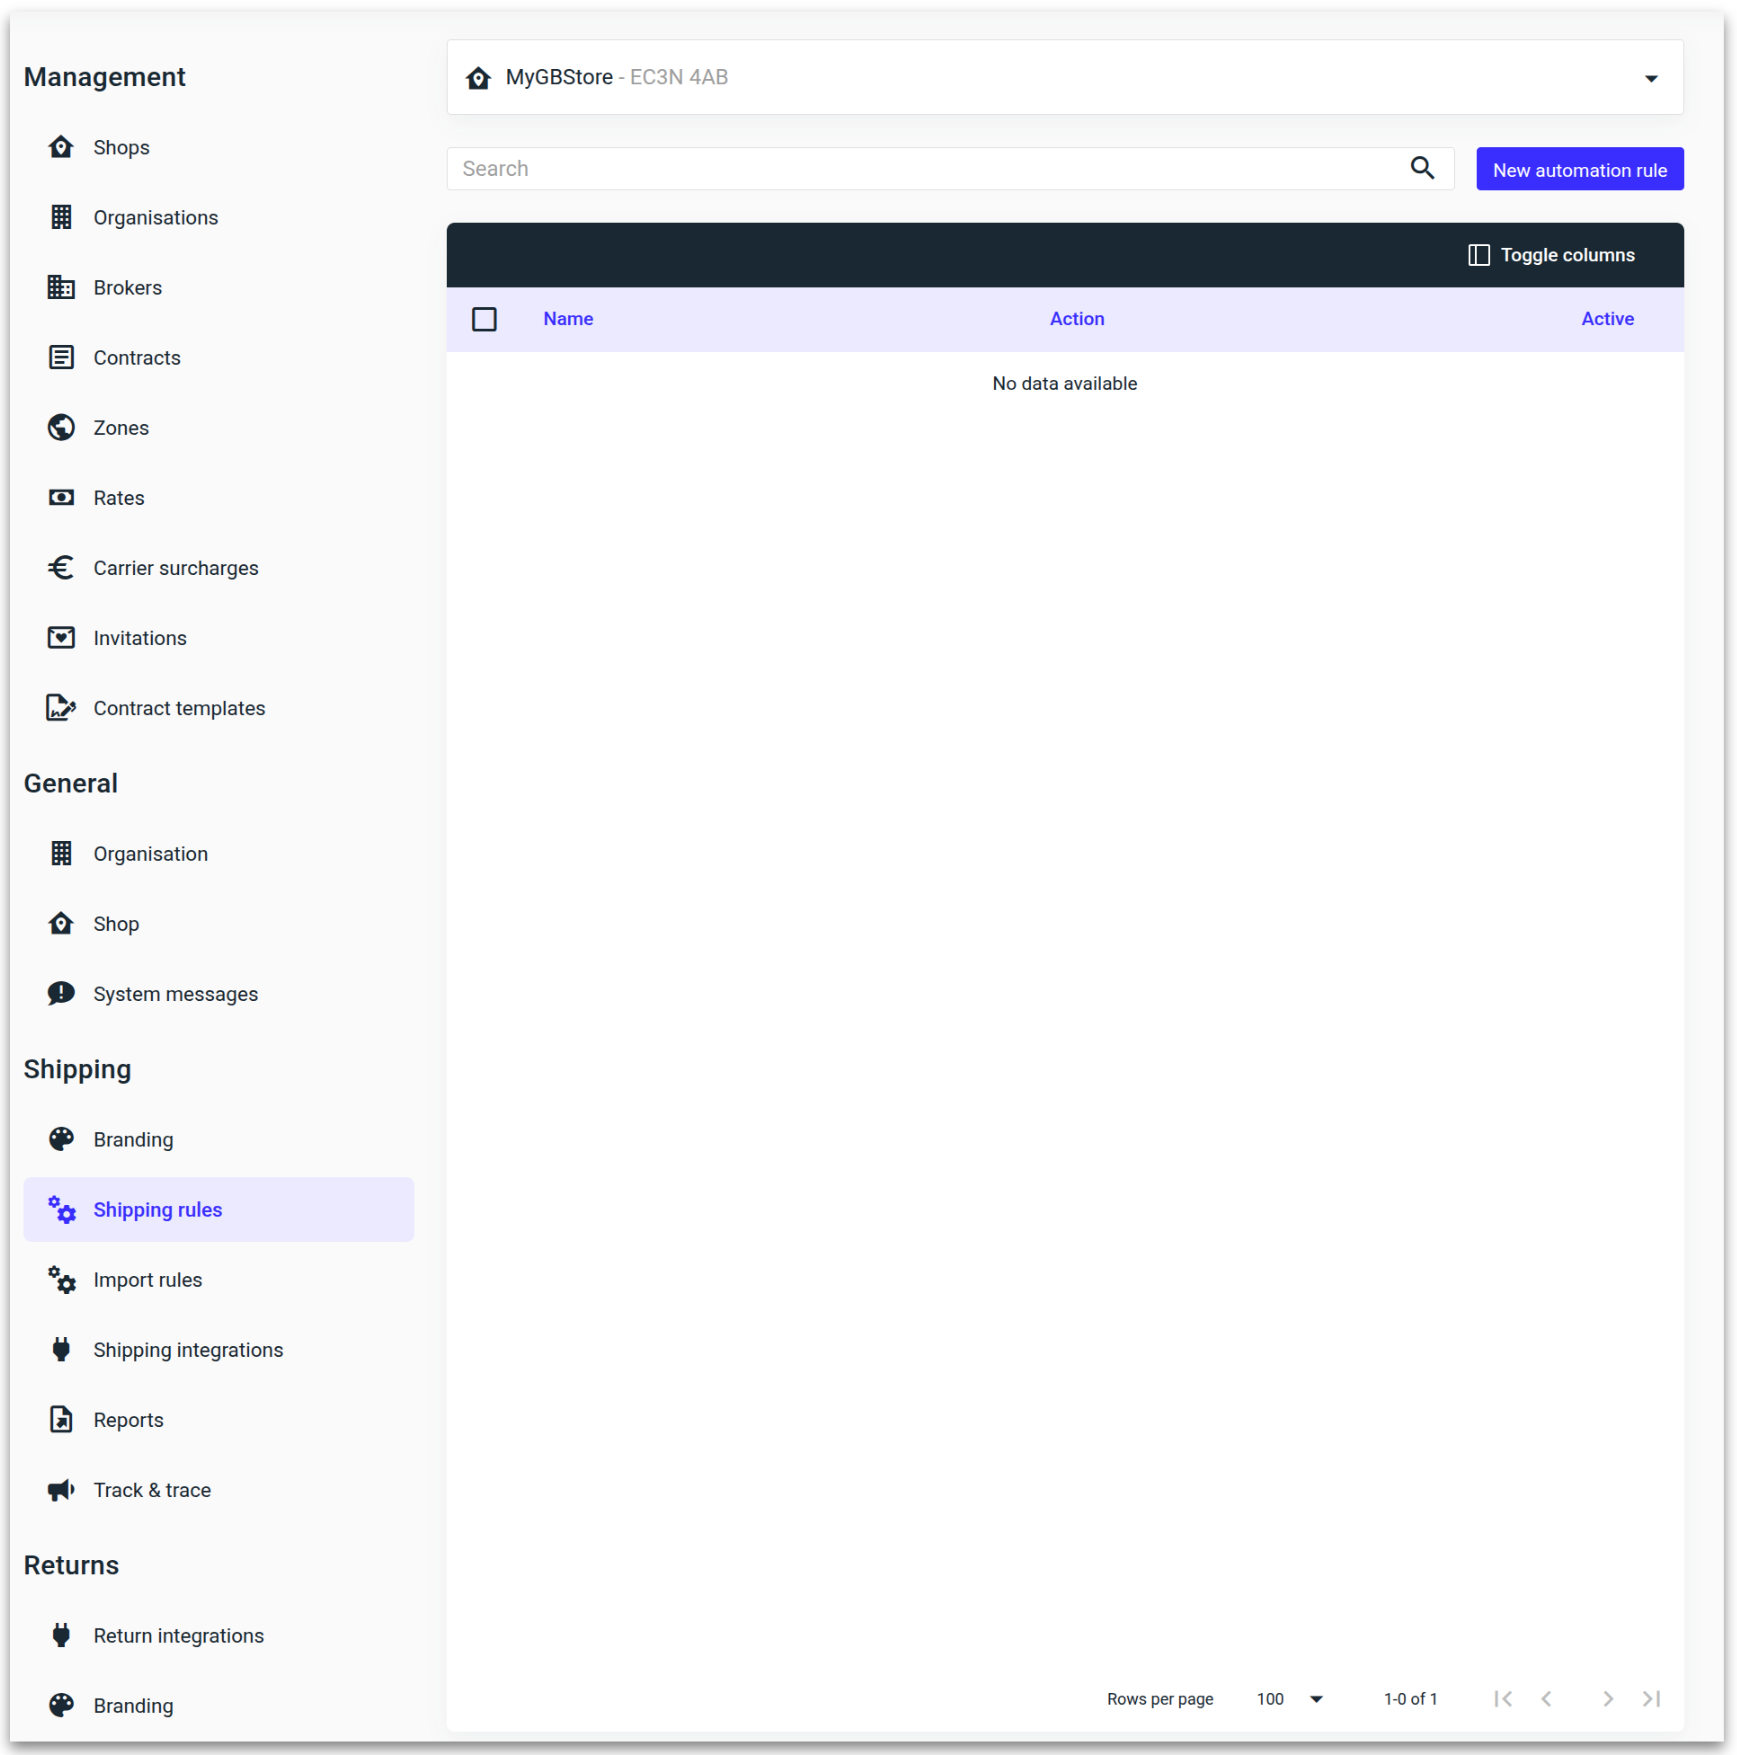
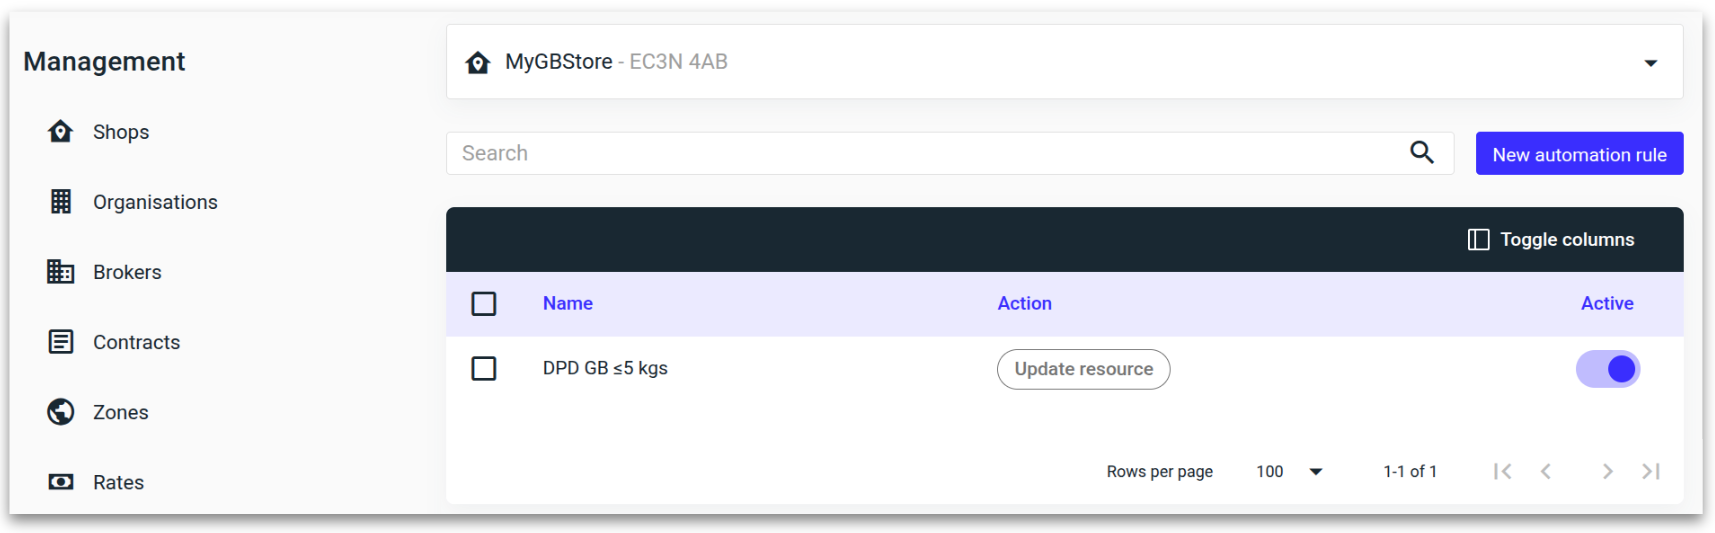
Navigate to the Shipping rules setting and click on the 'New automation rule' button towards the top right.
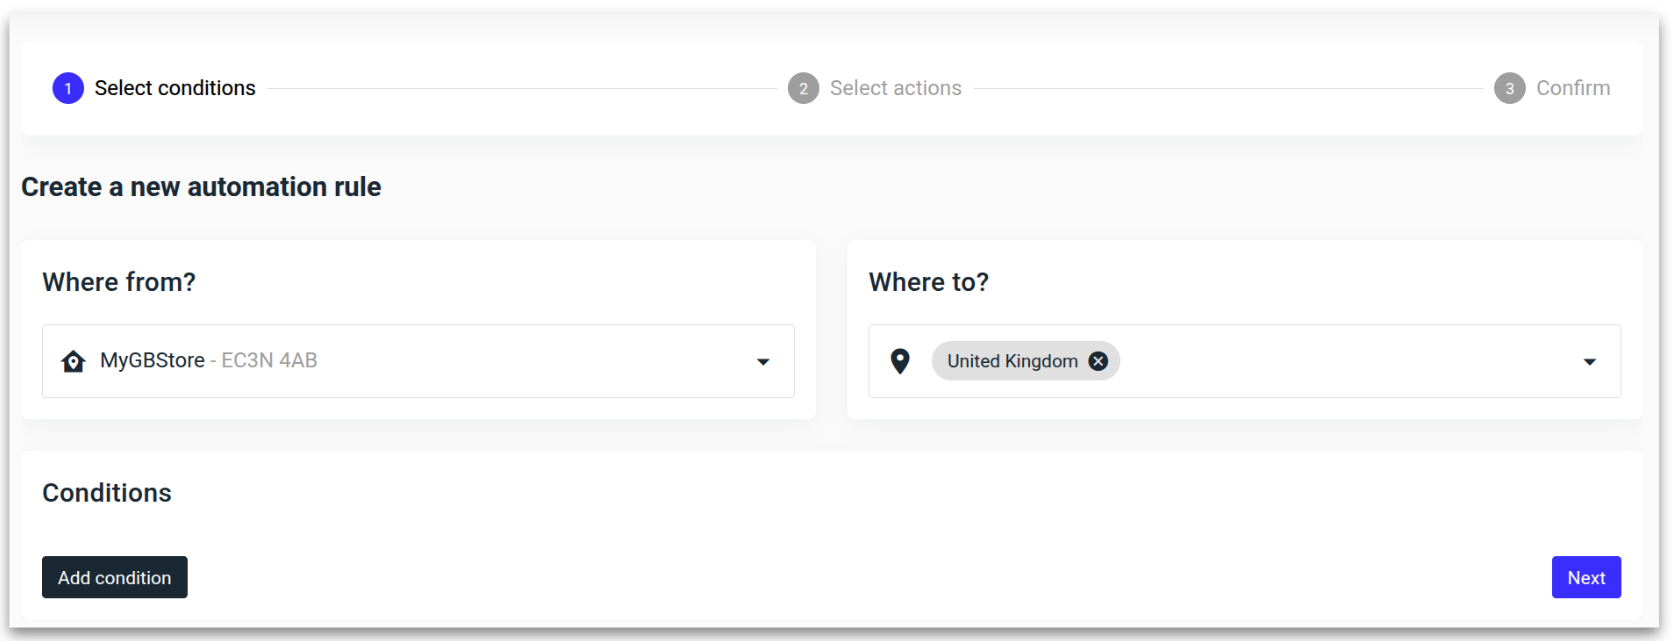
If you have multiple shops ensure the correct shop is selected that you want to create the rule for.
Enter the country or countries that this rule will apply to. If you do not need to add a Condition, click ‘Next.’
Each carrier has unique service offerings that vary by country. Adding more countries to a rule may result in fewer available services in the next step.
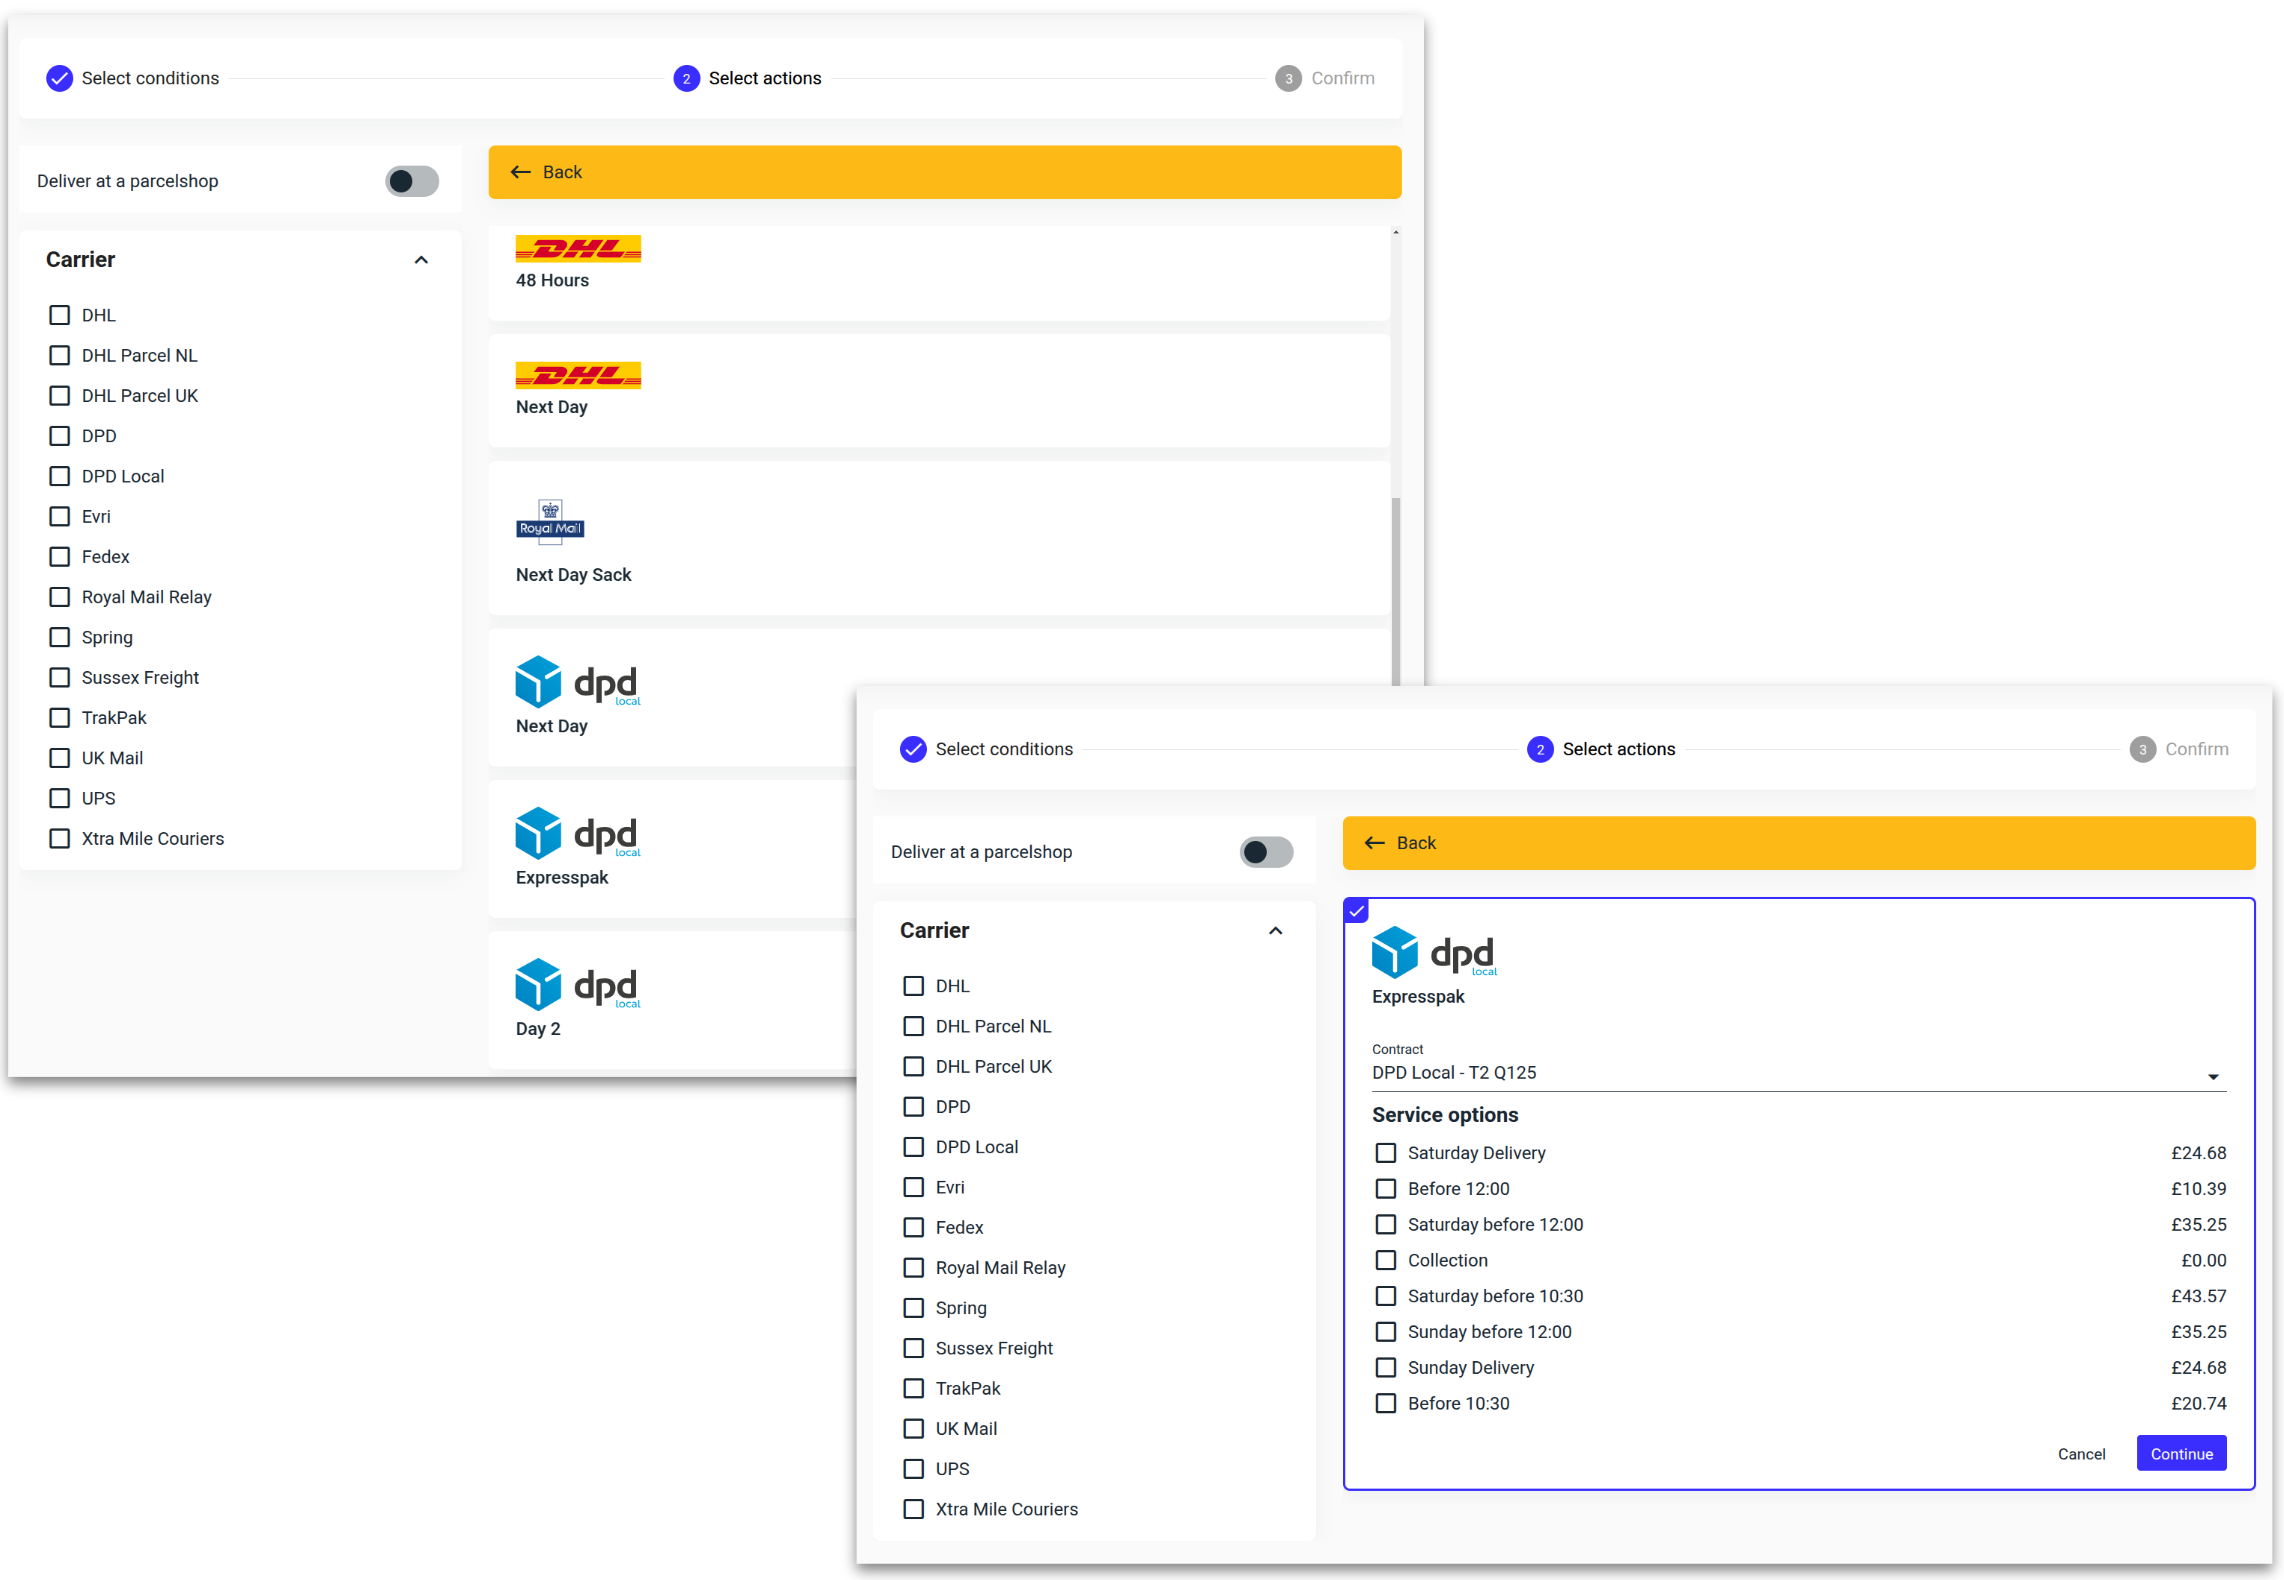
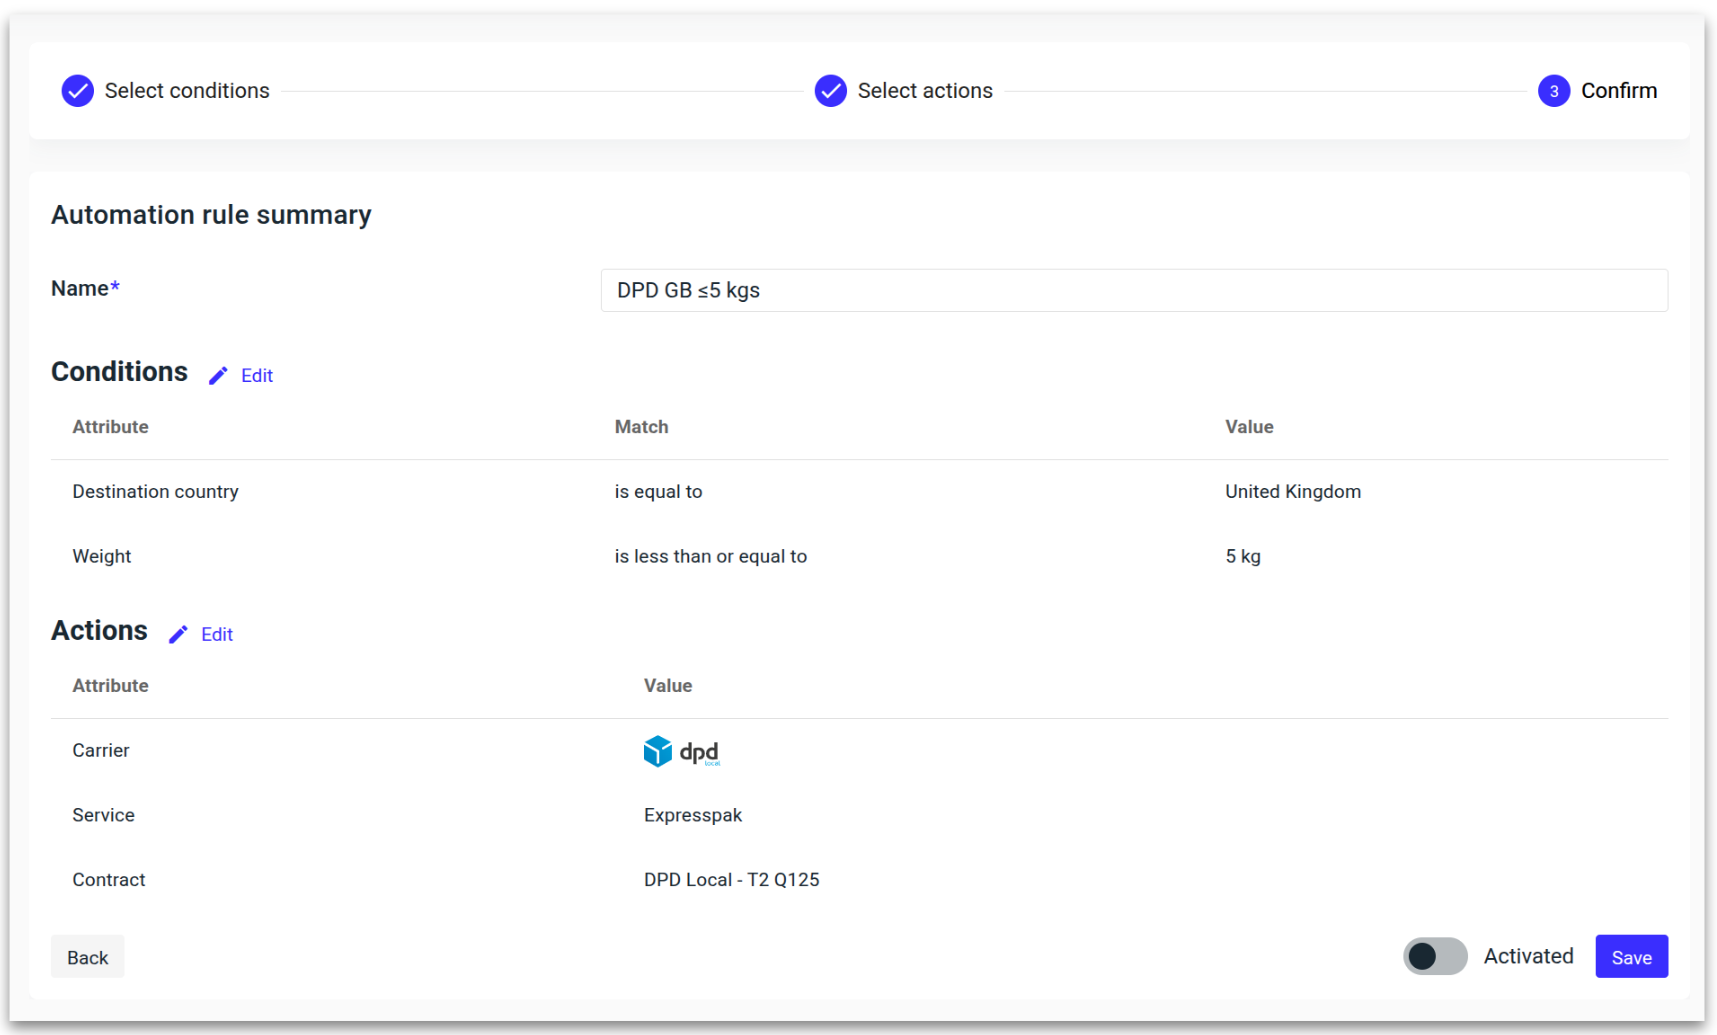
Select the preferred carrier, service, and delivery option, then click 'Continue.'
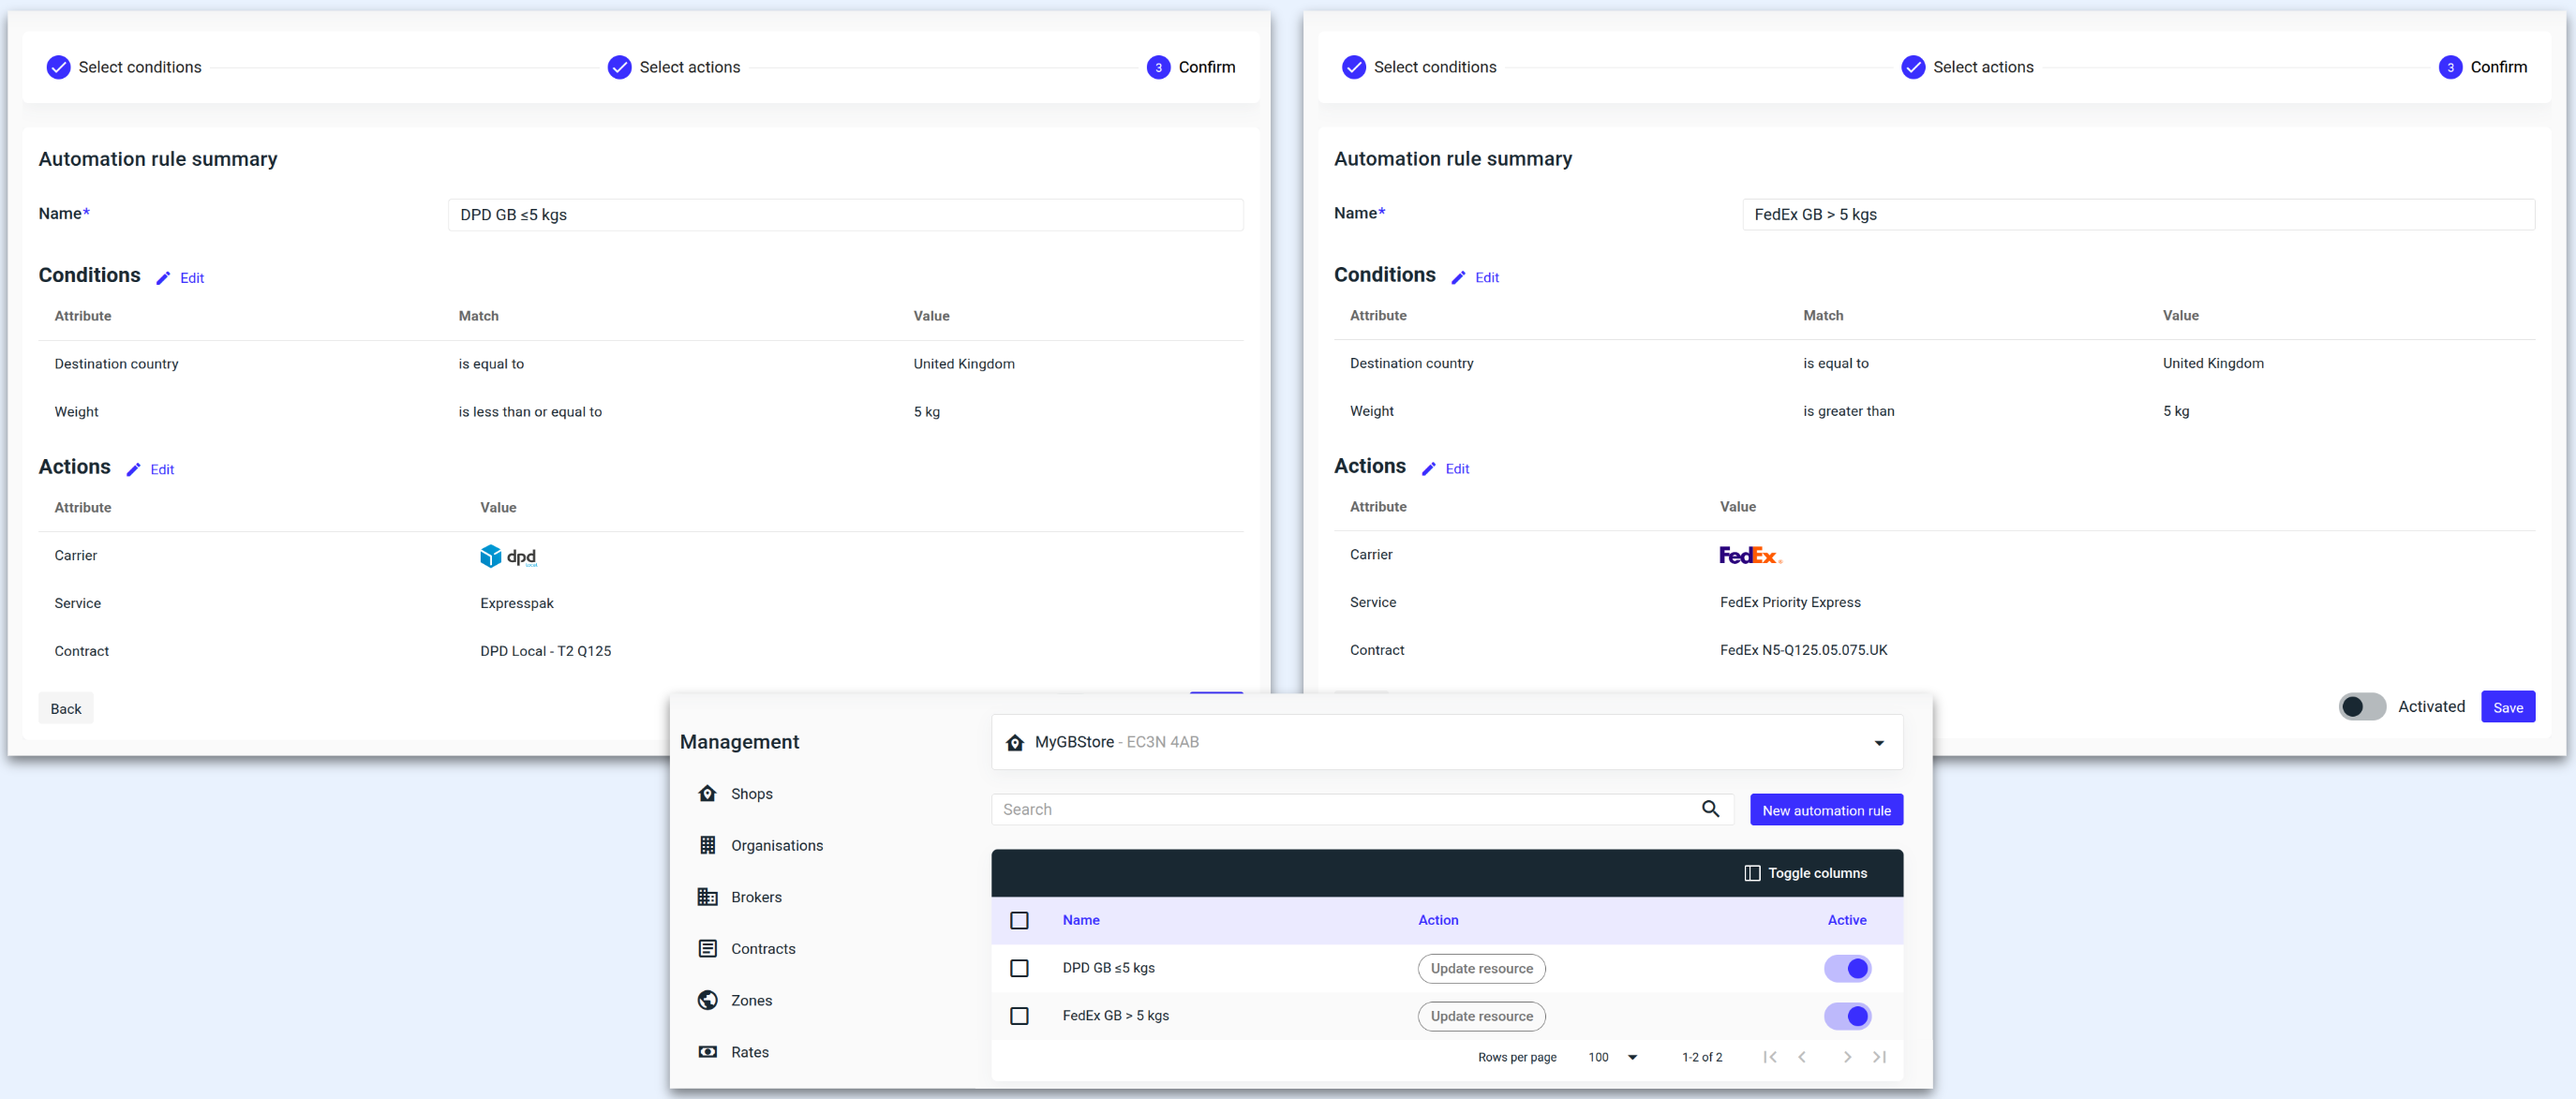
Give the rule a name, activate the toggle and click 'Save.'
Your new automation rule is now visible in the rule overview.
Conditions
Adding conditions to automation rules enables you to assign parcels based on specific attributes. For example, you can ship low-value items with Carrier X and high-value items with Carrier Y.
Weight: If the weight is less than or equal to 2 kg, select Carrier A.
Value: If the value is greater than 100, select carrier B.
Tags: Are mapped to the webshop's delivery checkouts, allowing your customers to select their prefered delivery option.
Tags also work when using the .csv upload. You can export all data including tags from marketplaces and eCommerce platforms.
2a. Click ‘Add condition’ and select the preferred attribute to add to the rule. Once complete, click 'Next.'

ℹ️ Add multiple conditions to a single rule. For example, select Carrier C for shipments that meet both a minimum weight and value.
ℹ️ If a rule uses a match like 'less than or equal to' for weight or value, you will need to create another rule with the condition 'greater than' to handle the remaining cases and ensure that all possible scenarios are covered.