.png)
Portal shipments
Create single and batch shipments directly from the shipping portal.
Providing complete and accurate information will help minimize failed registrations, ensure smoother transit, and reduce the risk of surcharges or returned shipments.
Manual shipments
Shipment flow
Create a shipment in four easy steps.
Creating shipments
The single shipment flow is split into 4 sections:
Shipping location: Select shipper location, add weight and dimensions and add the receiver address.
Select a service: Select your preferred carrier, service, and delivery options.
Shipping details: Receiver and parcel details.
Confirmation: Check details before saving as a concept shipment.
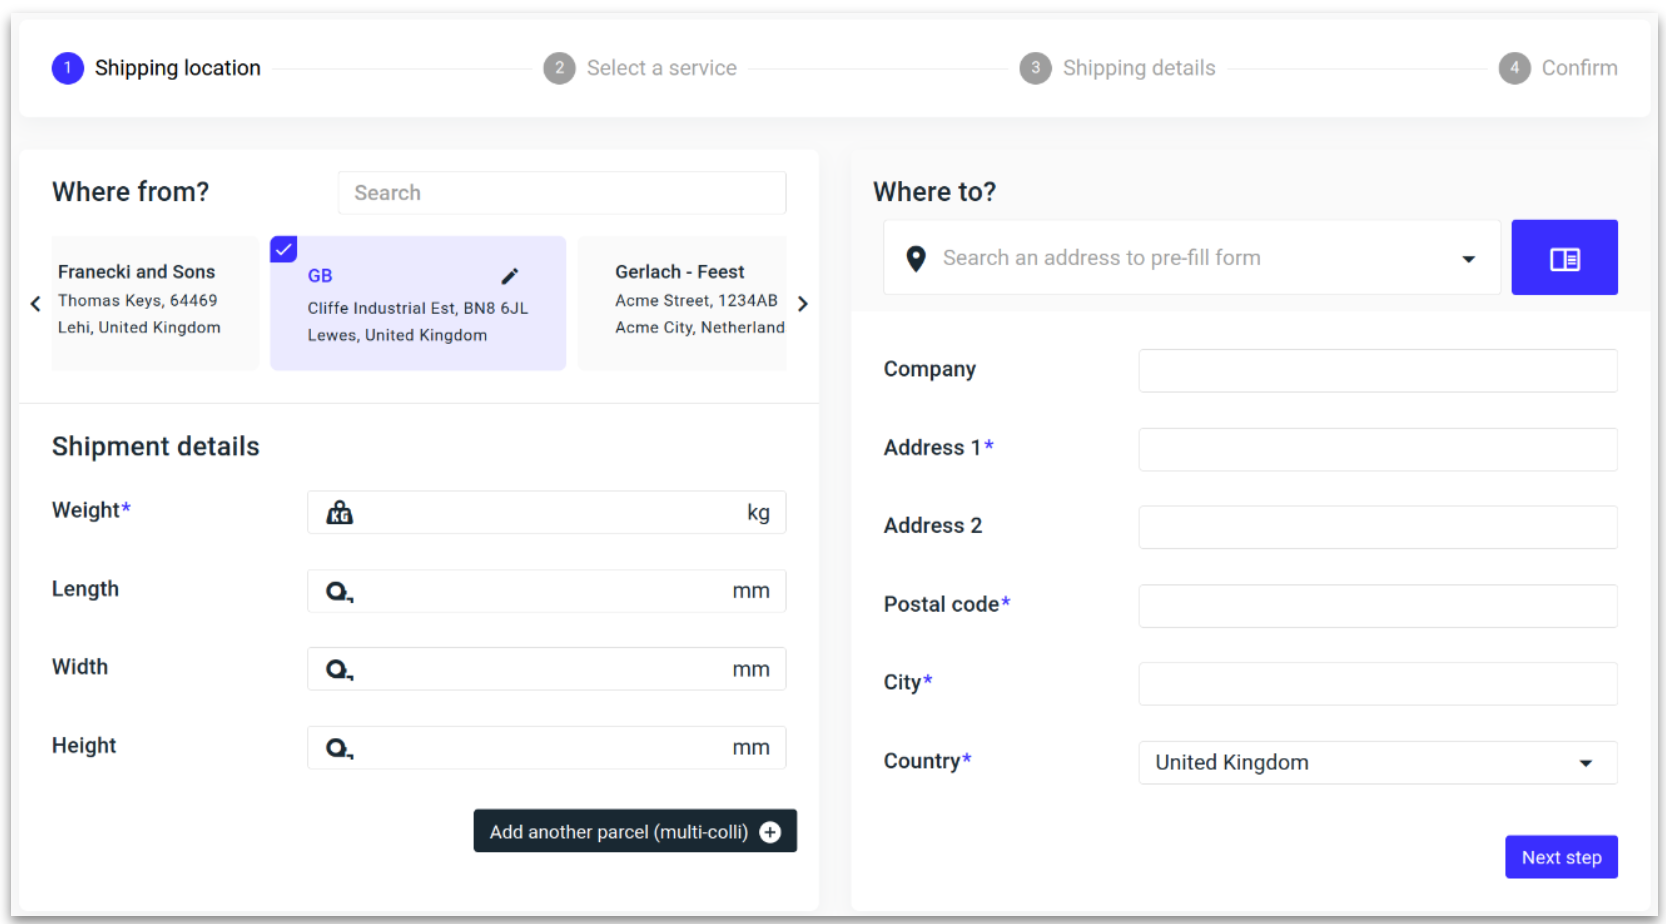
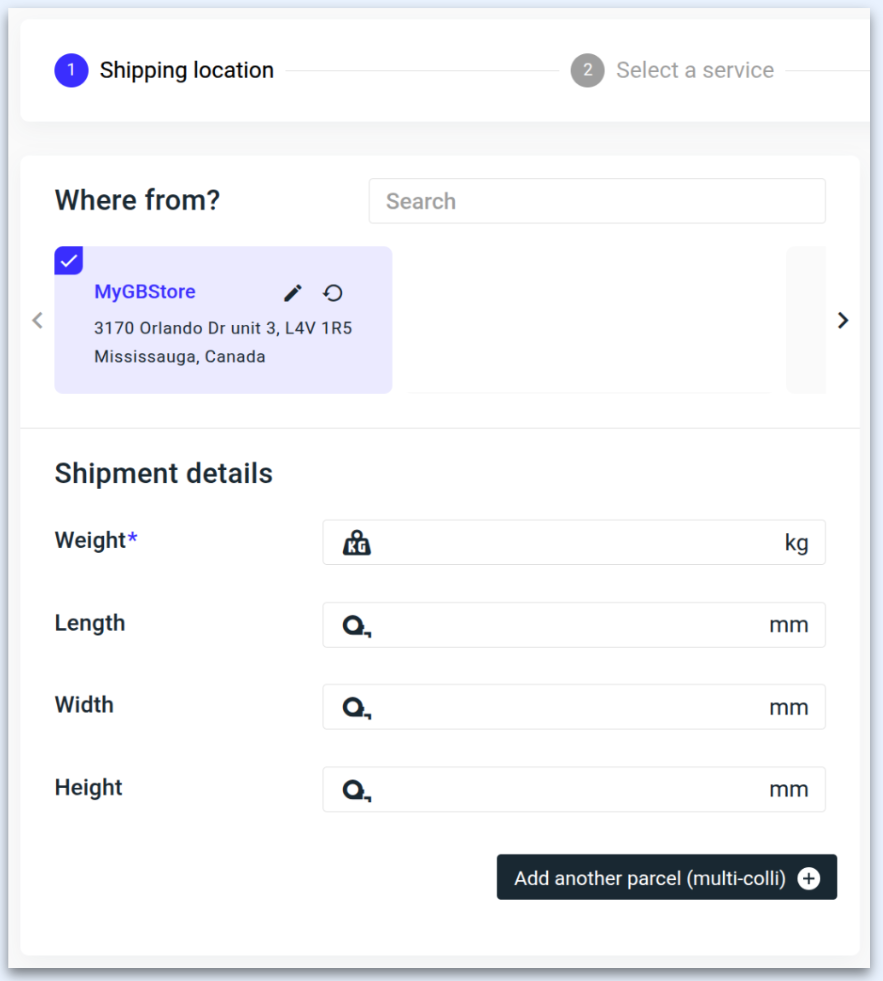
Shipping location
On the right-hand side of the shipment portal, click 'New Shipment.'

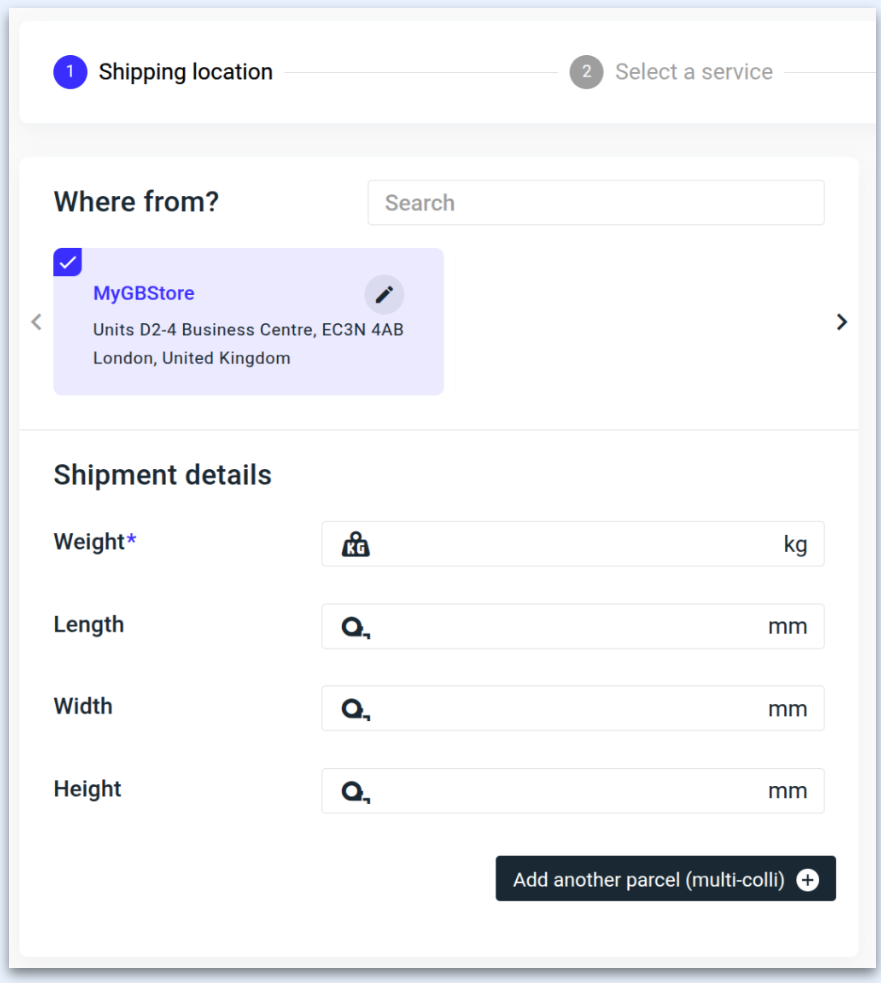
2. If you have multiple shops, select the correct one, then proceed to add the weight, dimensions.
Drop shipping
Set an alternative senders address to retrieve services from a different injection location.
2a. Click the pencil icon in the top right corner of your shop.
2b. Edit any line of the sender's address or select an address from the address book, then click 'Save.'
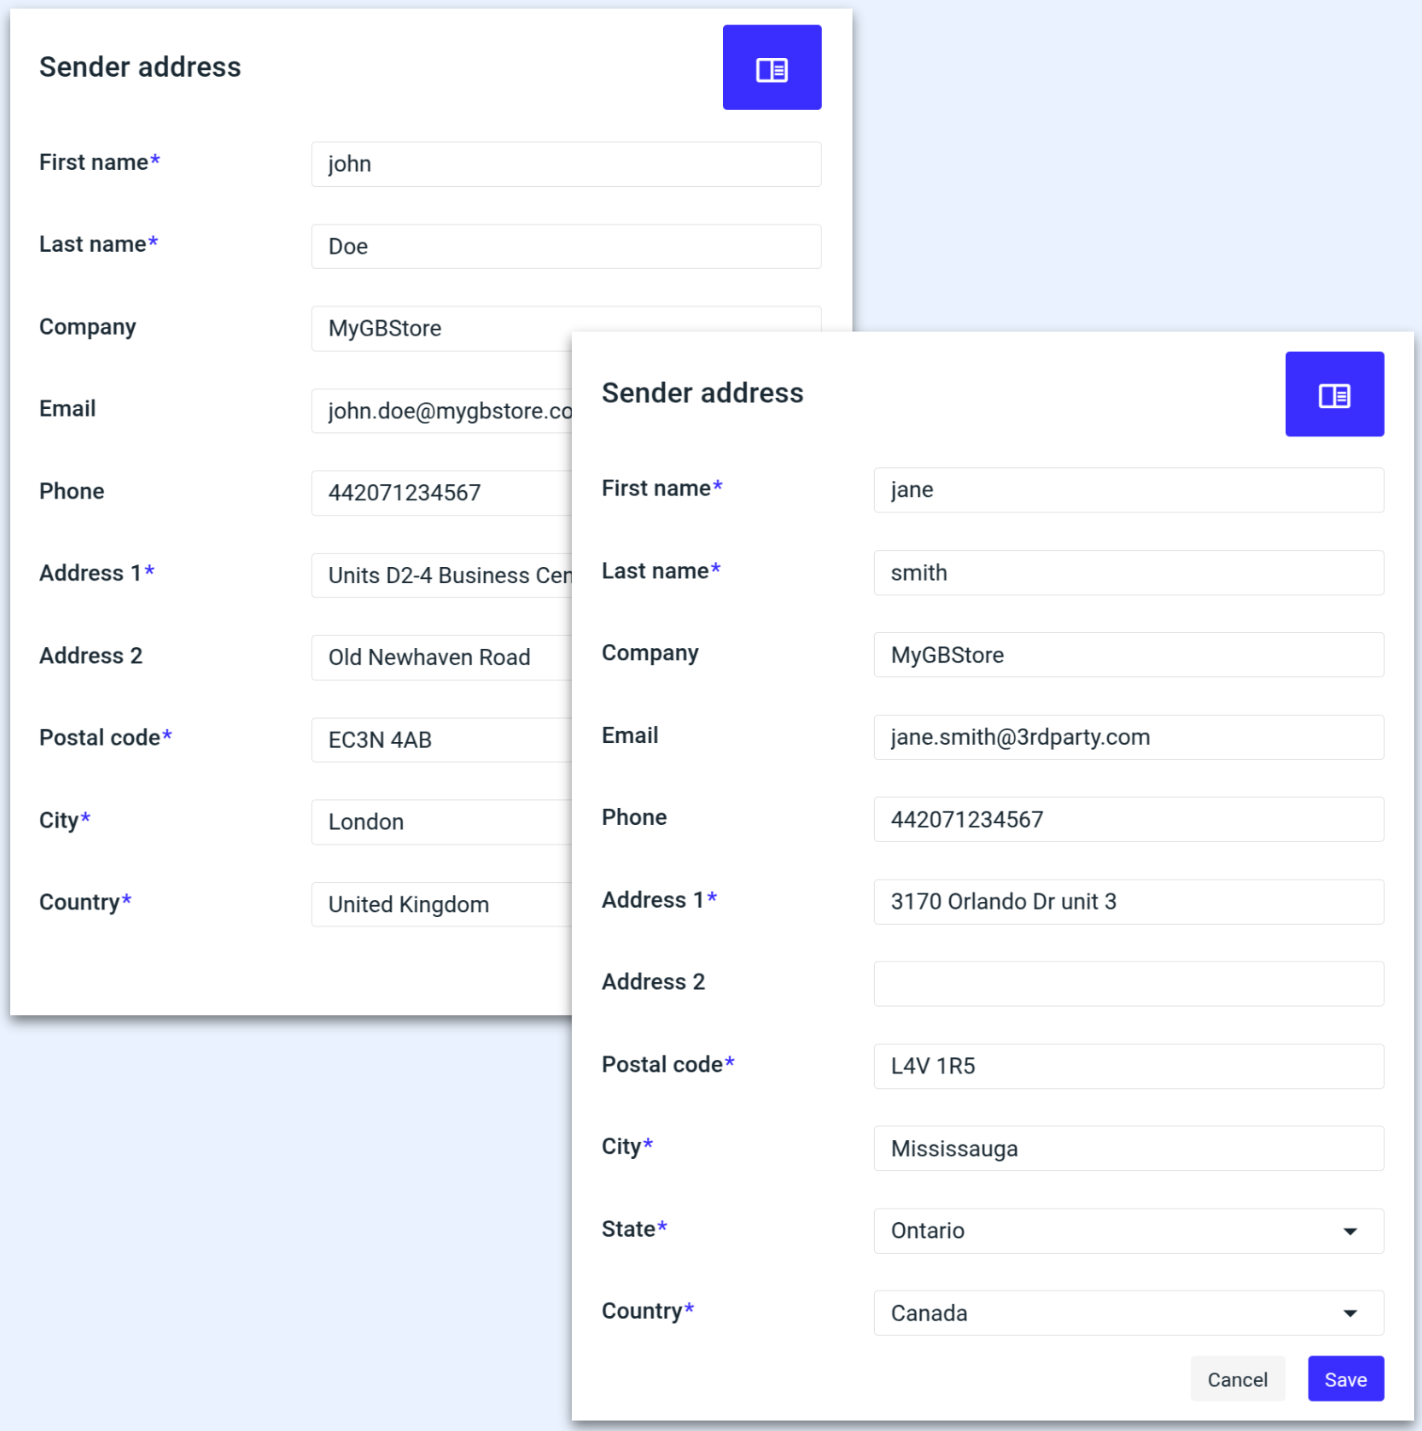
ℹ️ The new shipper details will now be reflected as the shop address.
ℹ️ Click the refresh icon in the top right corner to reset the shop address.
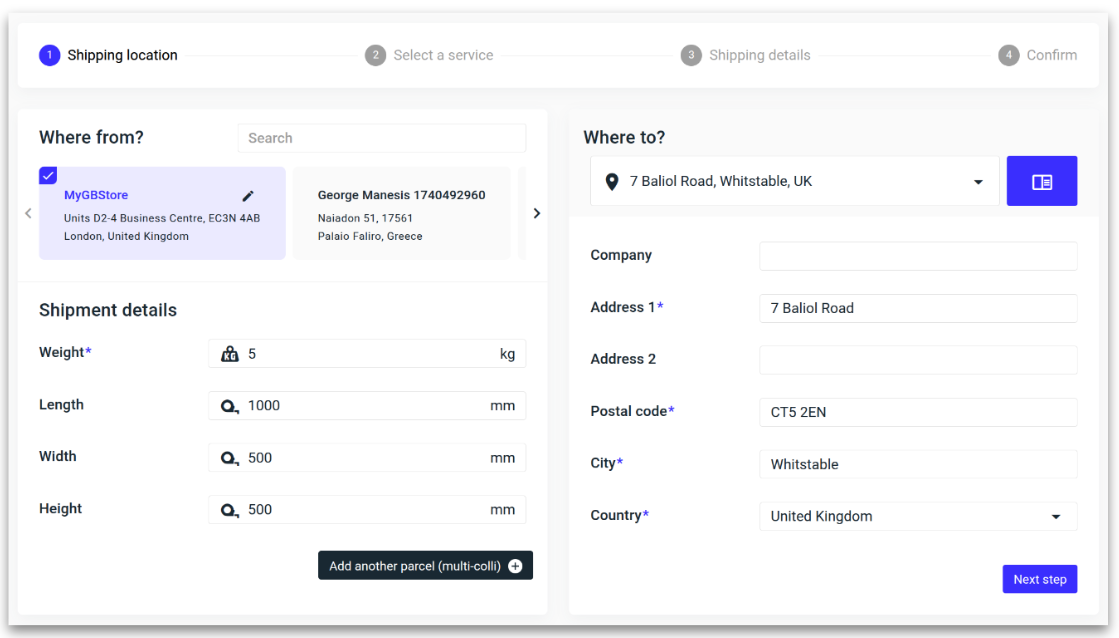
Use the address suggestion bar to automatically populate the receivers address or add an existing address from the address book.
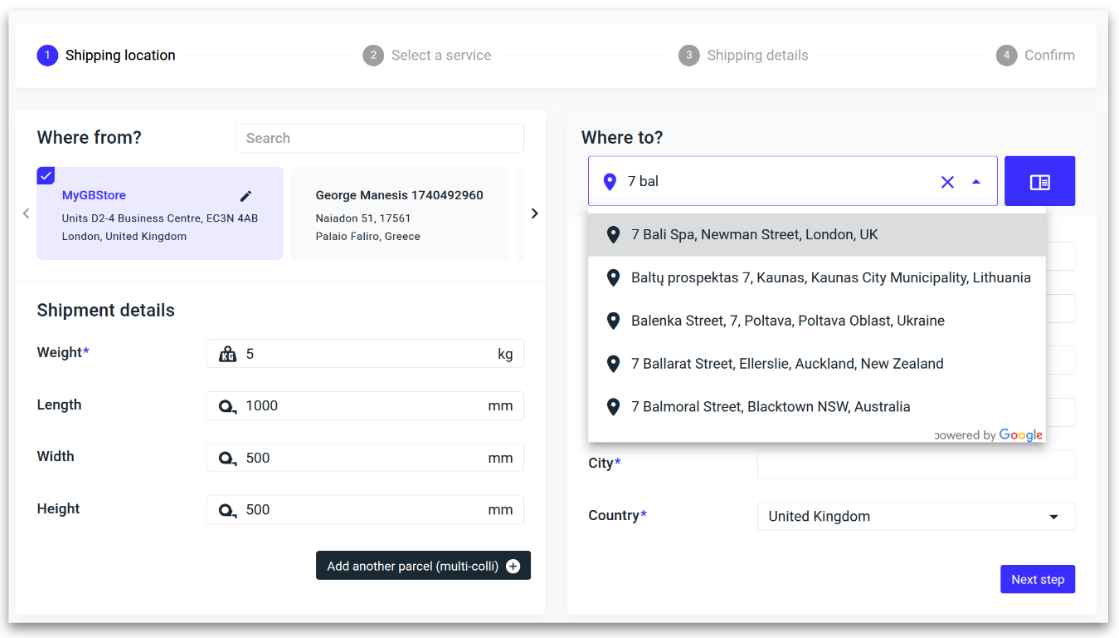
Once all fields are completed, click 'Next Step.'
Select a service
Select the preferred service.
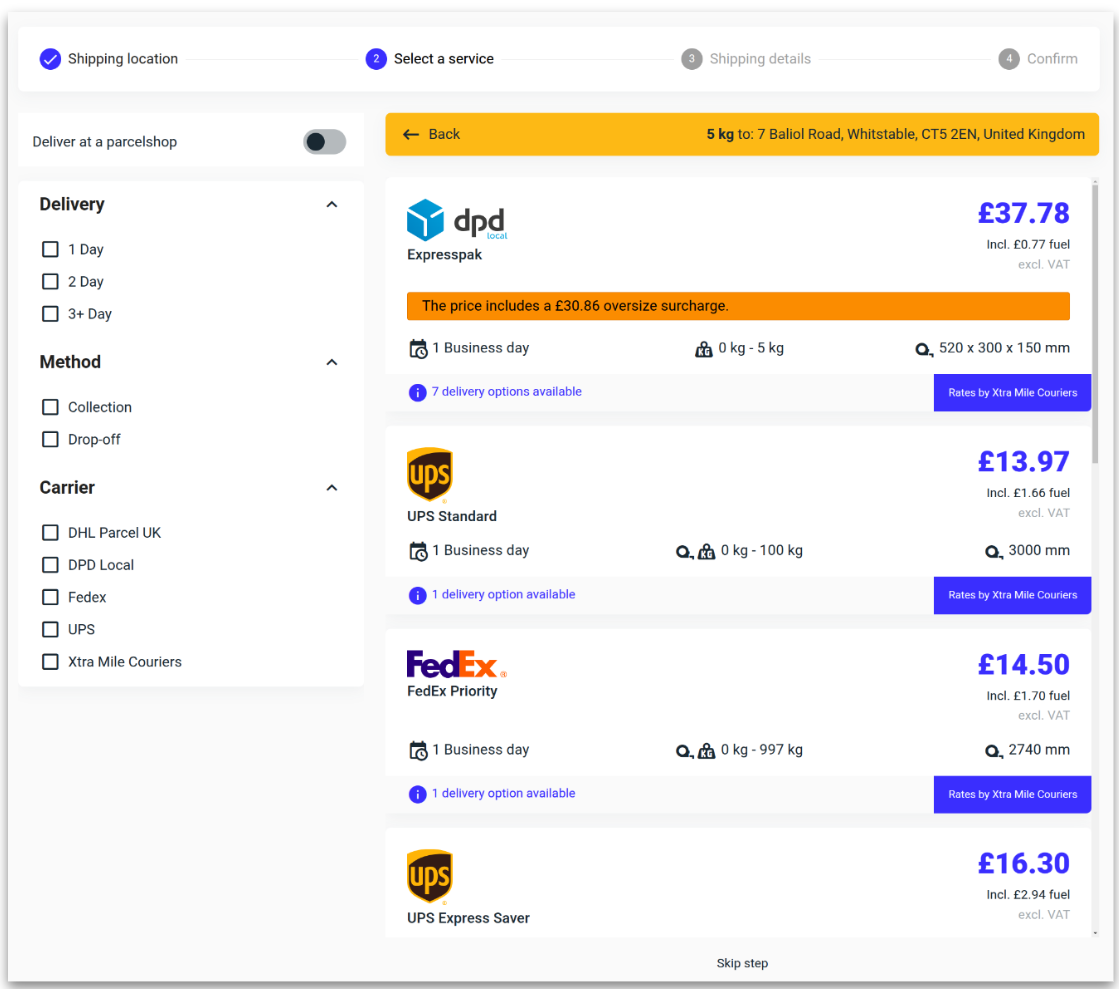
Optional: Select a delivery option.
The selected delivery option rate will be included in the total service price.
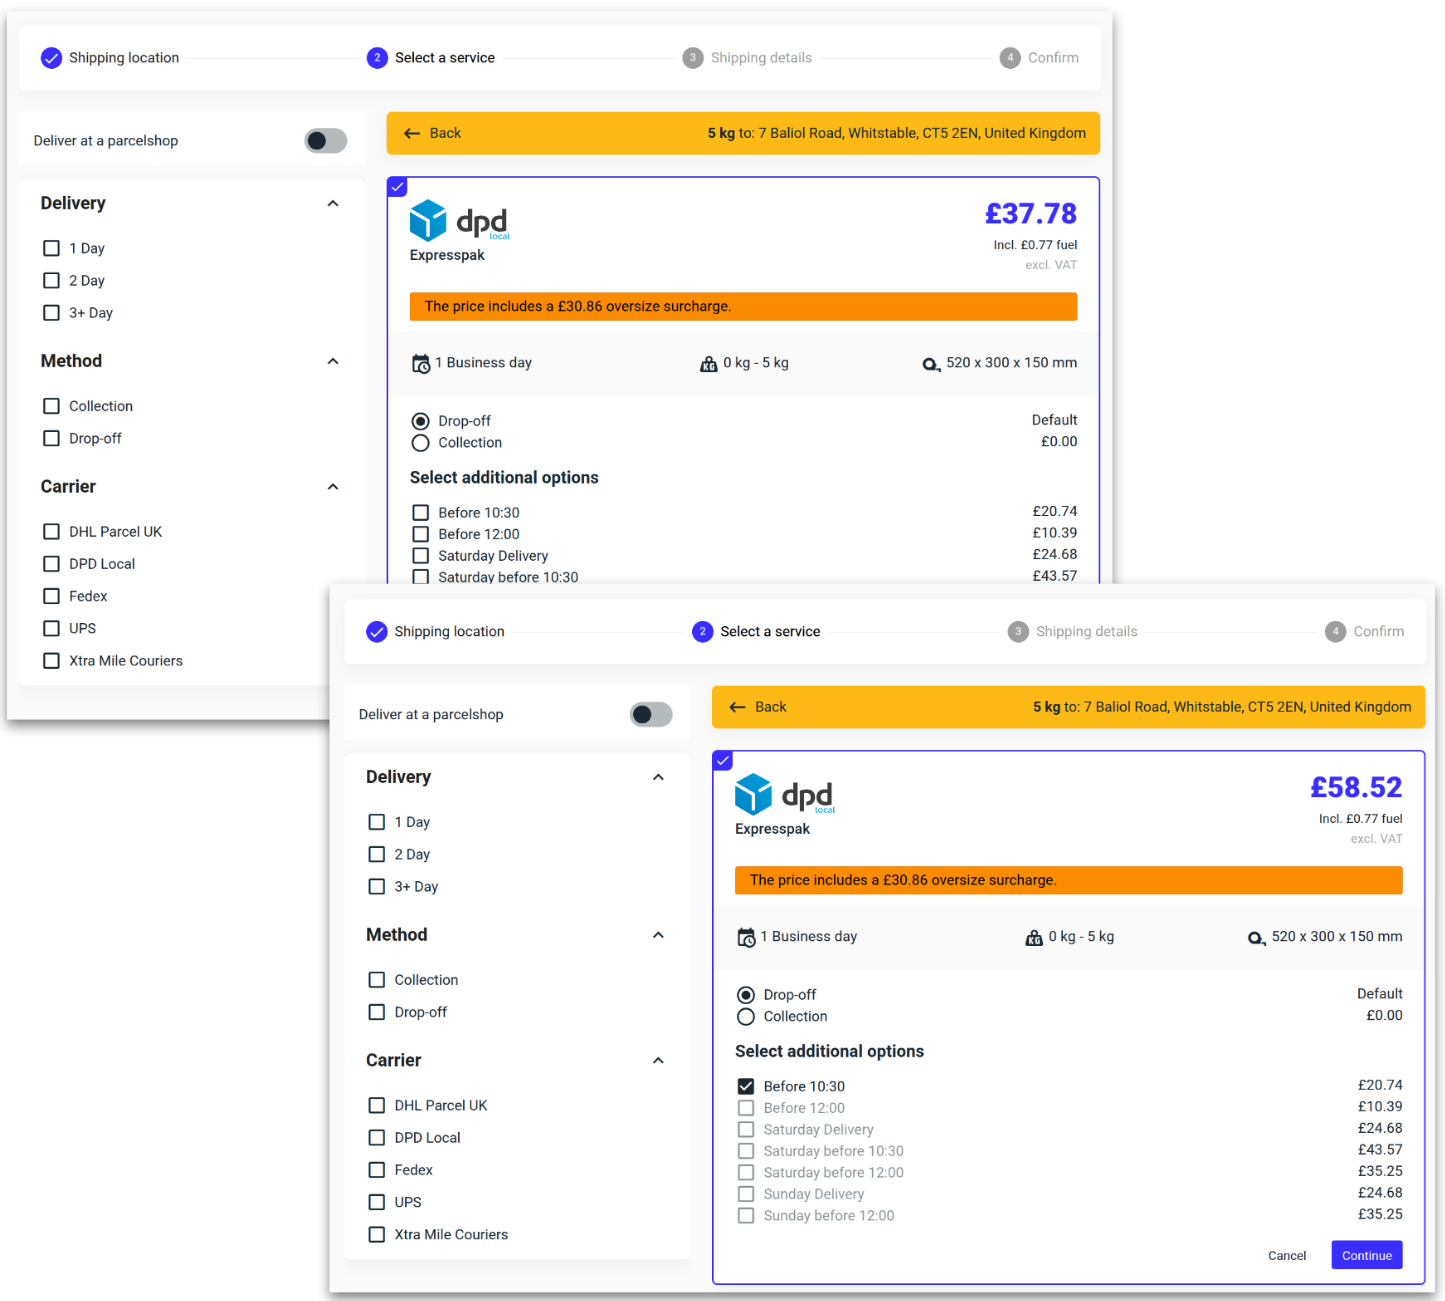
Once the correct service and option have been selected, click ‘Continue.’
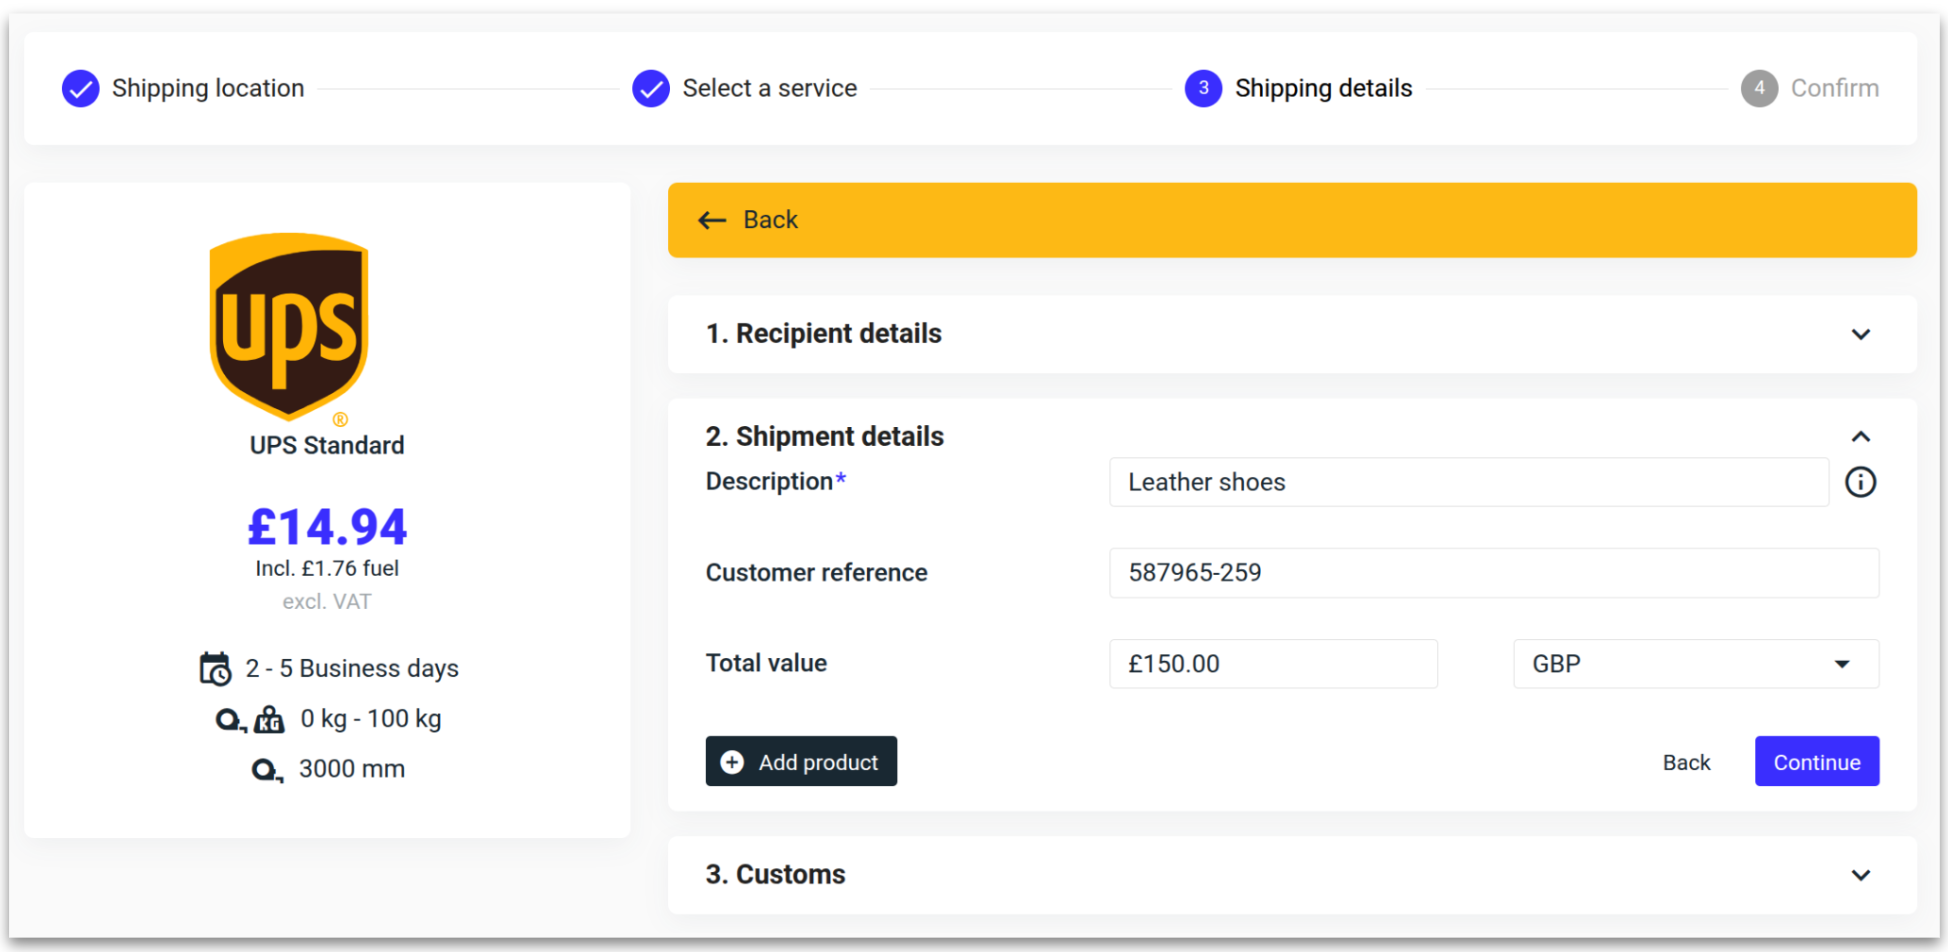
Shipping details
Fill in the receiver's contact details and click 'Continue.'
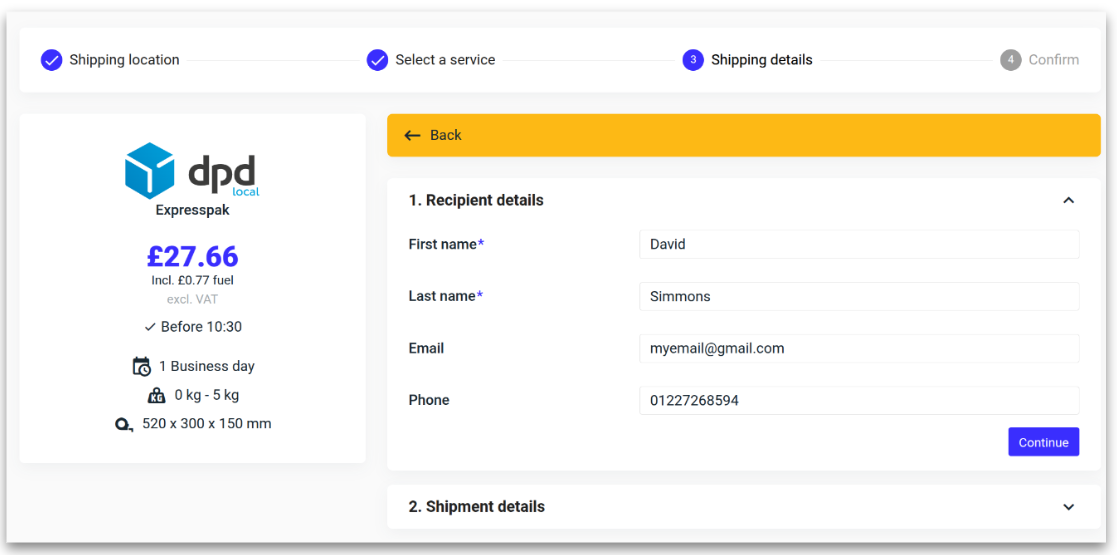
Add the relevant shipment details followed by ‘Continue.’
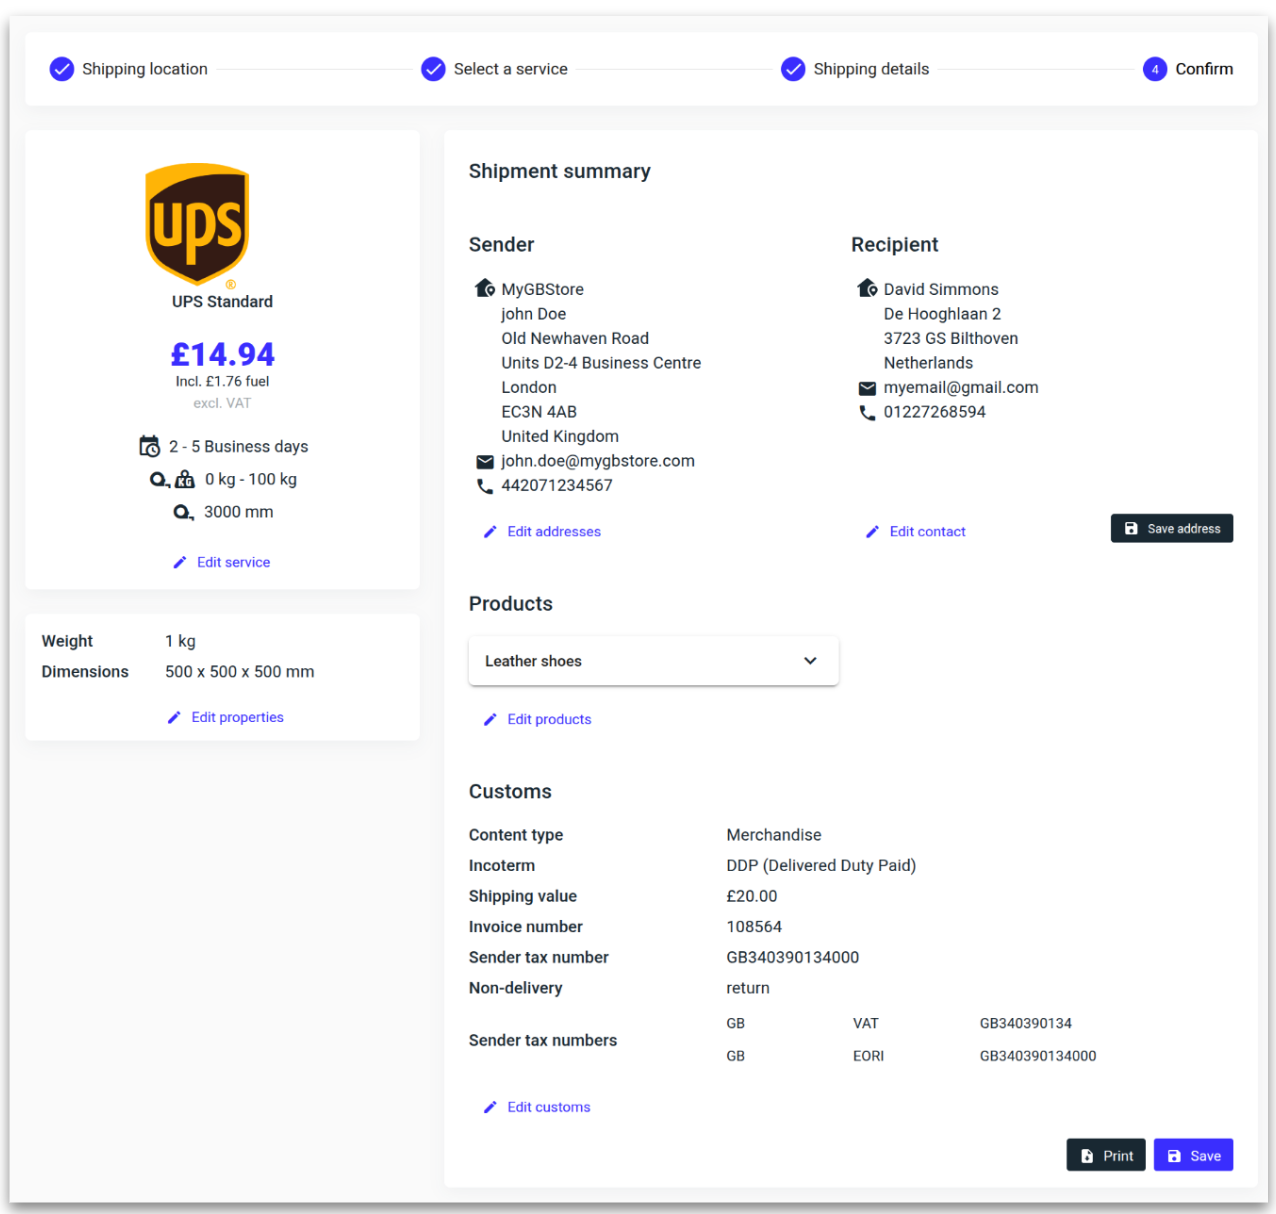
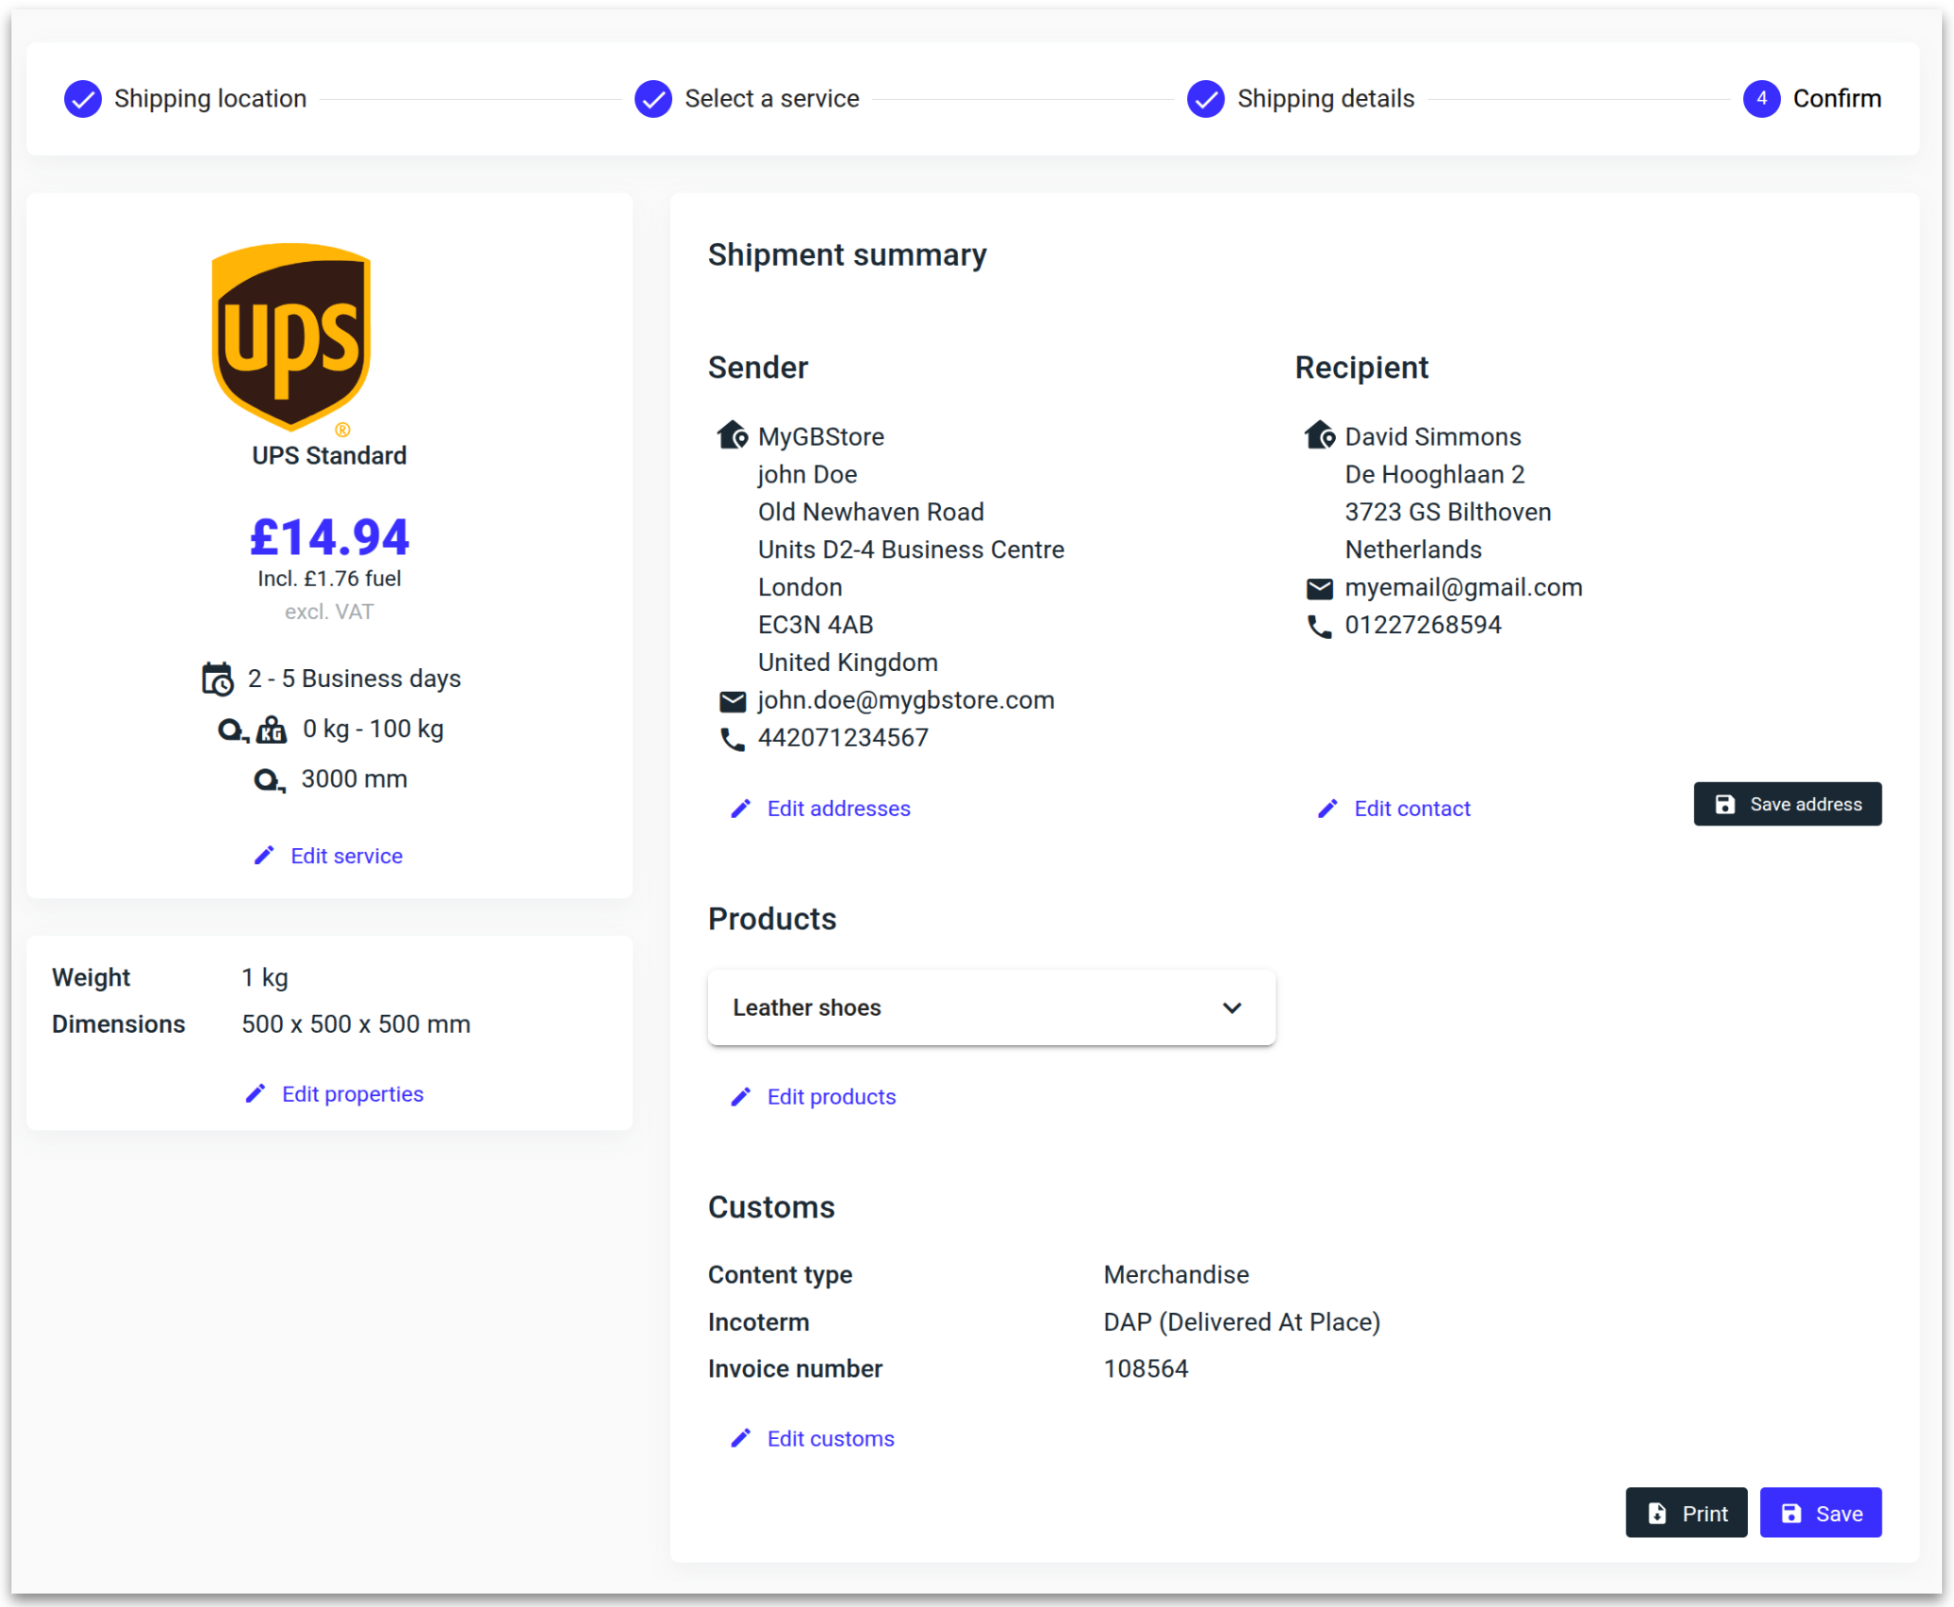
Confirmation
Check that all of the shipment details are correct, editing where necessary. Once you are satisfied with the information click ‘Save.’

You will now be redirected to the shipment overview where the concept shipment is ready to be registered with the carrier.

All shipments need to be registered before a label can be printed.
Registering shipments
Select the concept shipment and click 'Register.'

ℹ️ The shipment will now be pre-alerted to the carrier. The tracking number will be visible in the shipment overview and the label will be available to download.
Select the registered shipments and click 'Print' to download the PDF labels.

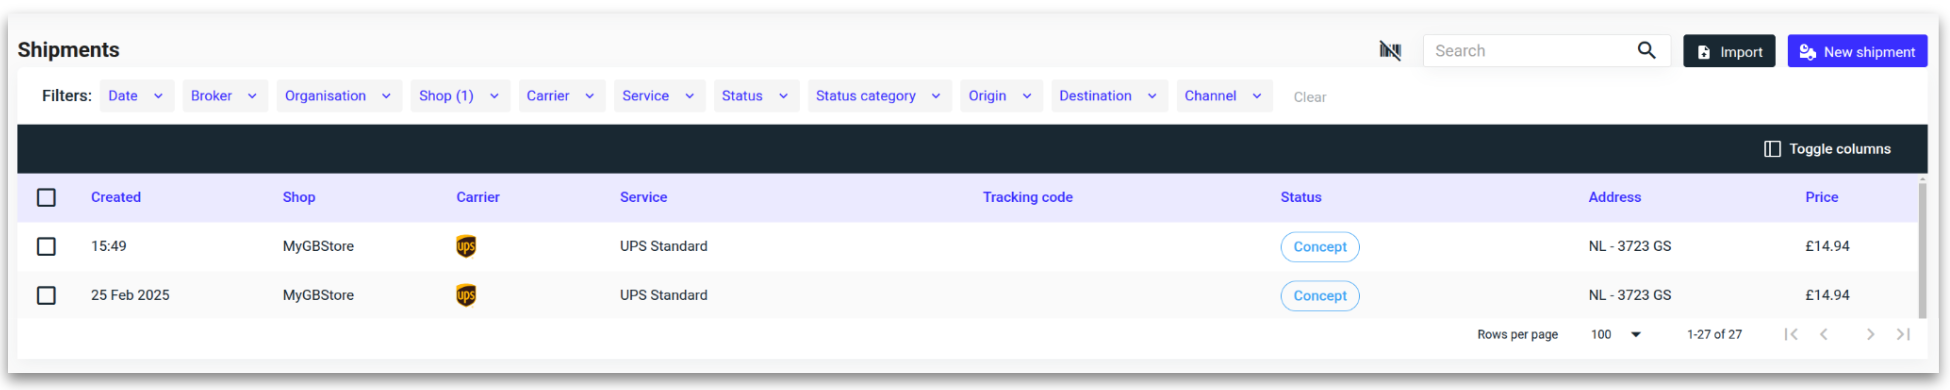
Duplicating shipments
Select any shipment that you want to duplicate.
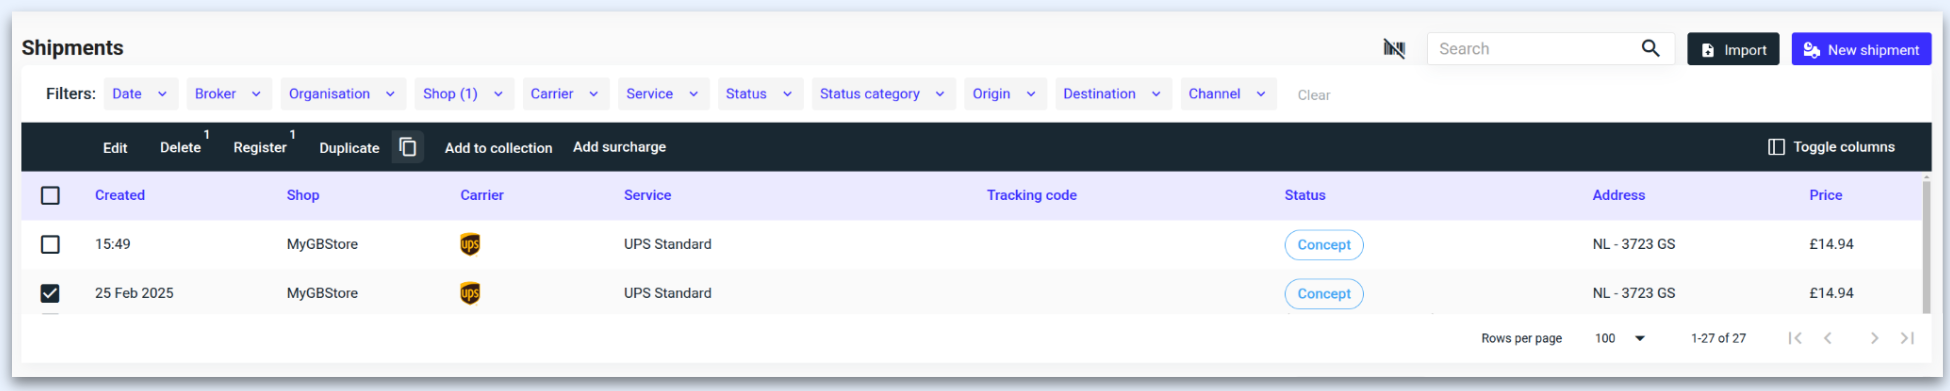
Click 'Duplicate.'

A duplicate shipment will be created, and you will be redirected to step 4 of the manual shipment creation process to confirm the details.
Once the details are confirmed, click 'Save.'
You will now be redirected to the shipment overview where the concept shipment is ready to be registered with the carrier.
2a. Create multiple shipments from a single shipment by selecting the copy icon next to the 'Duplicate' option.
2b. Input the number of shipments needed and click ‘Duplicate’
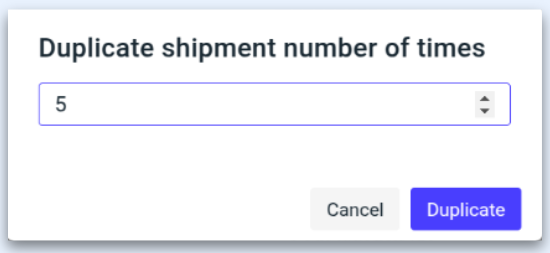
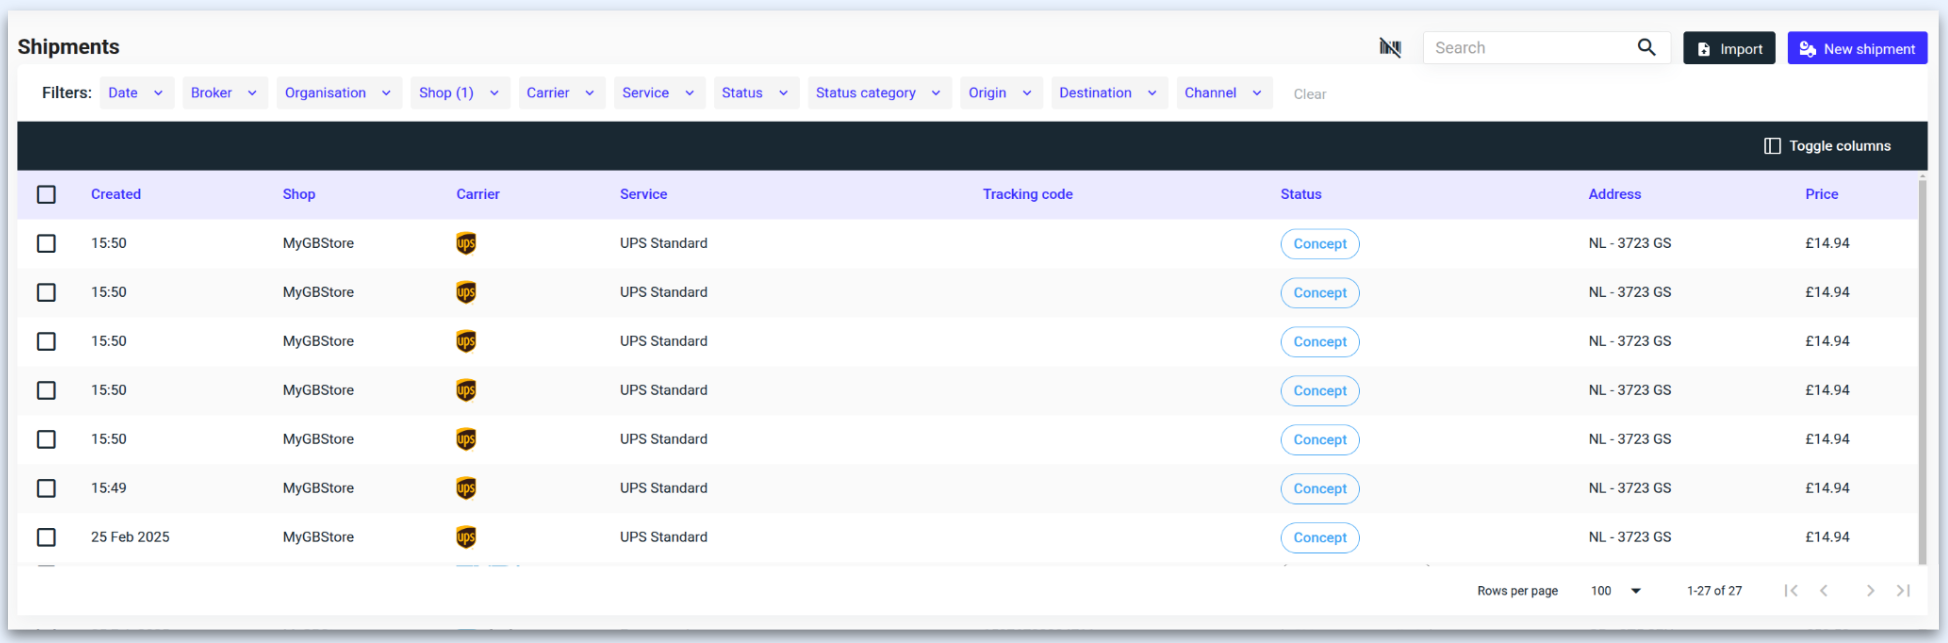
ℹ️ When using the multiple duplicate option, the duplicates will bypass the confirmation page and appear directly in the shipment overview as Concept shipments.
Customs
When shipping to destinations with customs requirements, an additional section will appear in the third step: Shipping Details.
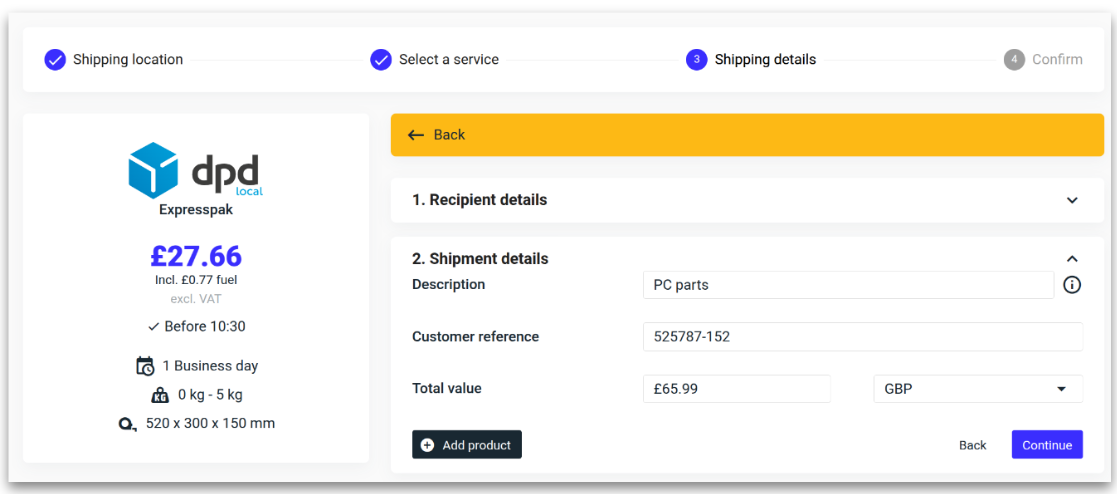
Shipment details
Products are required for international shipments.
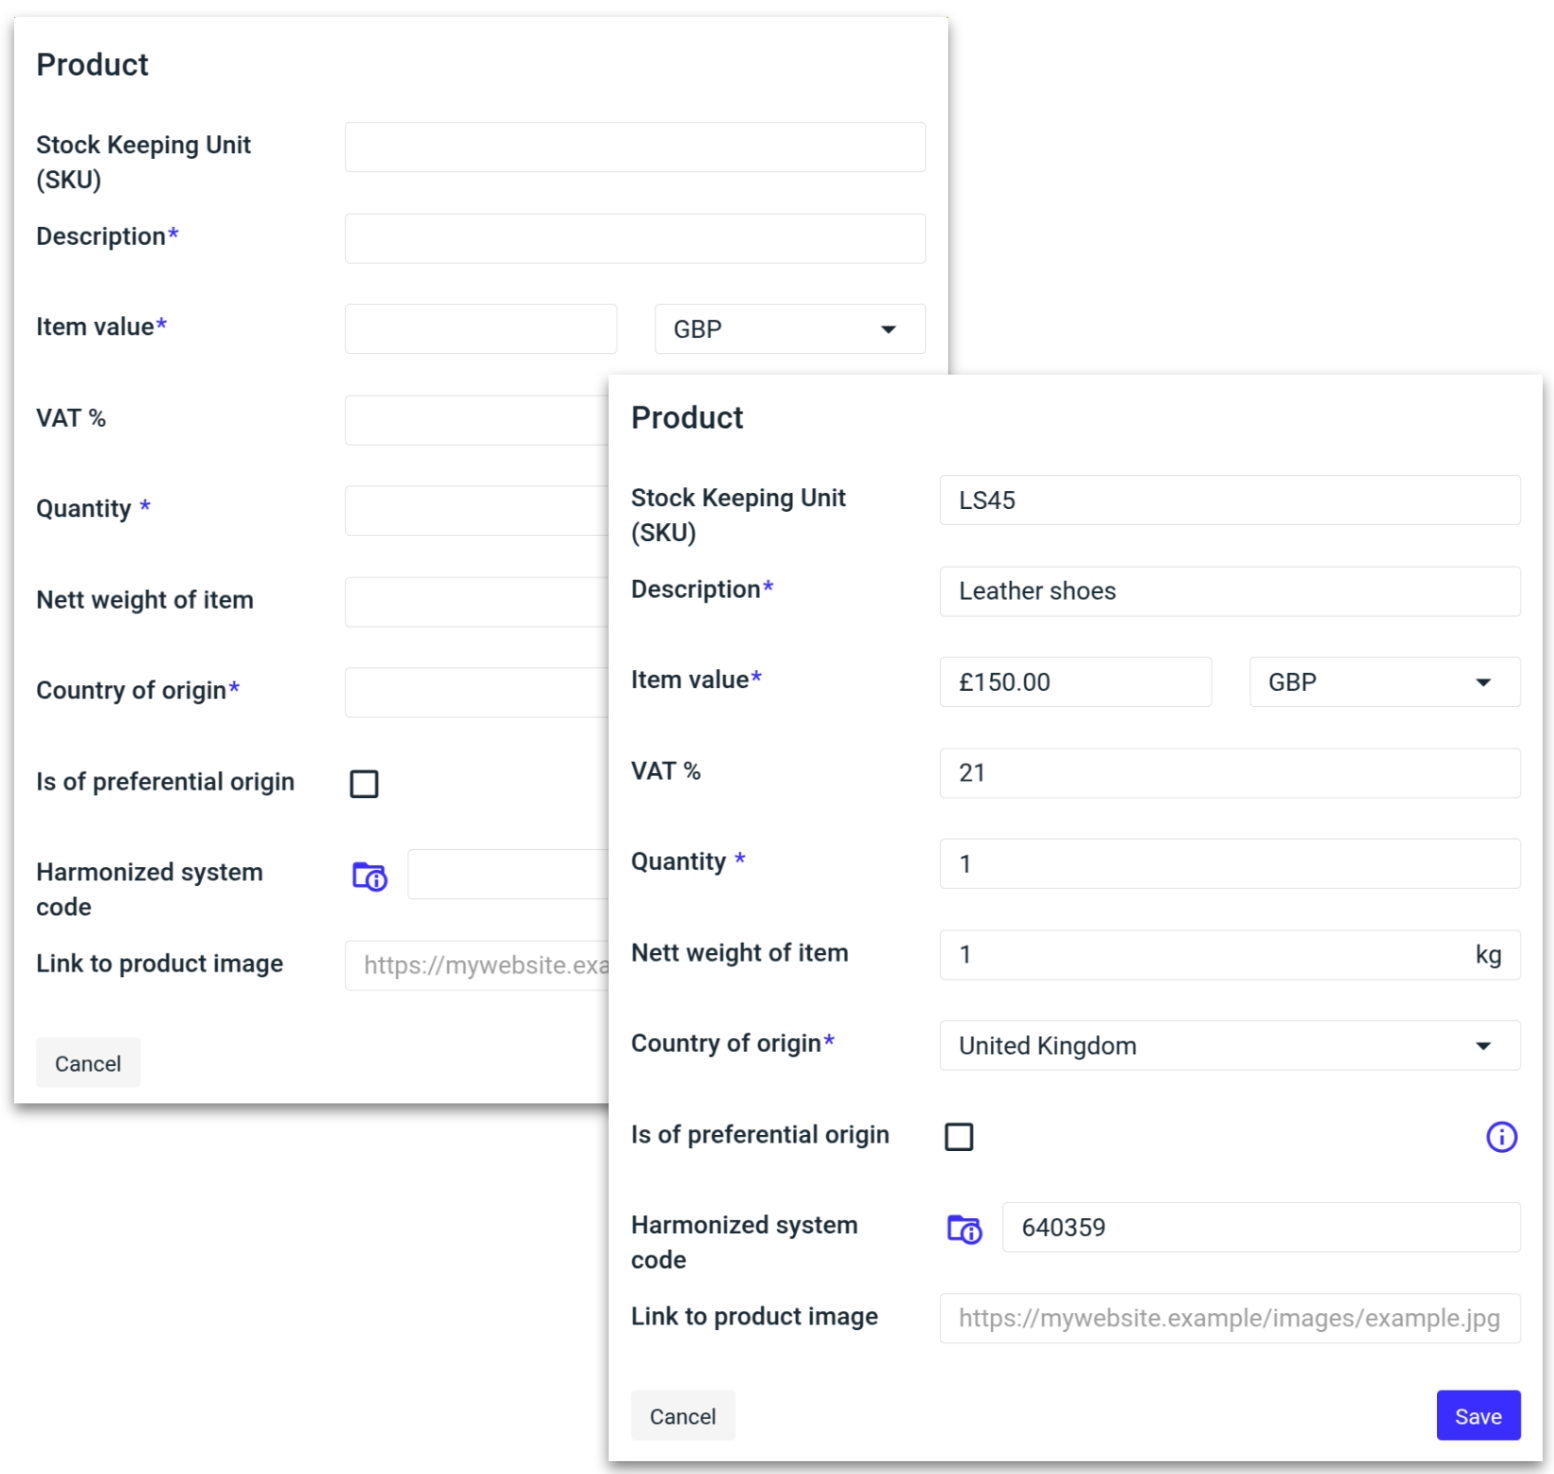
Enter the relevant shipment details, then click the black 'Add Product' button.
Fill in the item information and click ‘Save.’
HS Codes
Harmonized System (HS) codes are a unique identifier to classify the exact type of goods you are shipping.
Use the HS code suggestion to ensure accurate HS codes are applied, preventing goods from being delayed or seized by customs authorities.
2a. Next to ‘Harmonized System Code,’ click the blue folder icon.
ℹ️ A pop-up will display the most likely HS codes based on the SKU and Description.

2b. Select the preferred suggestion. This will automatically populate the Harmonized System Code field. Click 'Save.'
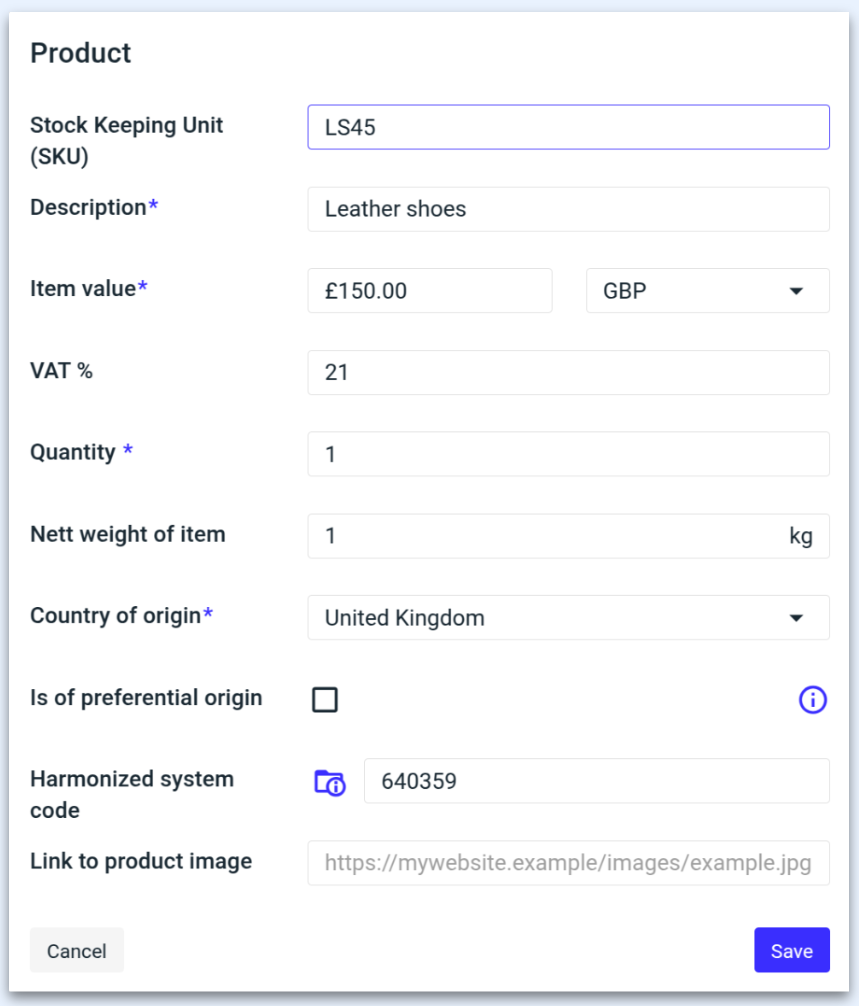
Some carriers require an 8 or 10 digit HS code.
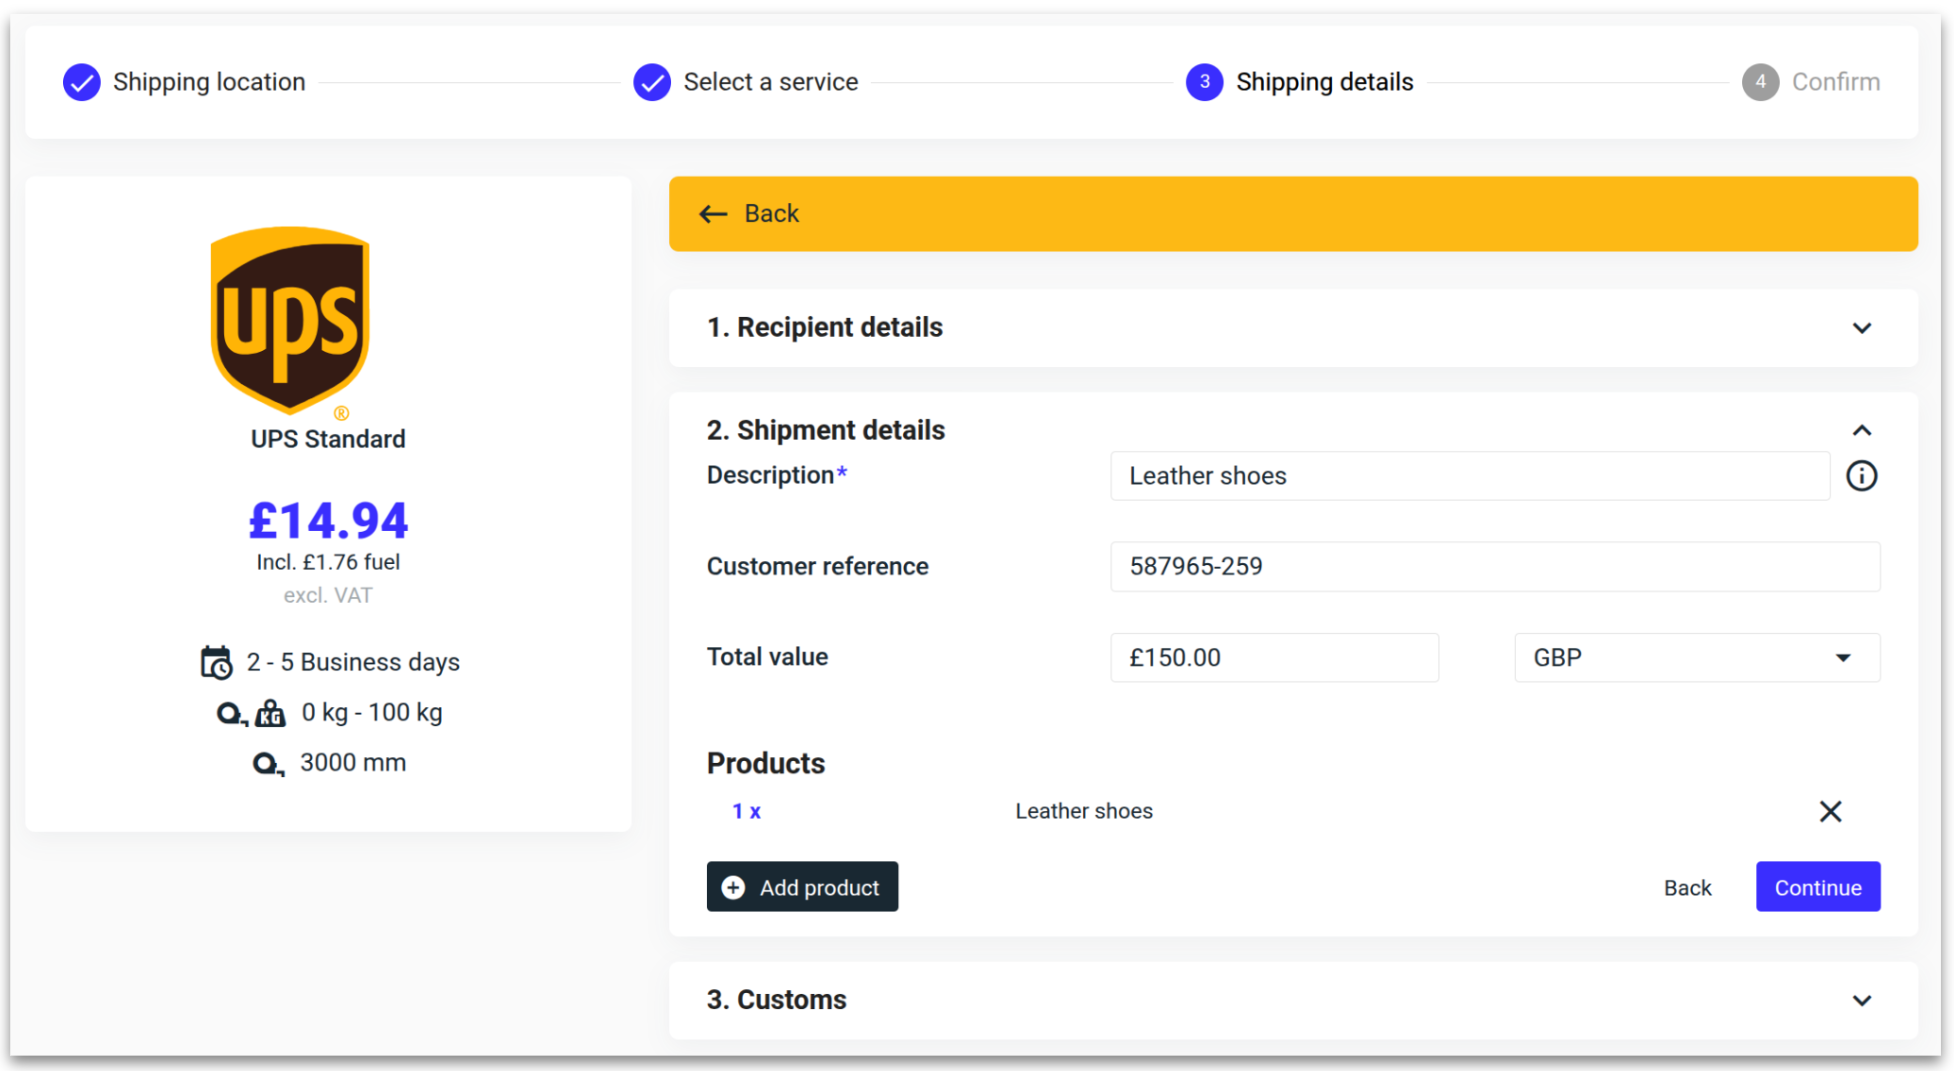
The product will now appear in the shipment details section.
Ensure that the Total value equals the combined value of all added products.
Once all products have been added, click 'Continue.'
Customs
Select the Content type and Incoterm, enter an invoice number and click ‘continue.’
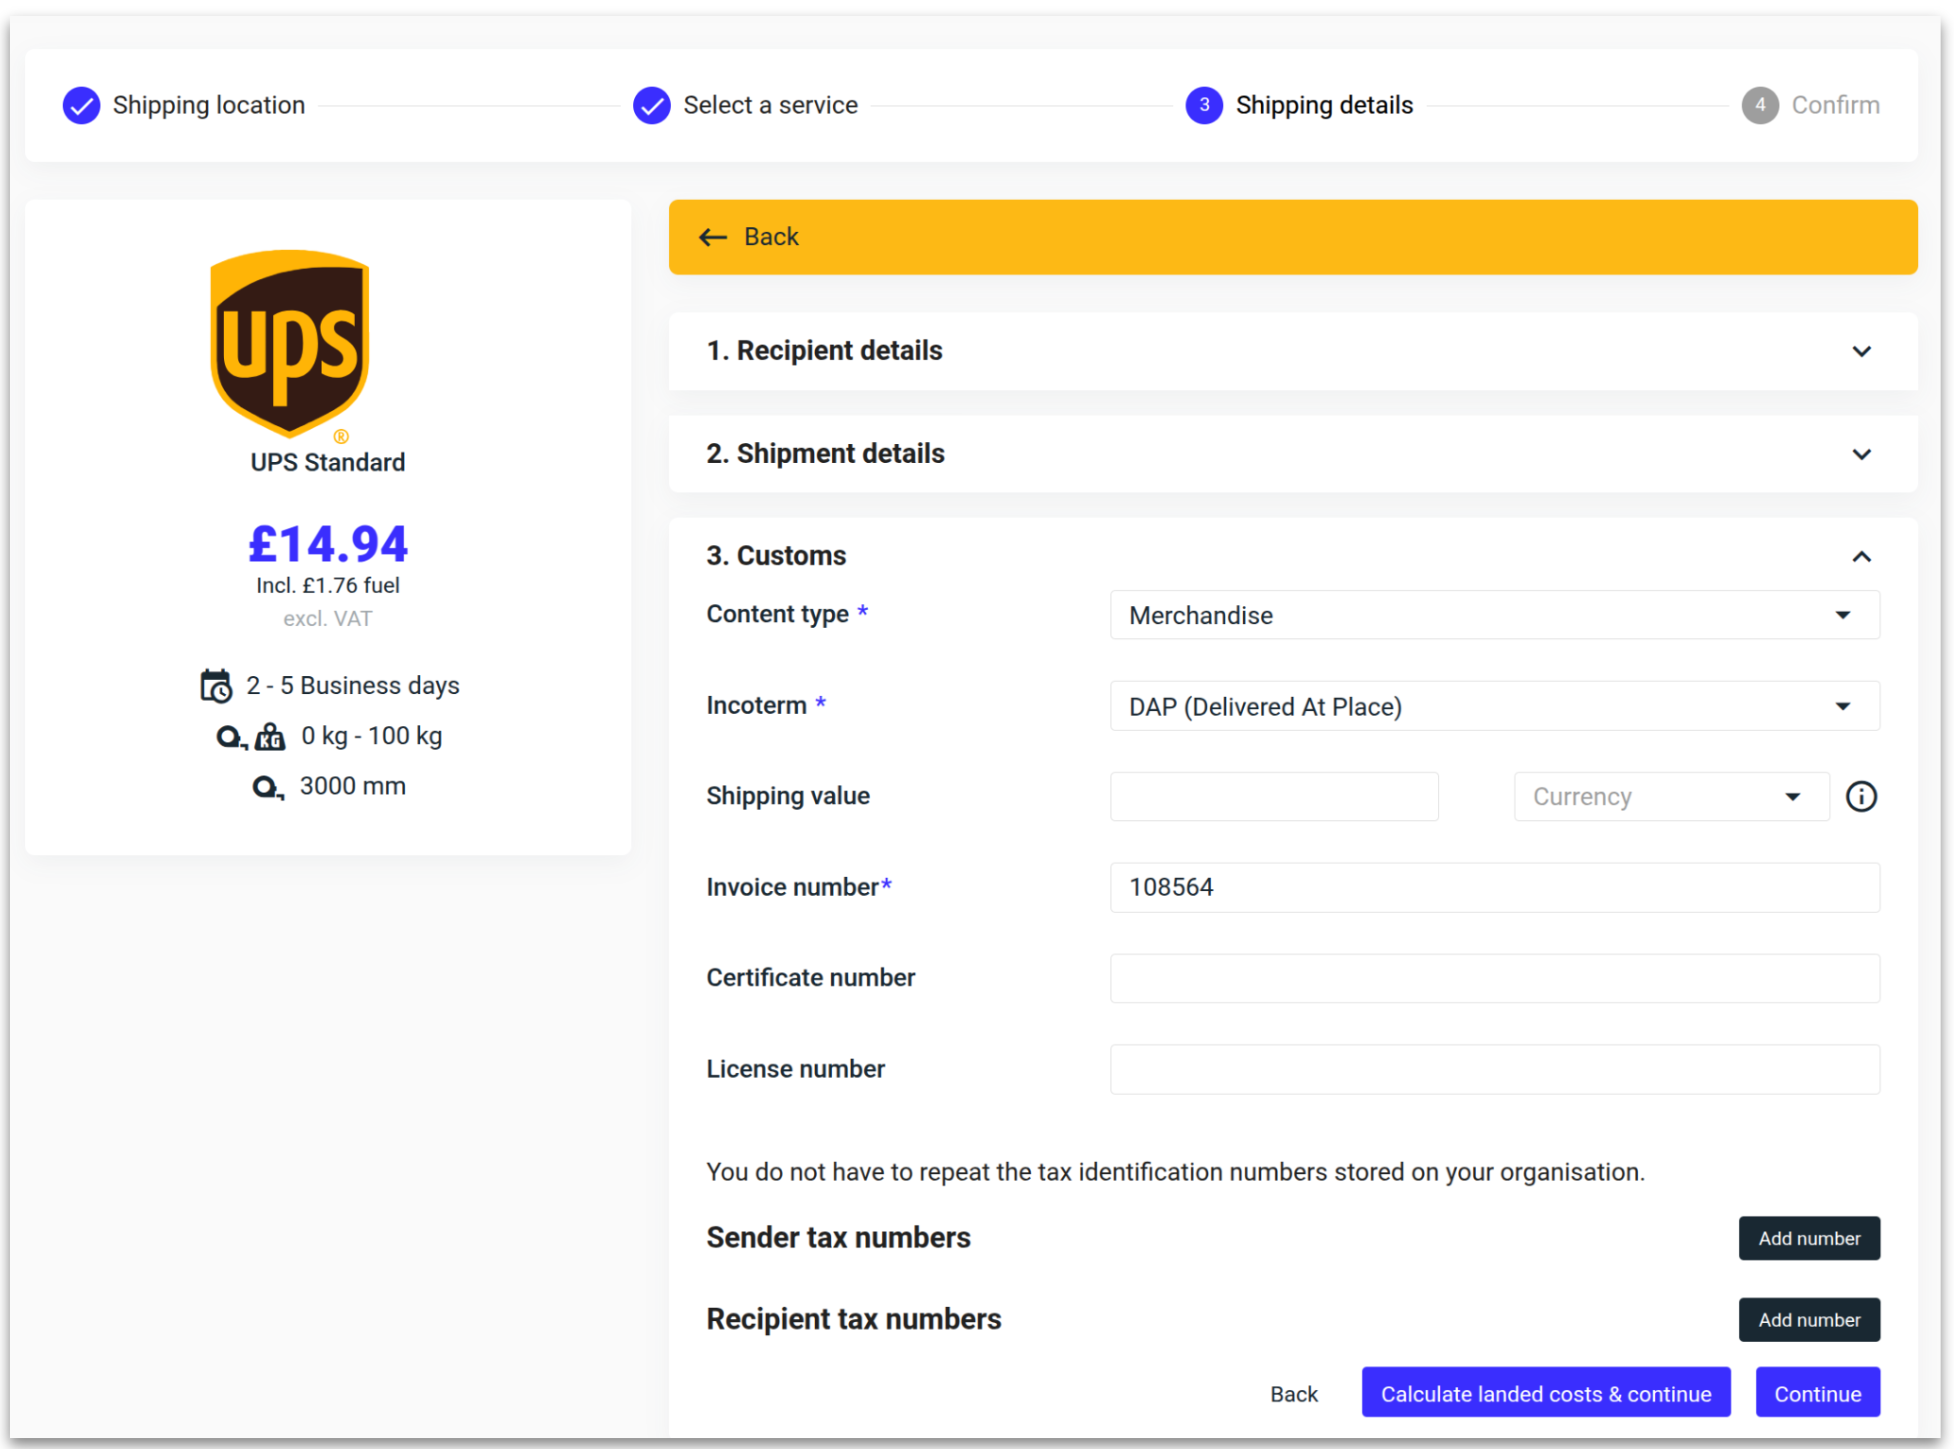
Incoterm
Incoterms are a set of internationally recognized rules which define the responsibilities of sellers and buyers.
DAP: Delivered At Place (formerly DDU): The seller is responsible for the delivery of the goods and it is the buyers responsibility for import duties.
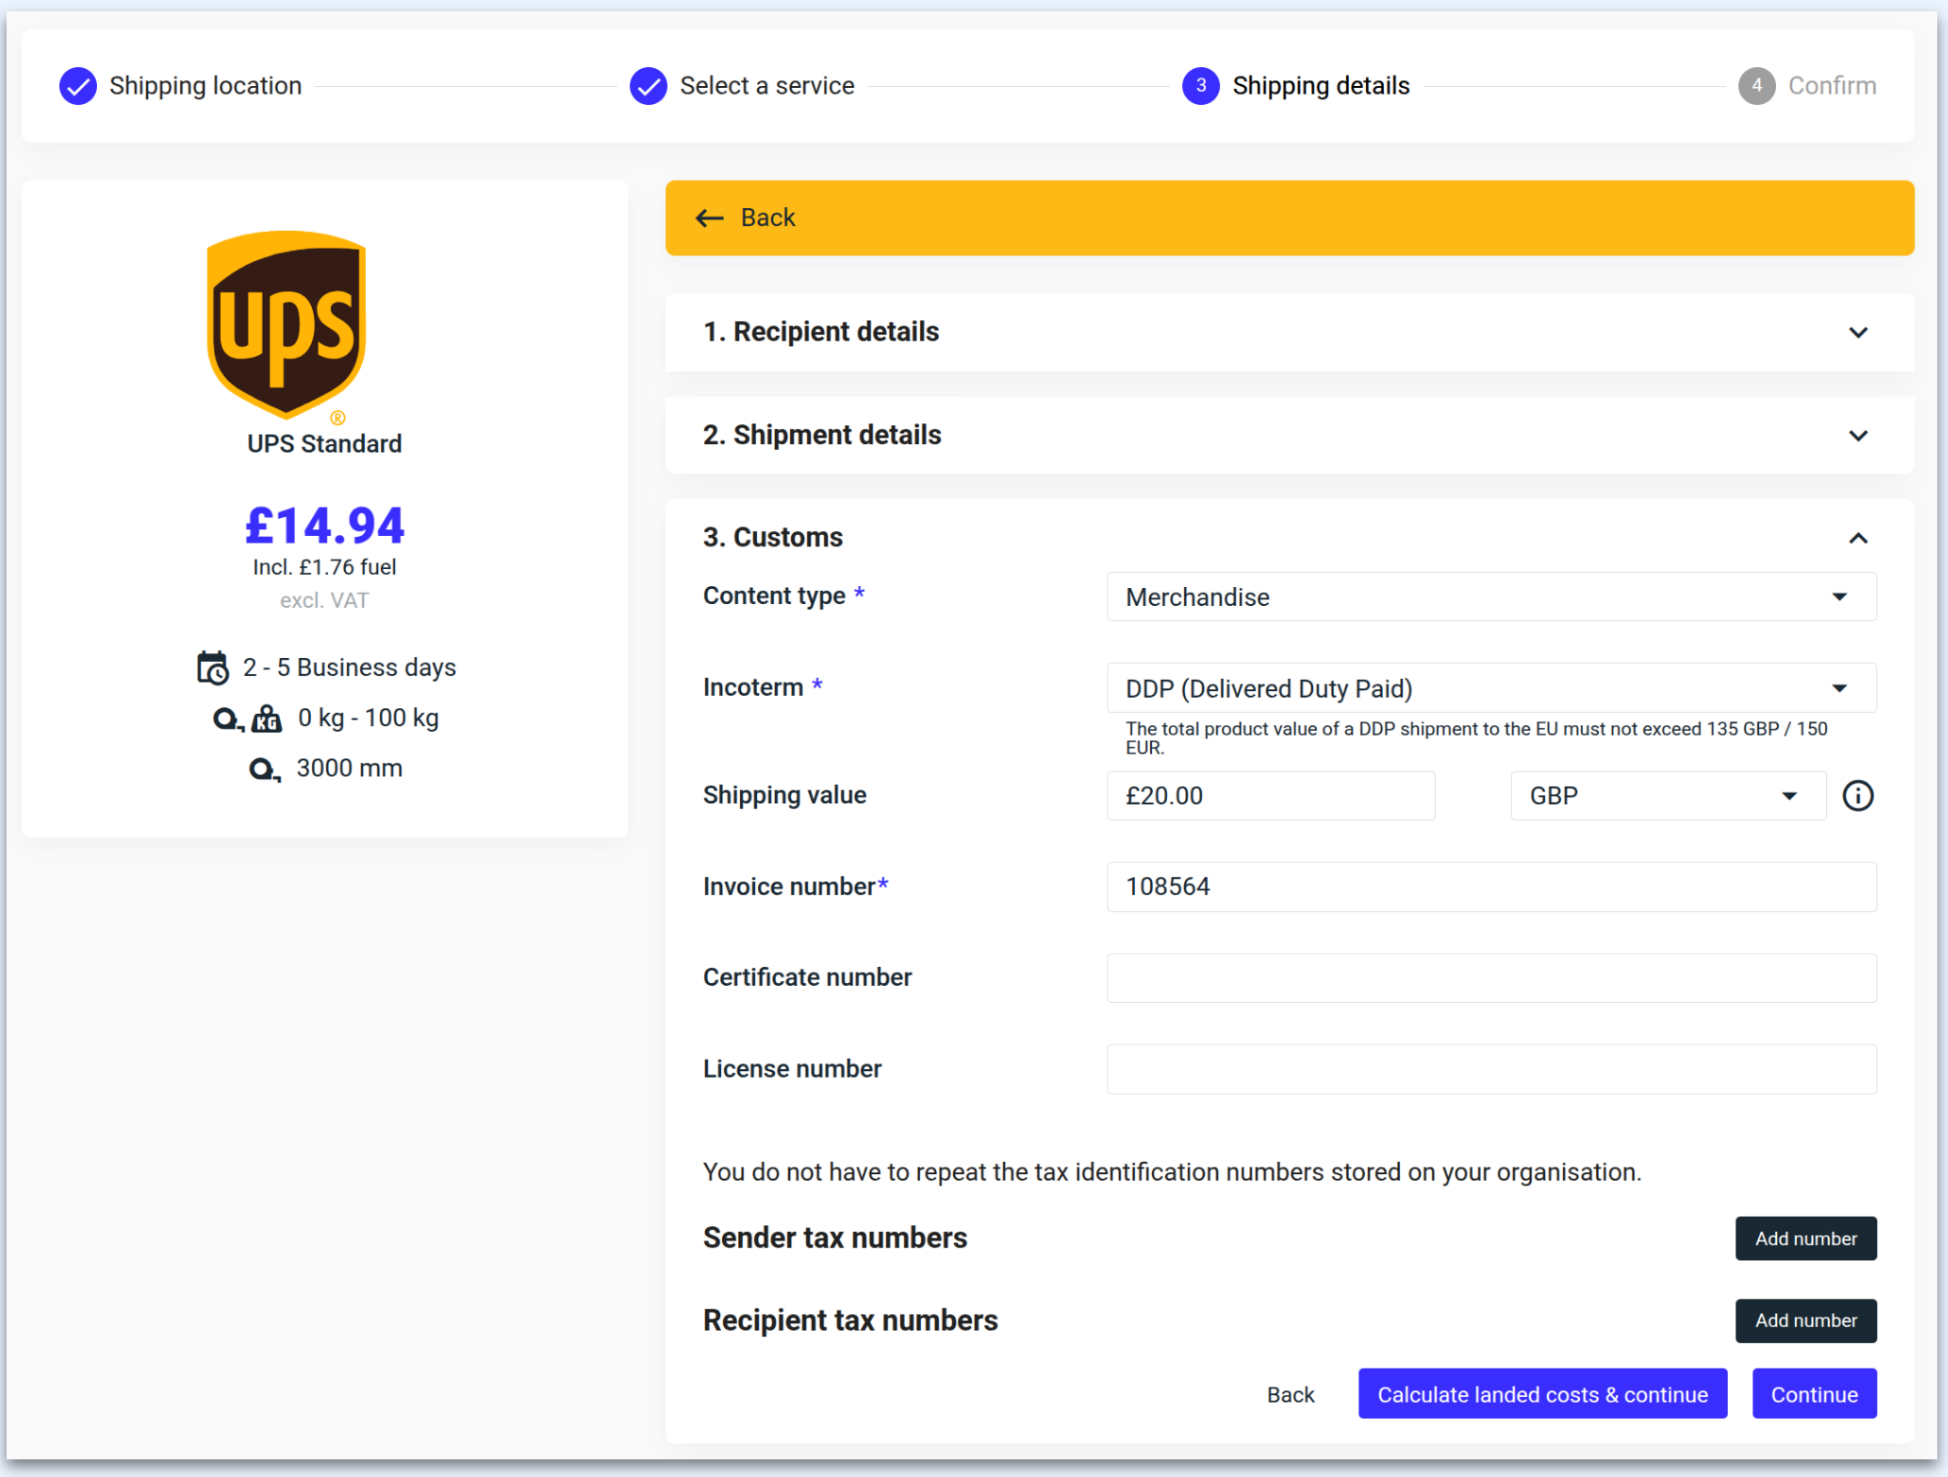
DDP: Delivered Duty Paid: The seller must cover duties, import clearance, and any taxes.
ℹ️ When selecting DDP, the Total value, Shipping value, and Currency must be included, along with any tax numbers that may not be assigned to your organization.
Landed costs
A landed cost is the total amount of money spent getting a product to the customer’s doorstep. It starts with the original price of your product (including manufacturing costs) and ends with local delivery.
Landed cost includes factors such as, but not limited to, customs fees, duties, taxes, insurance, transportation, packaging, storage, payment processing, and exchange rates. The buyer will see the total price of the commodity as inclusive of all these fees.
ℹ️ When using the Landed Cost engine, the Total value, Shipping value, and Currency must be included, along with any tax numbers that may not be assigned to your organization.
ℹ️ Taxes and duties calculations are supported in 191 destinations.
4a. Select 'Calculate landed costs & continue.'

ℹ️ The duty and tax calculation is now displayed in the confirmation step.
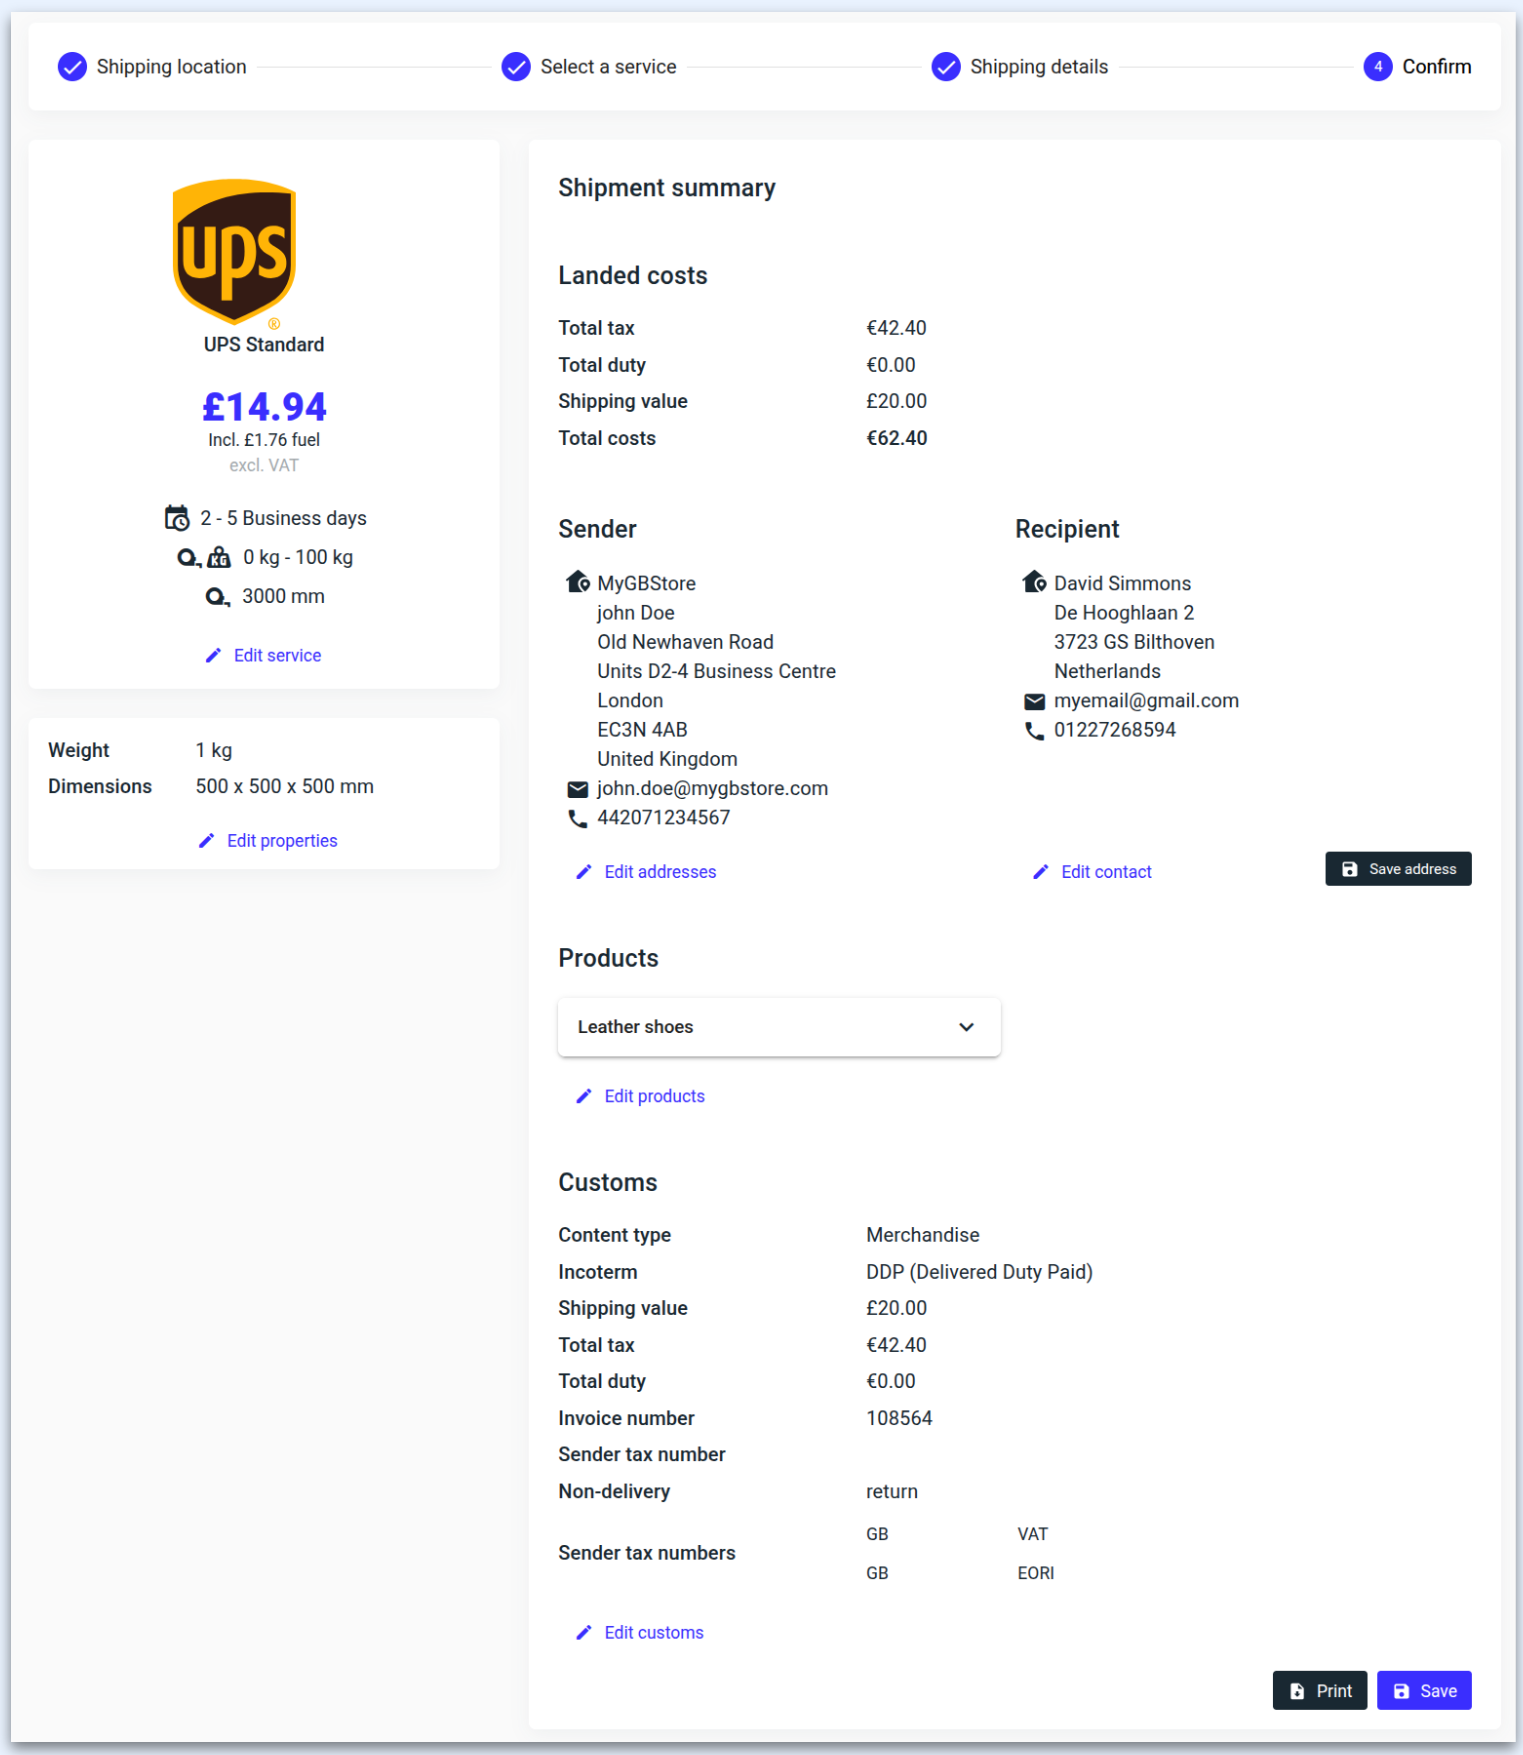
Confirmation
Check that all of the shipment details are correct, editing where necessary. Once you are satisfied with the information click ‘Save.’
You will now be redirected to the shipment overview where the concept shipment is ready to be registered with the carrier.

Batch shipments
CSV imports
Import 100s of orders at a time from multiple sources using a .csv file.
The .csv import is split into 4 sections:
Settings: Type of data in the .csv file.
CSV file: Uploading the file.
Mapping: Map the .csv fields to the MyParcel.com fields.
Select shipment: Validation and import.
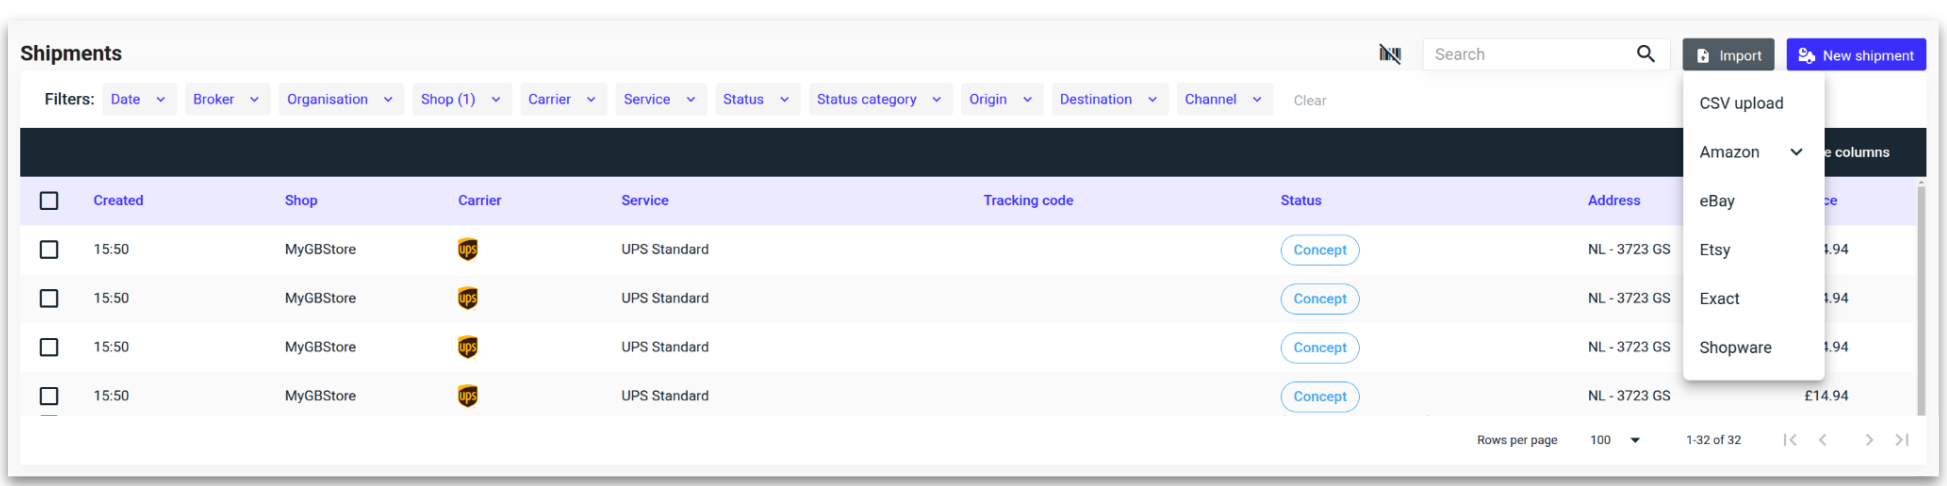
From your shipment overview, navigate to and click 'Import,' then select 'CSV upload.'
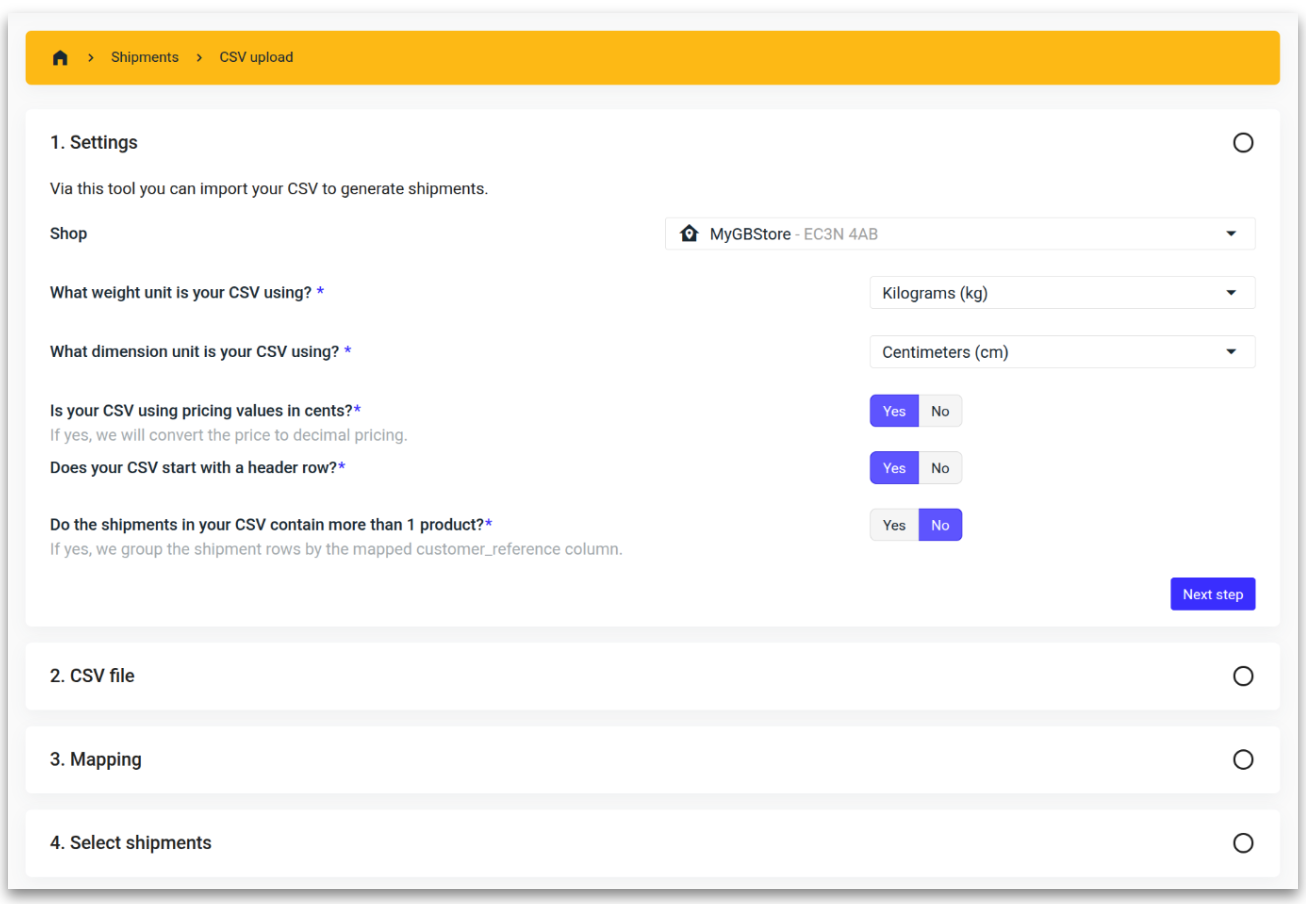
Settings
Set the relevant variables and click 'Next step.'
Is your .csv using pricing values in cents? Are the rates shown as 1.00 (decimal) or 100 (cents)?
Do the shipments in your .csv contain more than 1 product? Do any of the receivers have multiple rows of orders in the .csv, or is there only one row per delivery address?
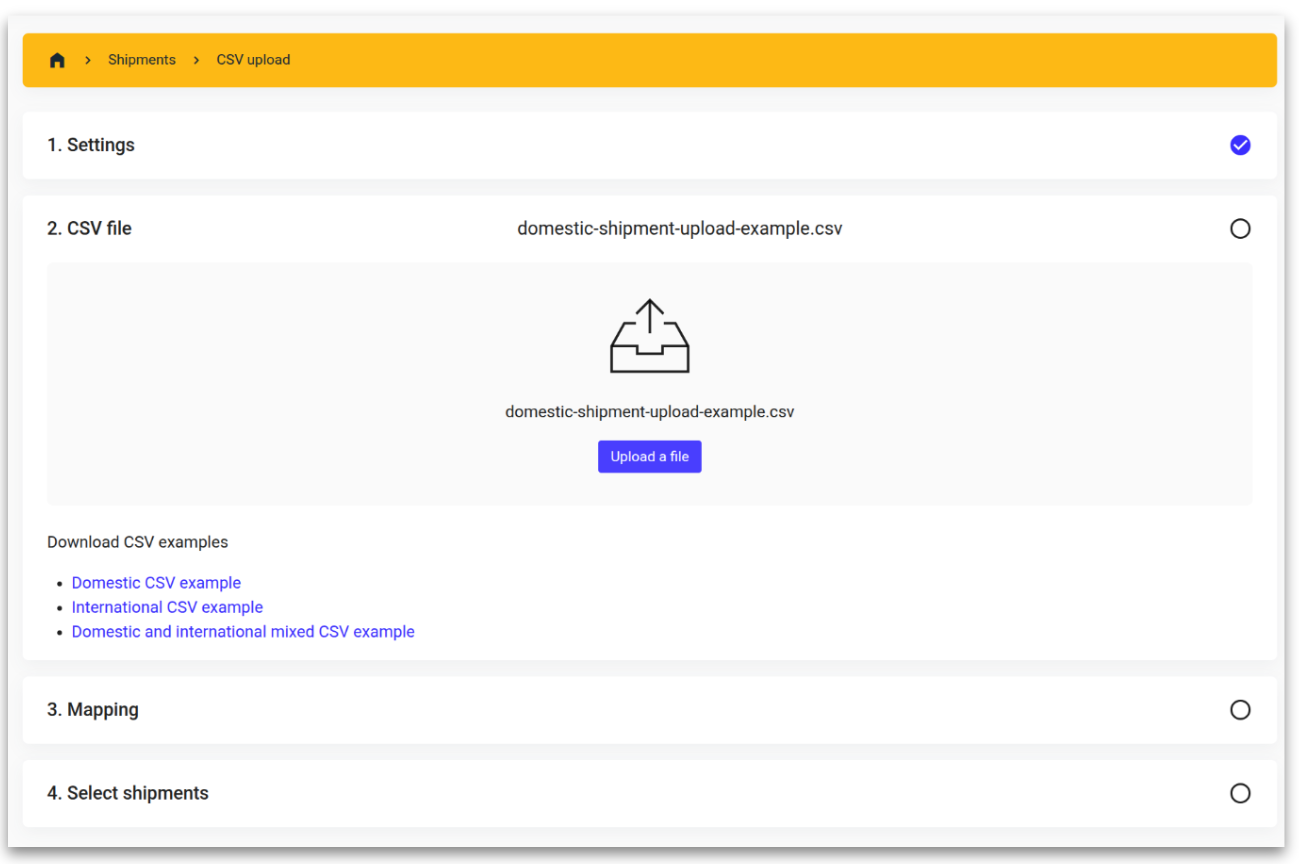
CSV file
Upload your .csv and click 'Next step.'
Download a .csv example to view the required data format.
Mapping
The mapper is split into 4 groups, selecting any of the groups will show the available fields to map.
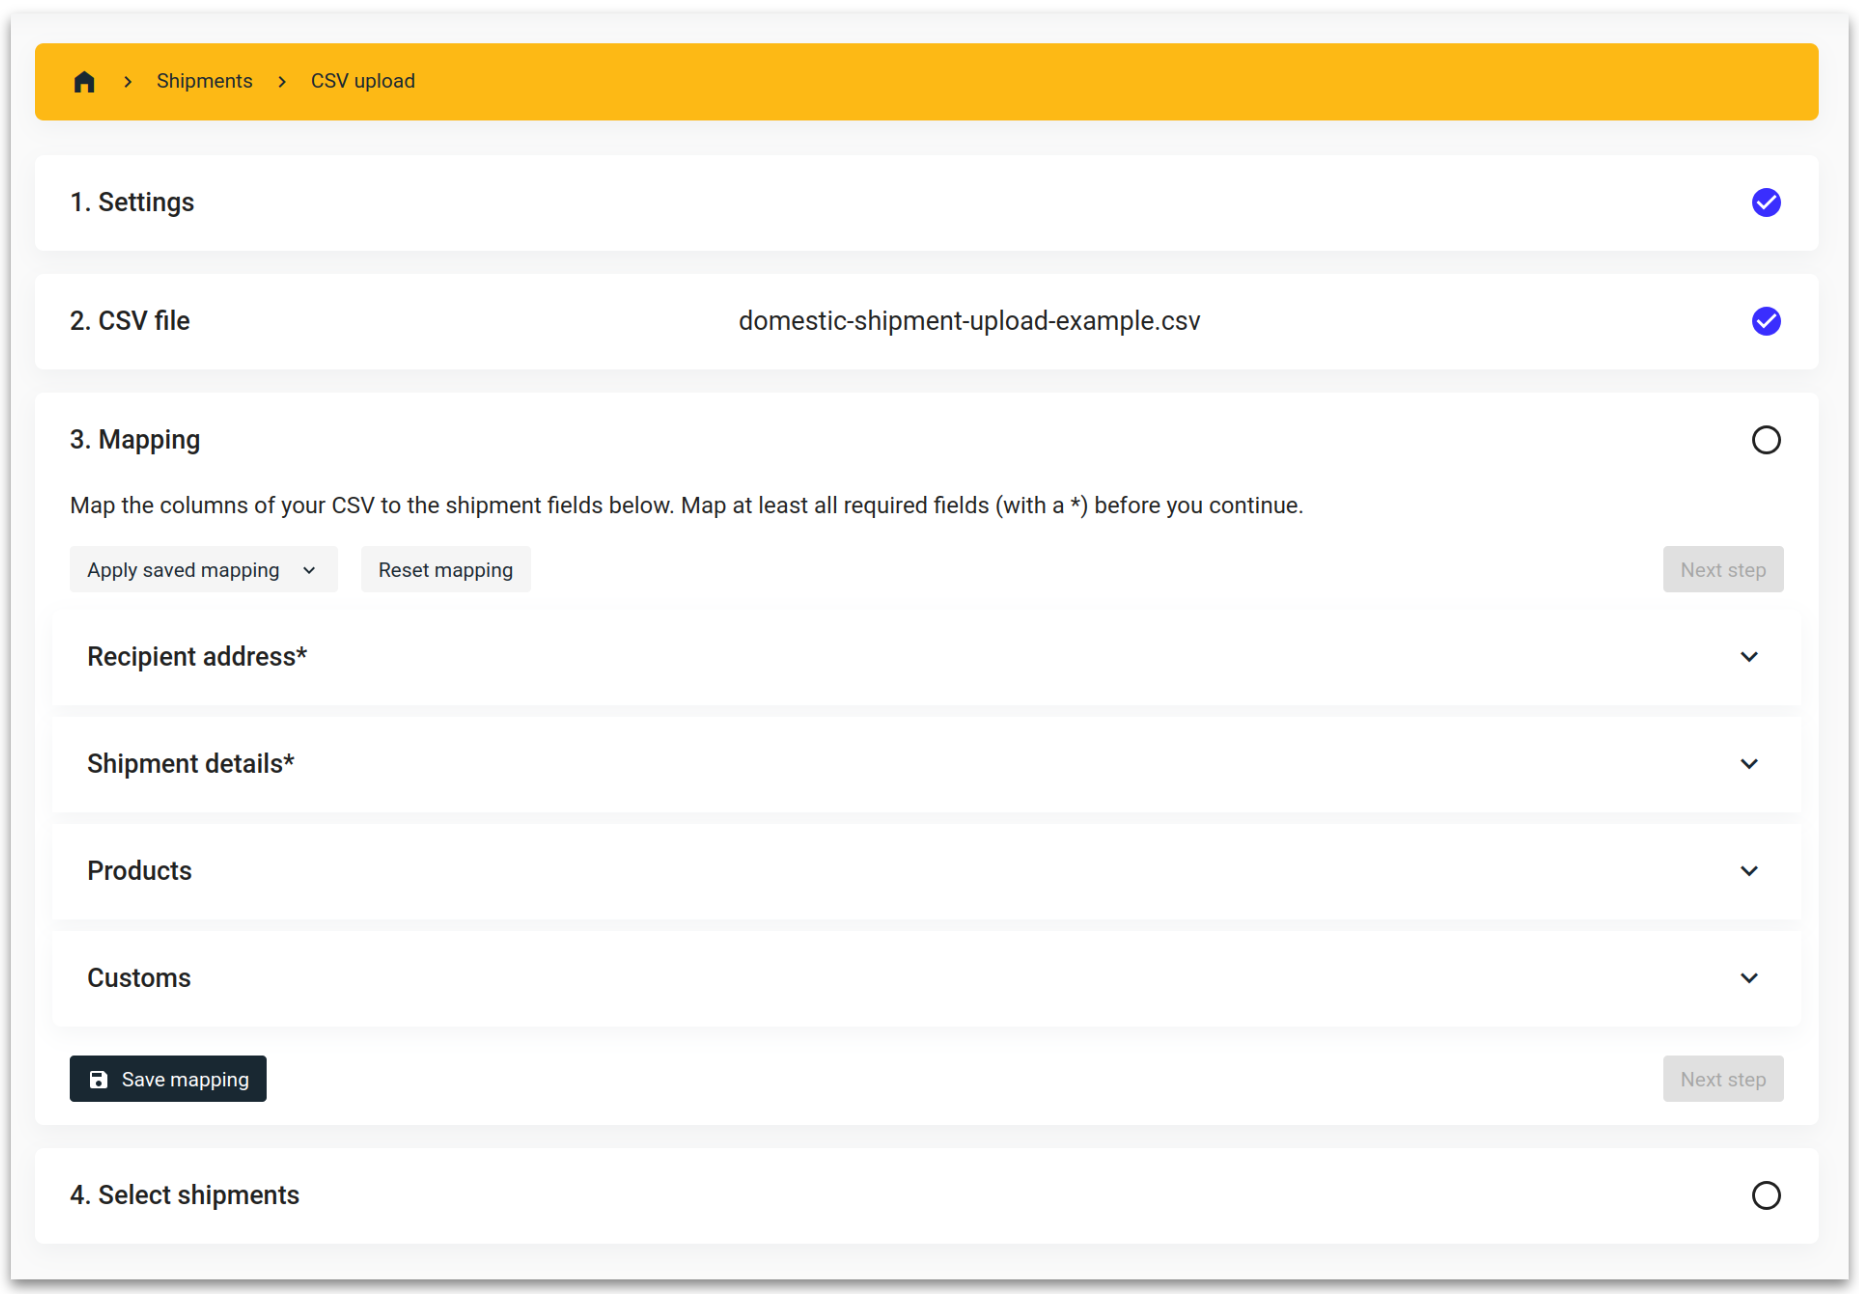
Click on ‘Select field(s)’ under each heading to show the available .csv columns to map.
All fields marked with an * are mandatory.
The Product and Customs groups should be mapped for international orders.
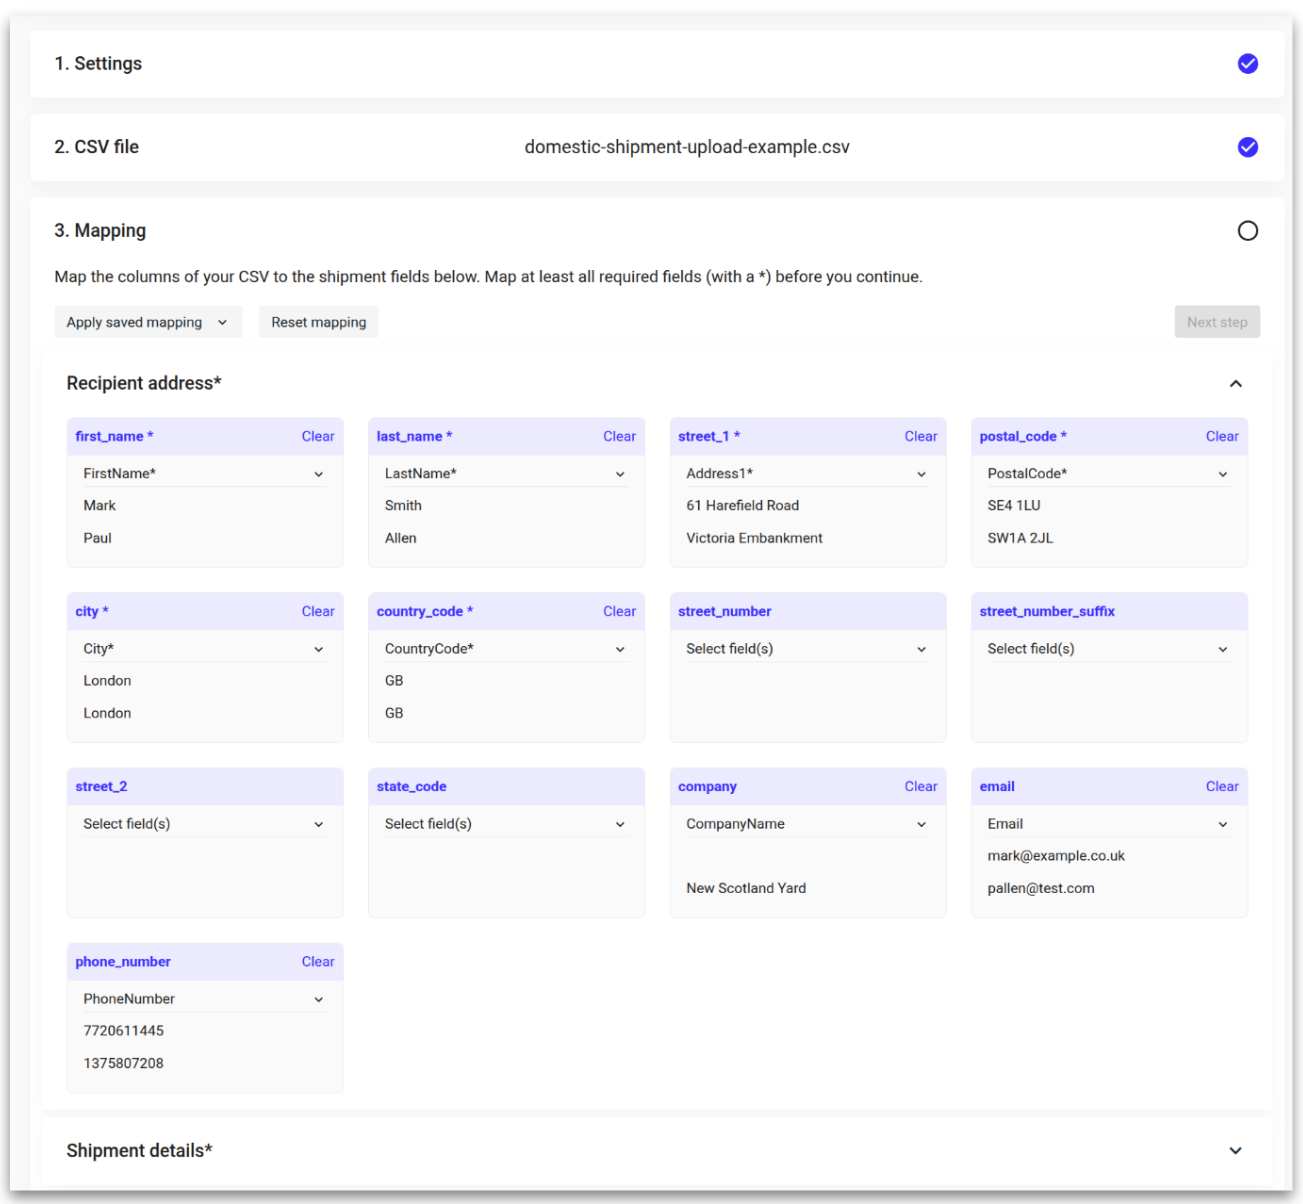
Once all fields have been mapped click 'Save mapping' and provide a recognisable name. Once saved, click 'Next step.'
Use ‘Apply saved mapping’ in step 3 for future uploads.

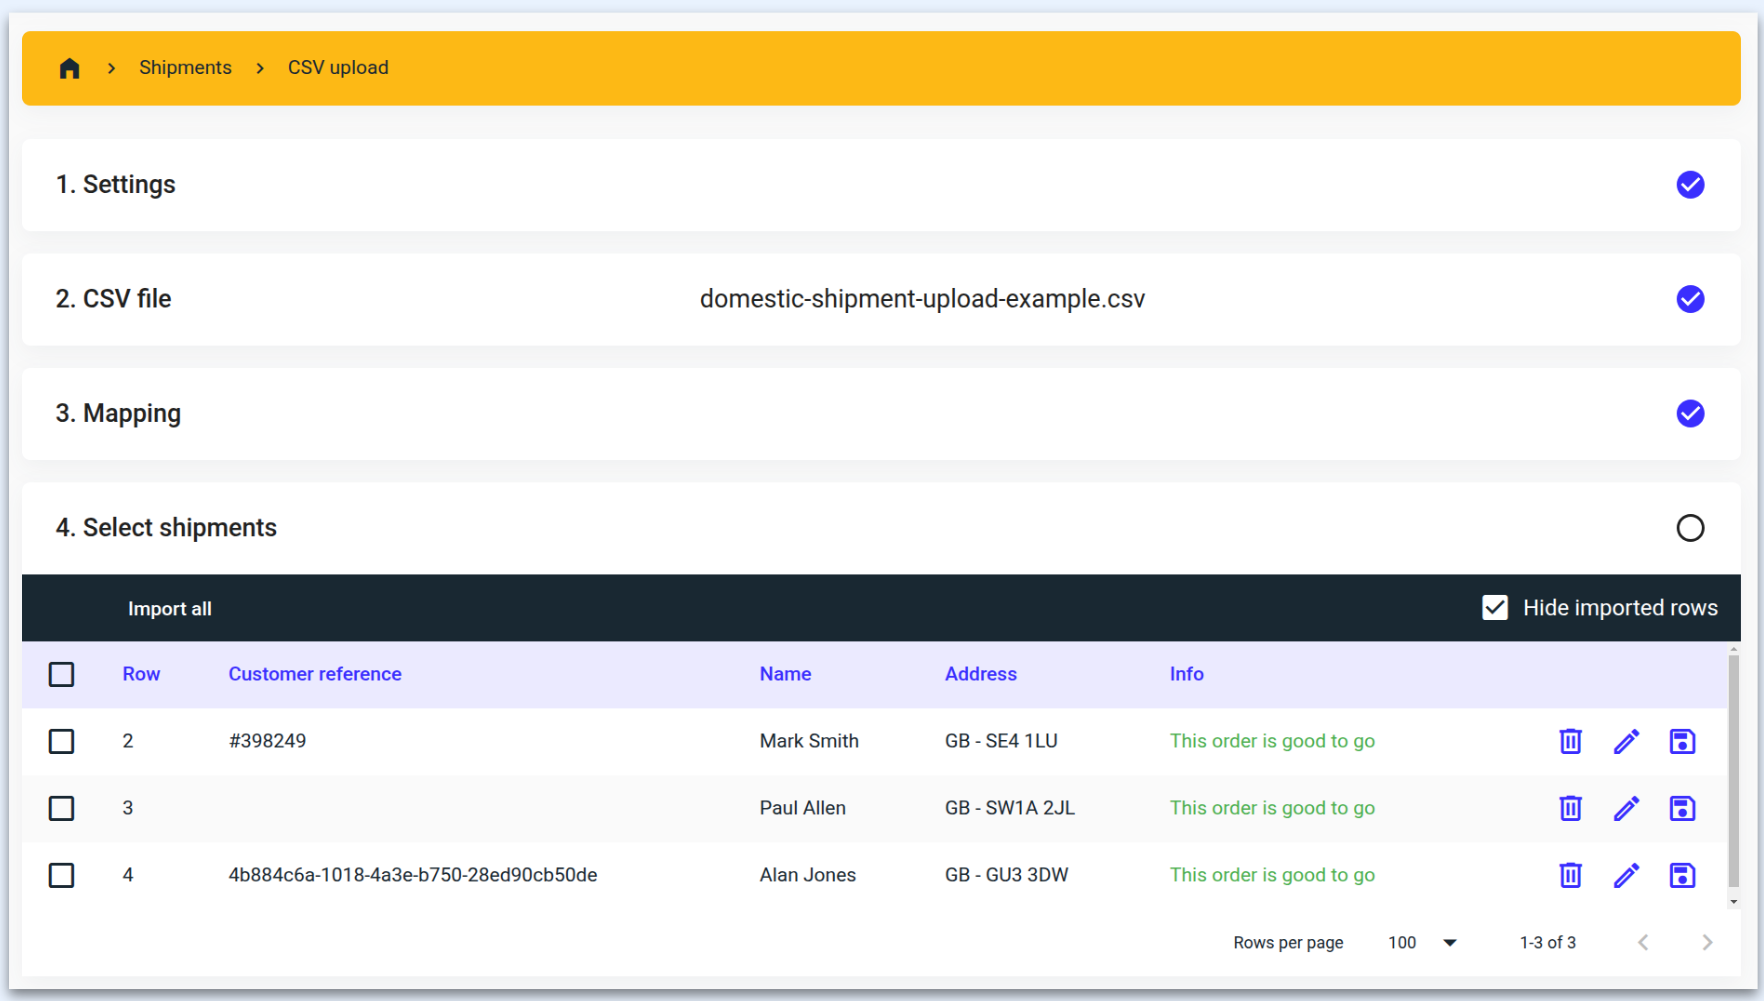
Select shipments
Once moving from step 3 to step 4, the platform will automatically validate the data in the .csv
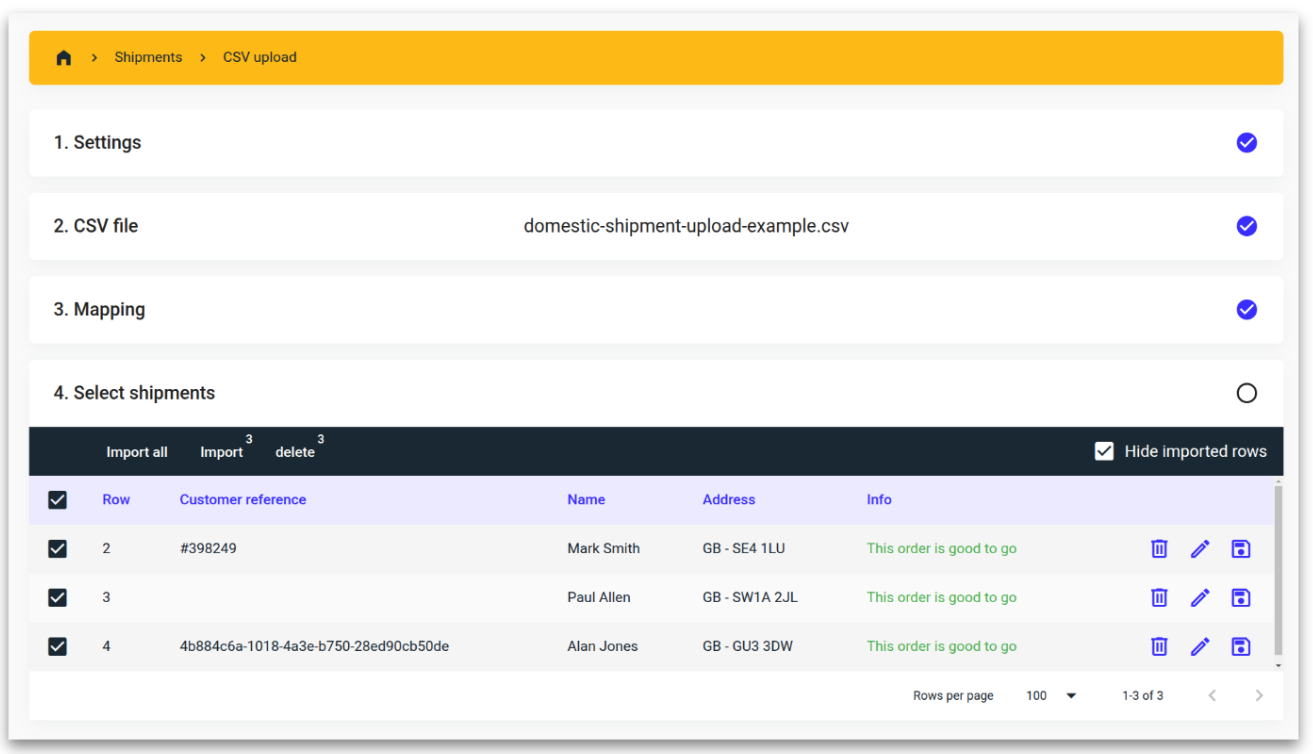
After each line indicates 'This order is good to go,' click on 'Import all.'
The orders will now be imported into the system and visible in the shipment overview.
If there are hundreds of orders to import, you don't want to go through each one and manually assign a carrier and service. Instead, use our shipping rules to automatically assign the services when importing orders.
Missing data
If a line displays 'This order is missing data,' click on the pencil icon on the right-hand side of the order to edit.
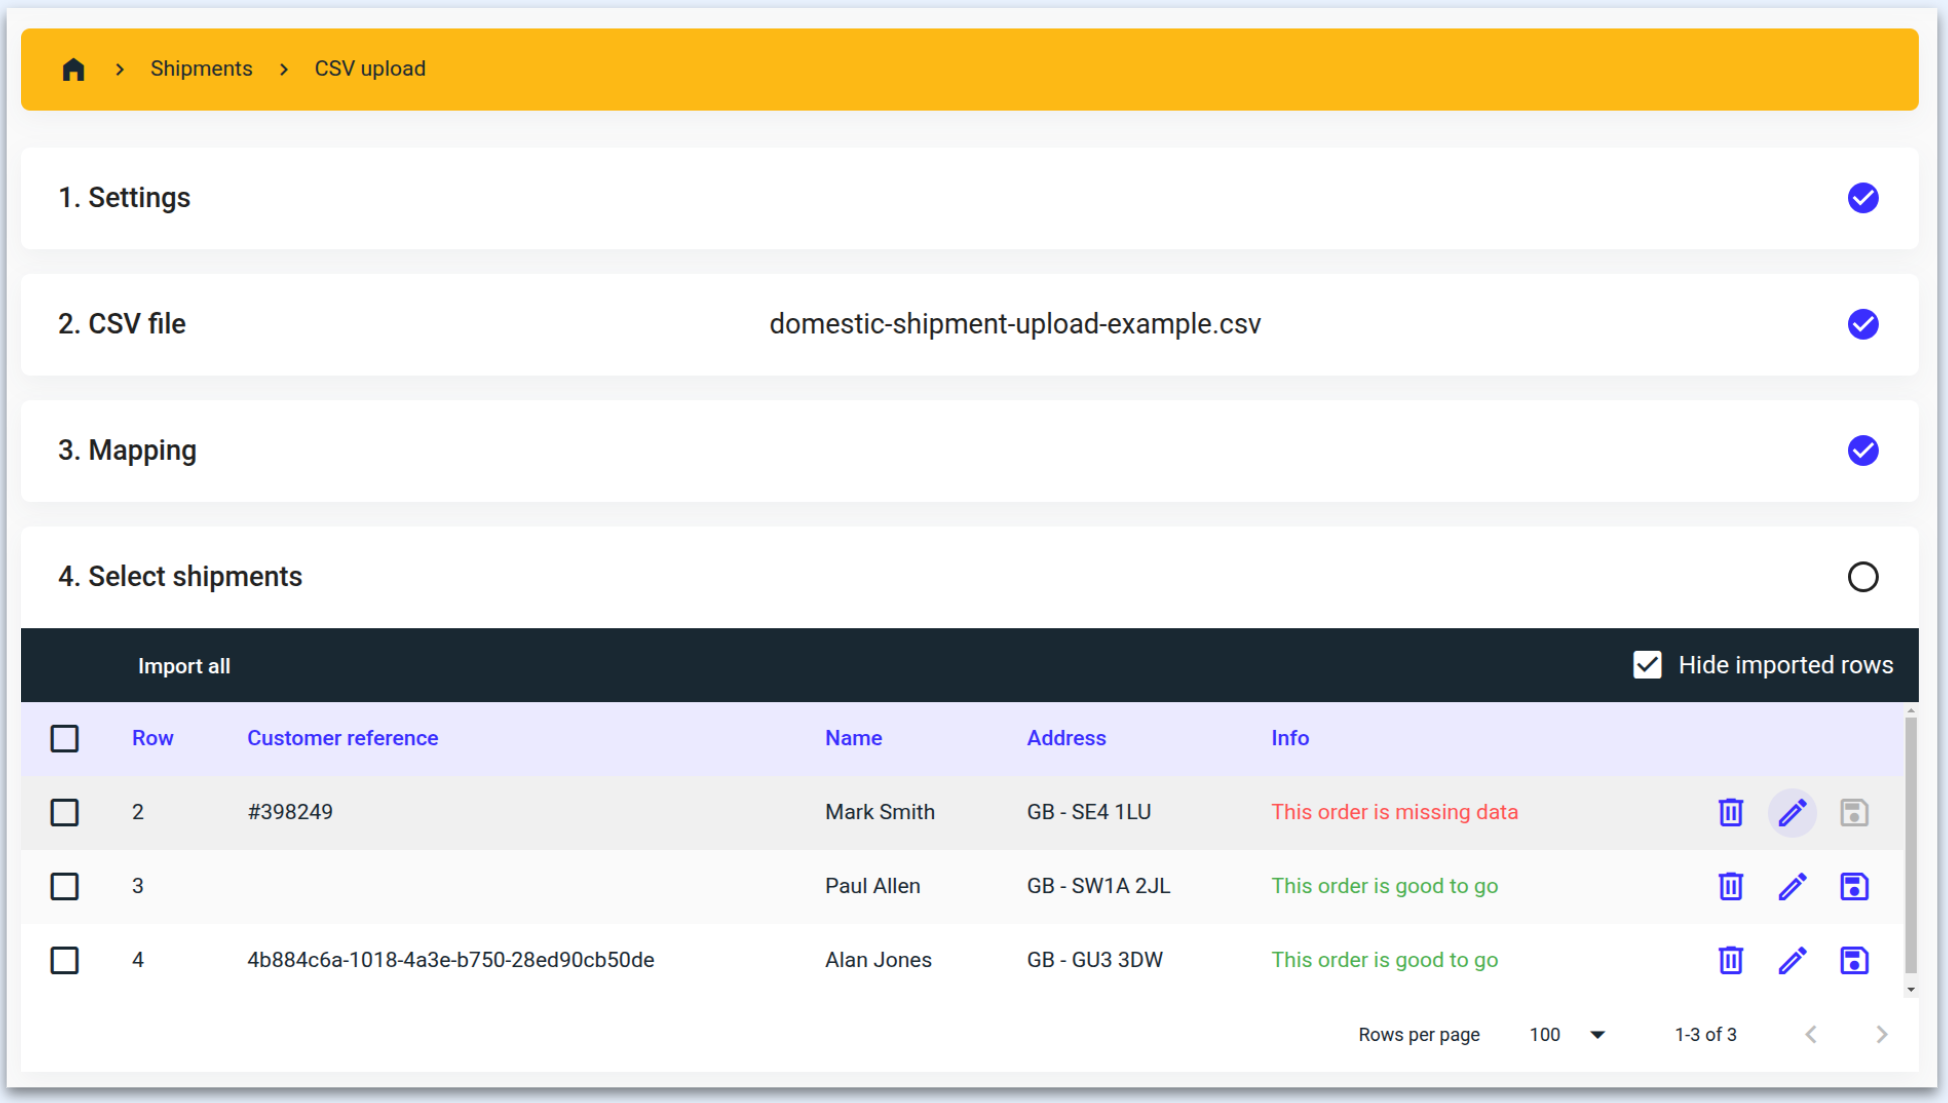
Check that all of the shipment details are correct, editing where necessary. Once you are satisfied with the information click ‘Save.’
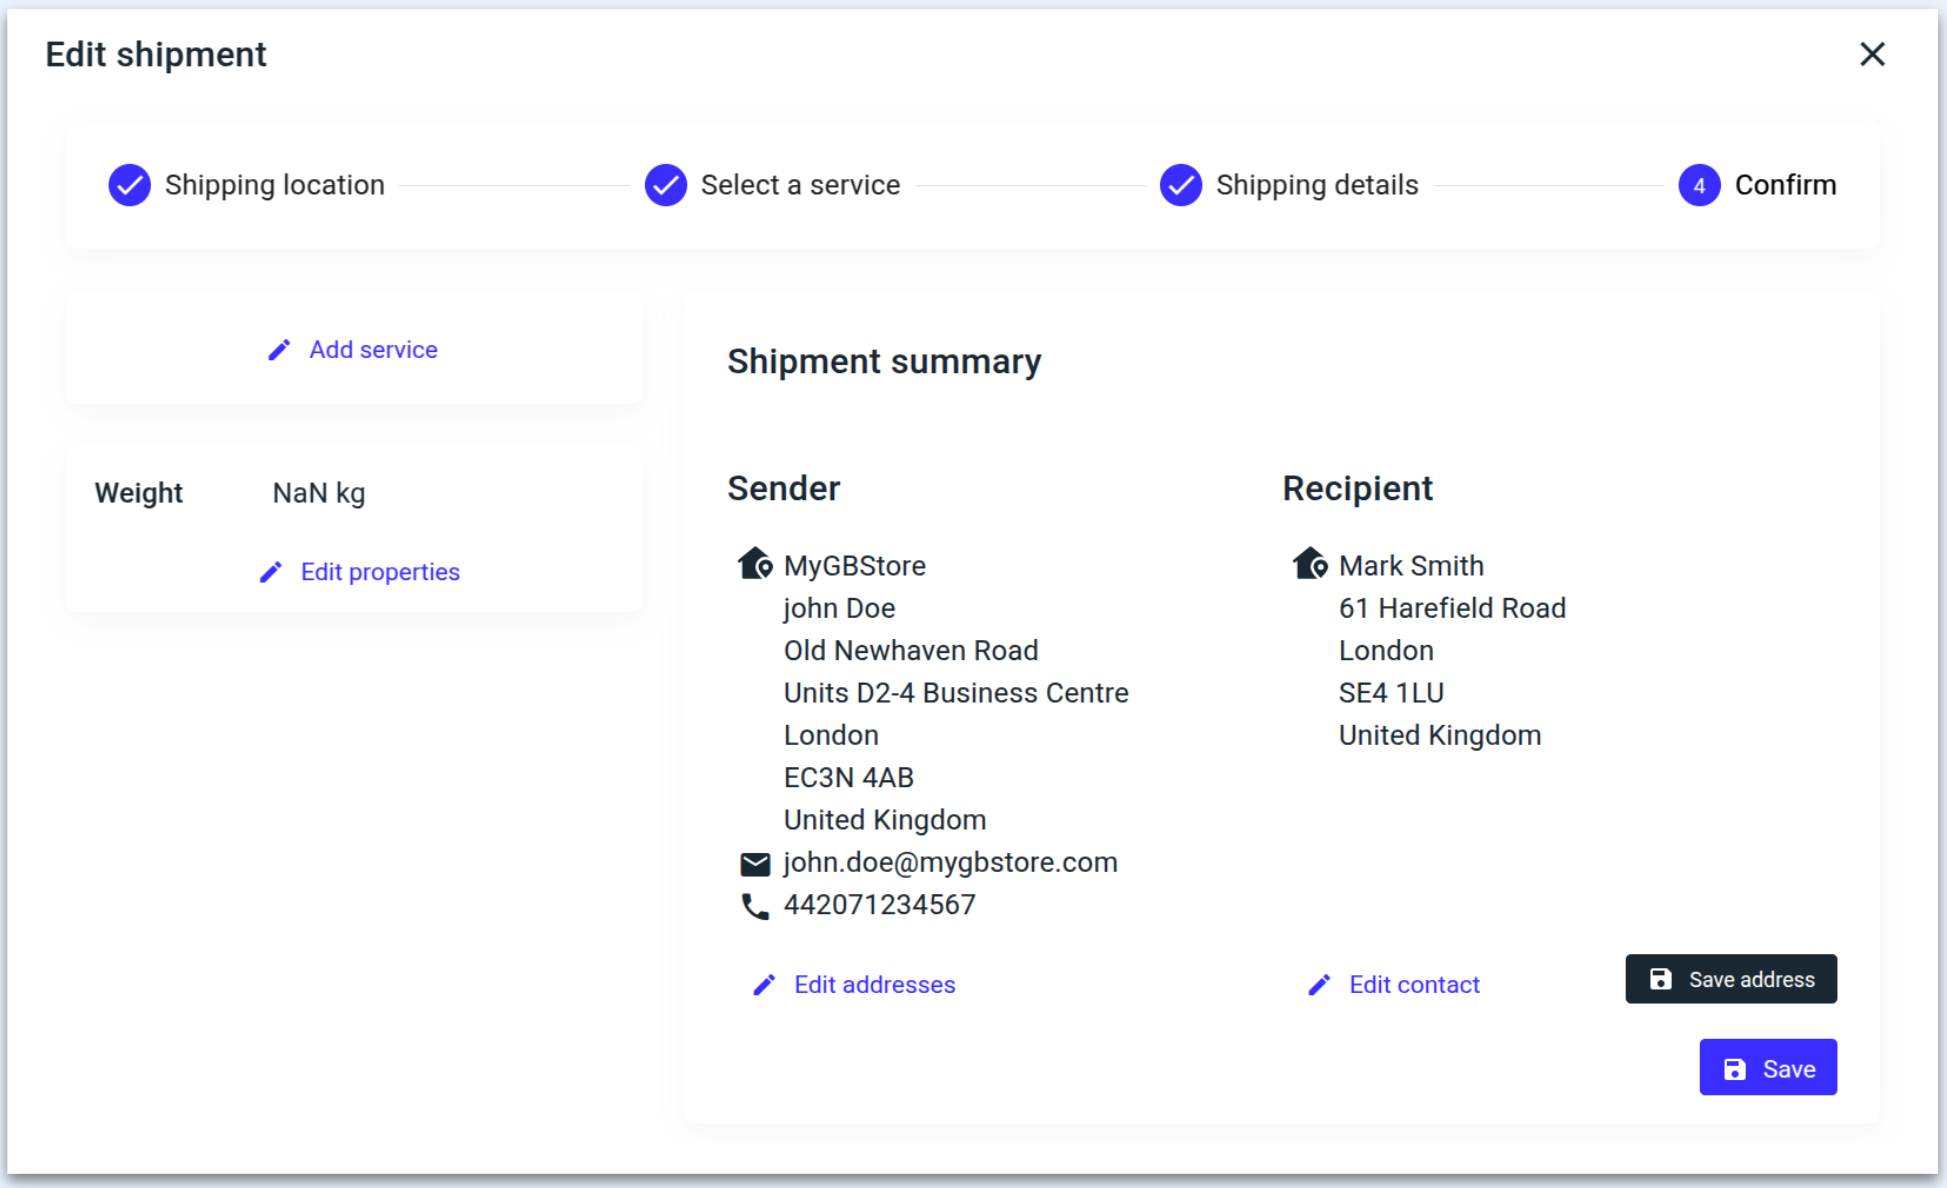
Once the missing or incorrect data has been corrected, the message will change to 'This order is good to go.' Now click 'Import All.'