.png)
Track & Trace
Statuses
From the very first moment a shipment is created, it will receive a status. Each carrier has its own set of status events reflecting the physical location of a parcel within their network. We’ve mapped these physical scan codes to our milestone statuses, providing a clear overview of the current status of each shipment, regardless of the carrier used.
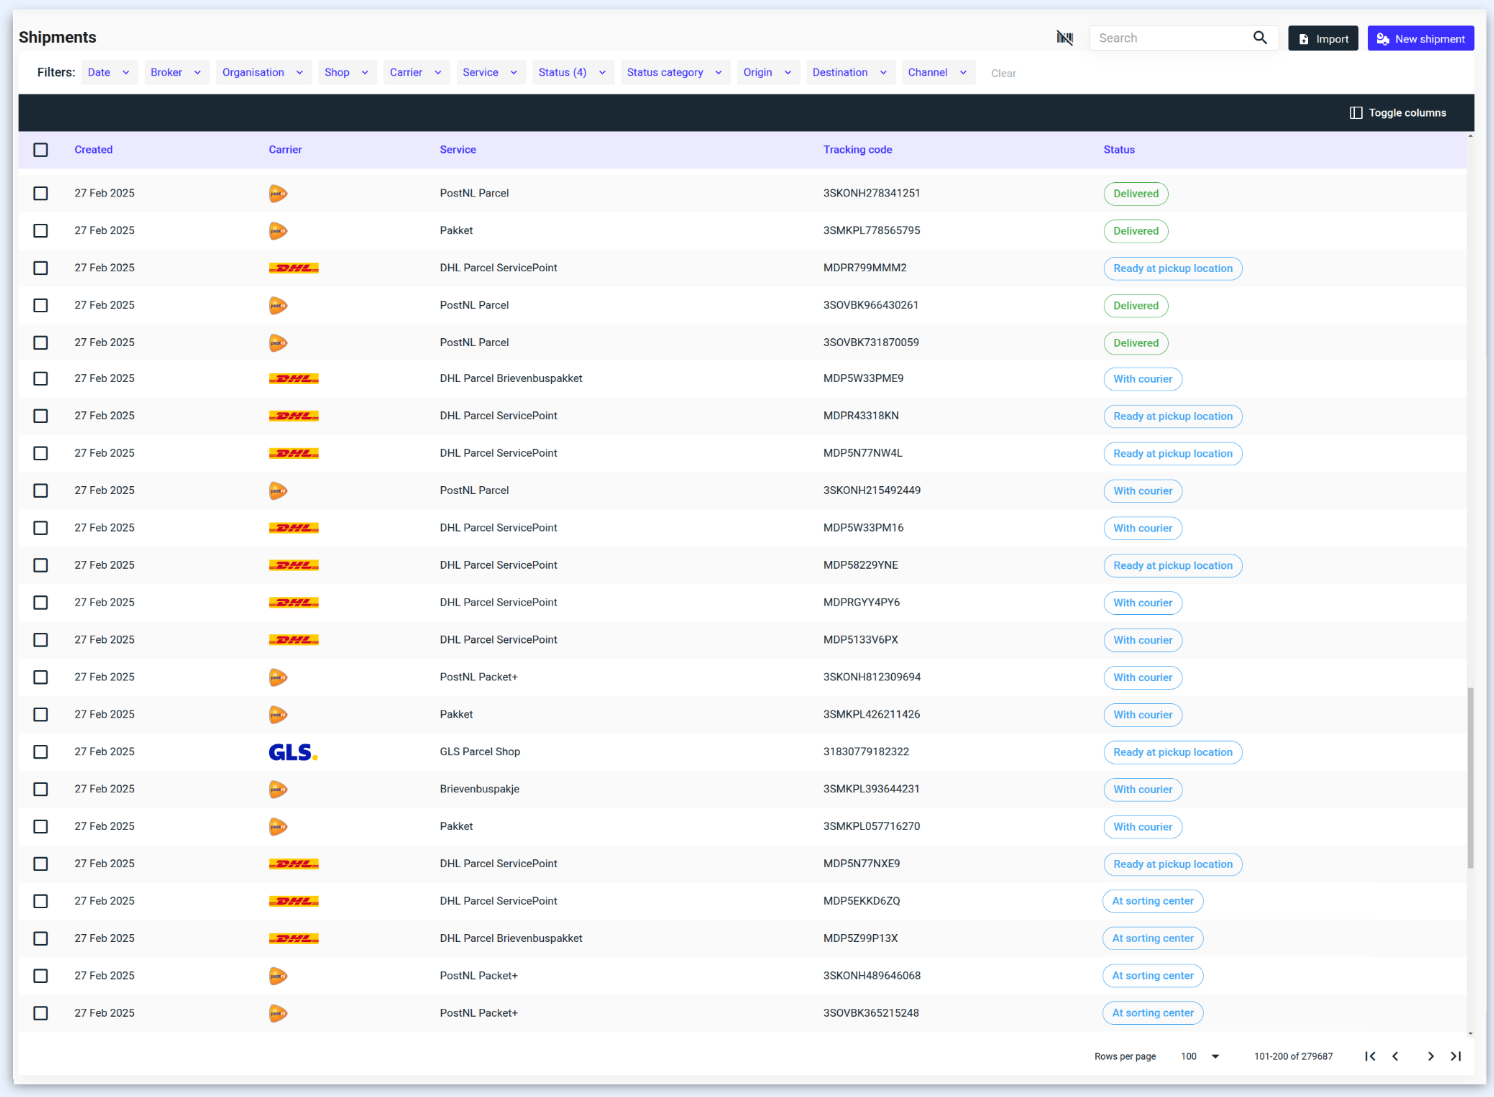
ℹ️ Selecting any shipment will provide more detailed information directly from the carrier.
Concept: All shipments created in the MyParcel.com system start as a Concept shipment. While in this stage, the shipment can still be edited or deleted.
Registered: A label has been created, and the carrier has been pre-advised.
Received by carrier: The carrier has scanned the shipment into their network.
Shipment at sorting: The shipment is scanned through the network.
With courier: The shipment is out for delivery.
Delivered: The shipment has been successfully delivered.
Delivered at parcelshop: The shipment is ready for the customer to pick up at the specified location, including depots and lockers.
Returned to sender: Undeliverables being returned.
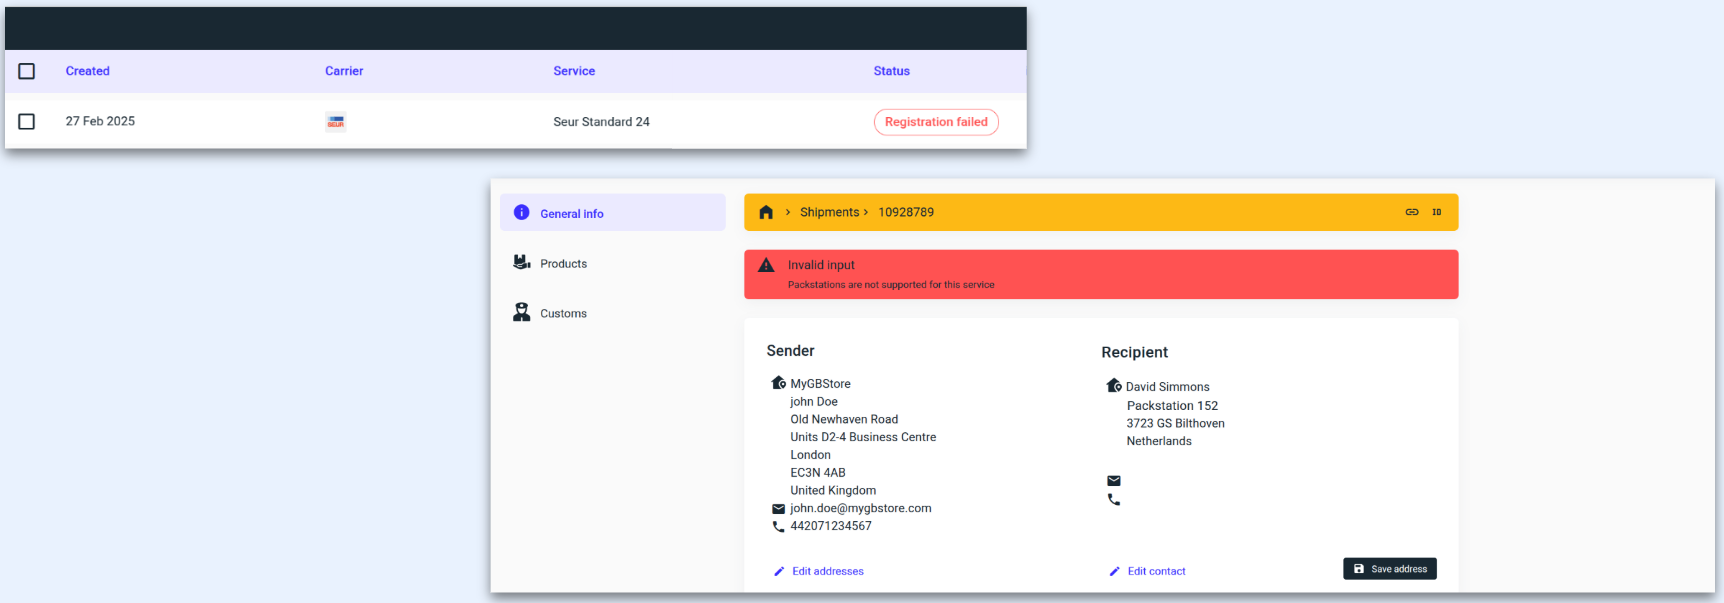
Registration failed: Typically, the carrier will return a detailed error message if there is incorrect or missing information. This message is displayed in the shipment tracking cards.
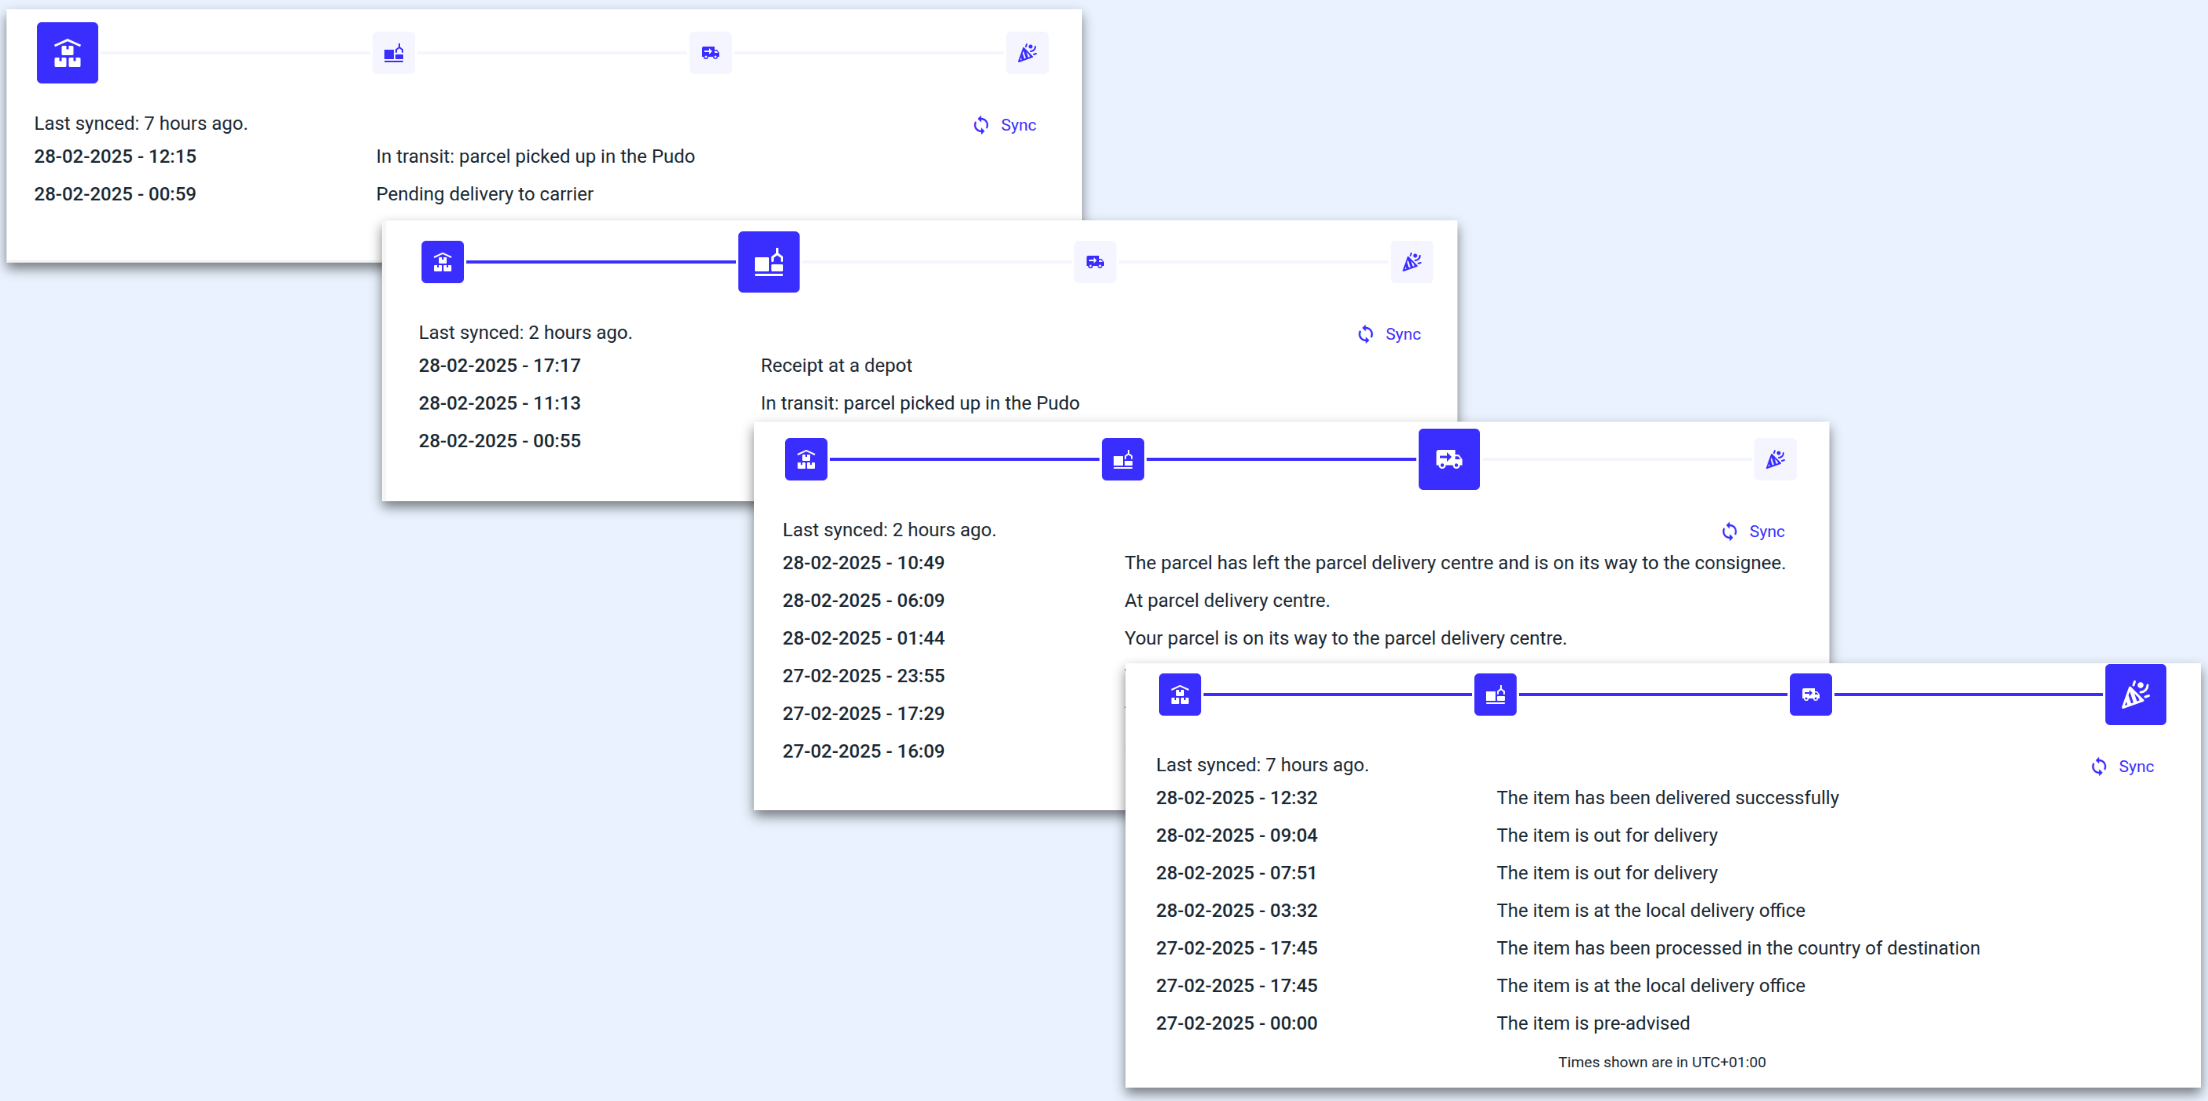
Tracking in the portal
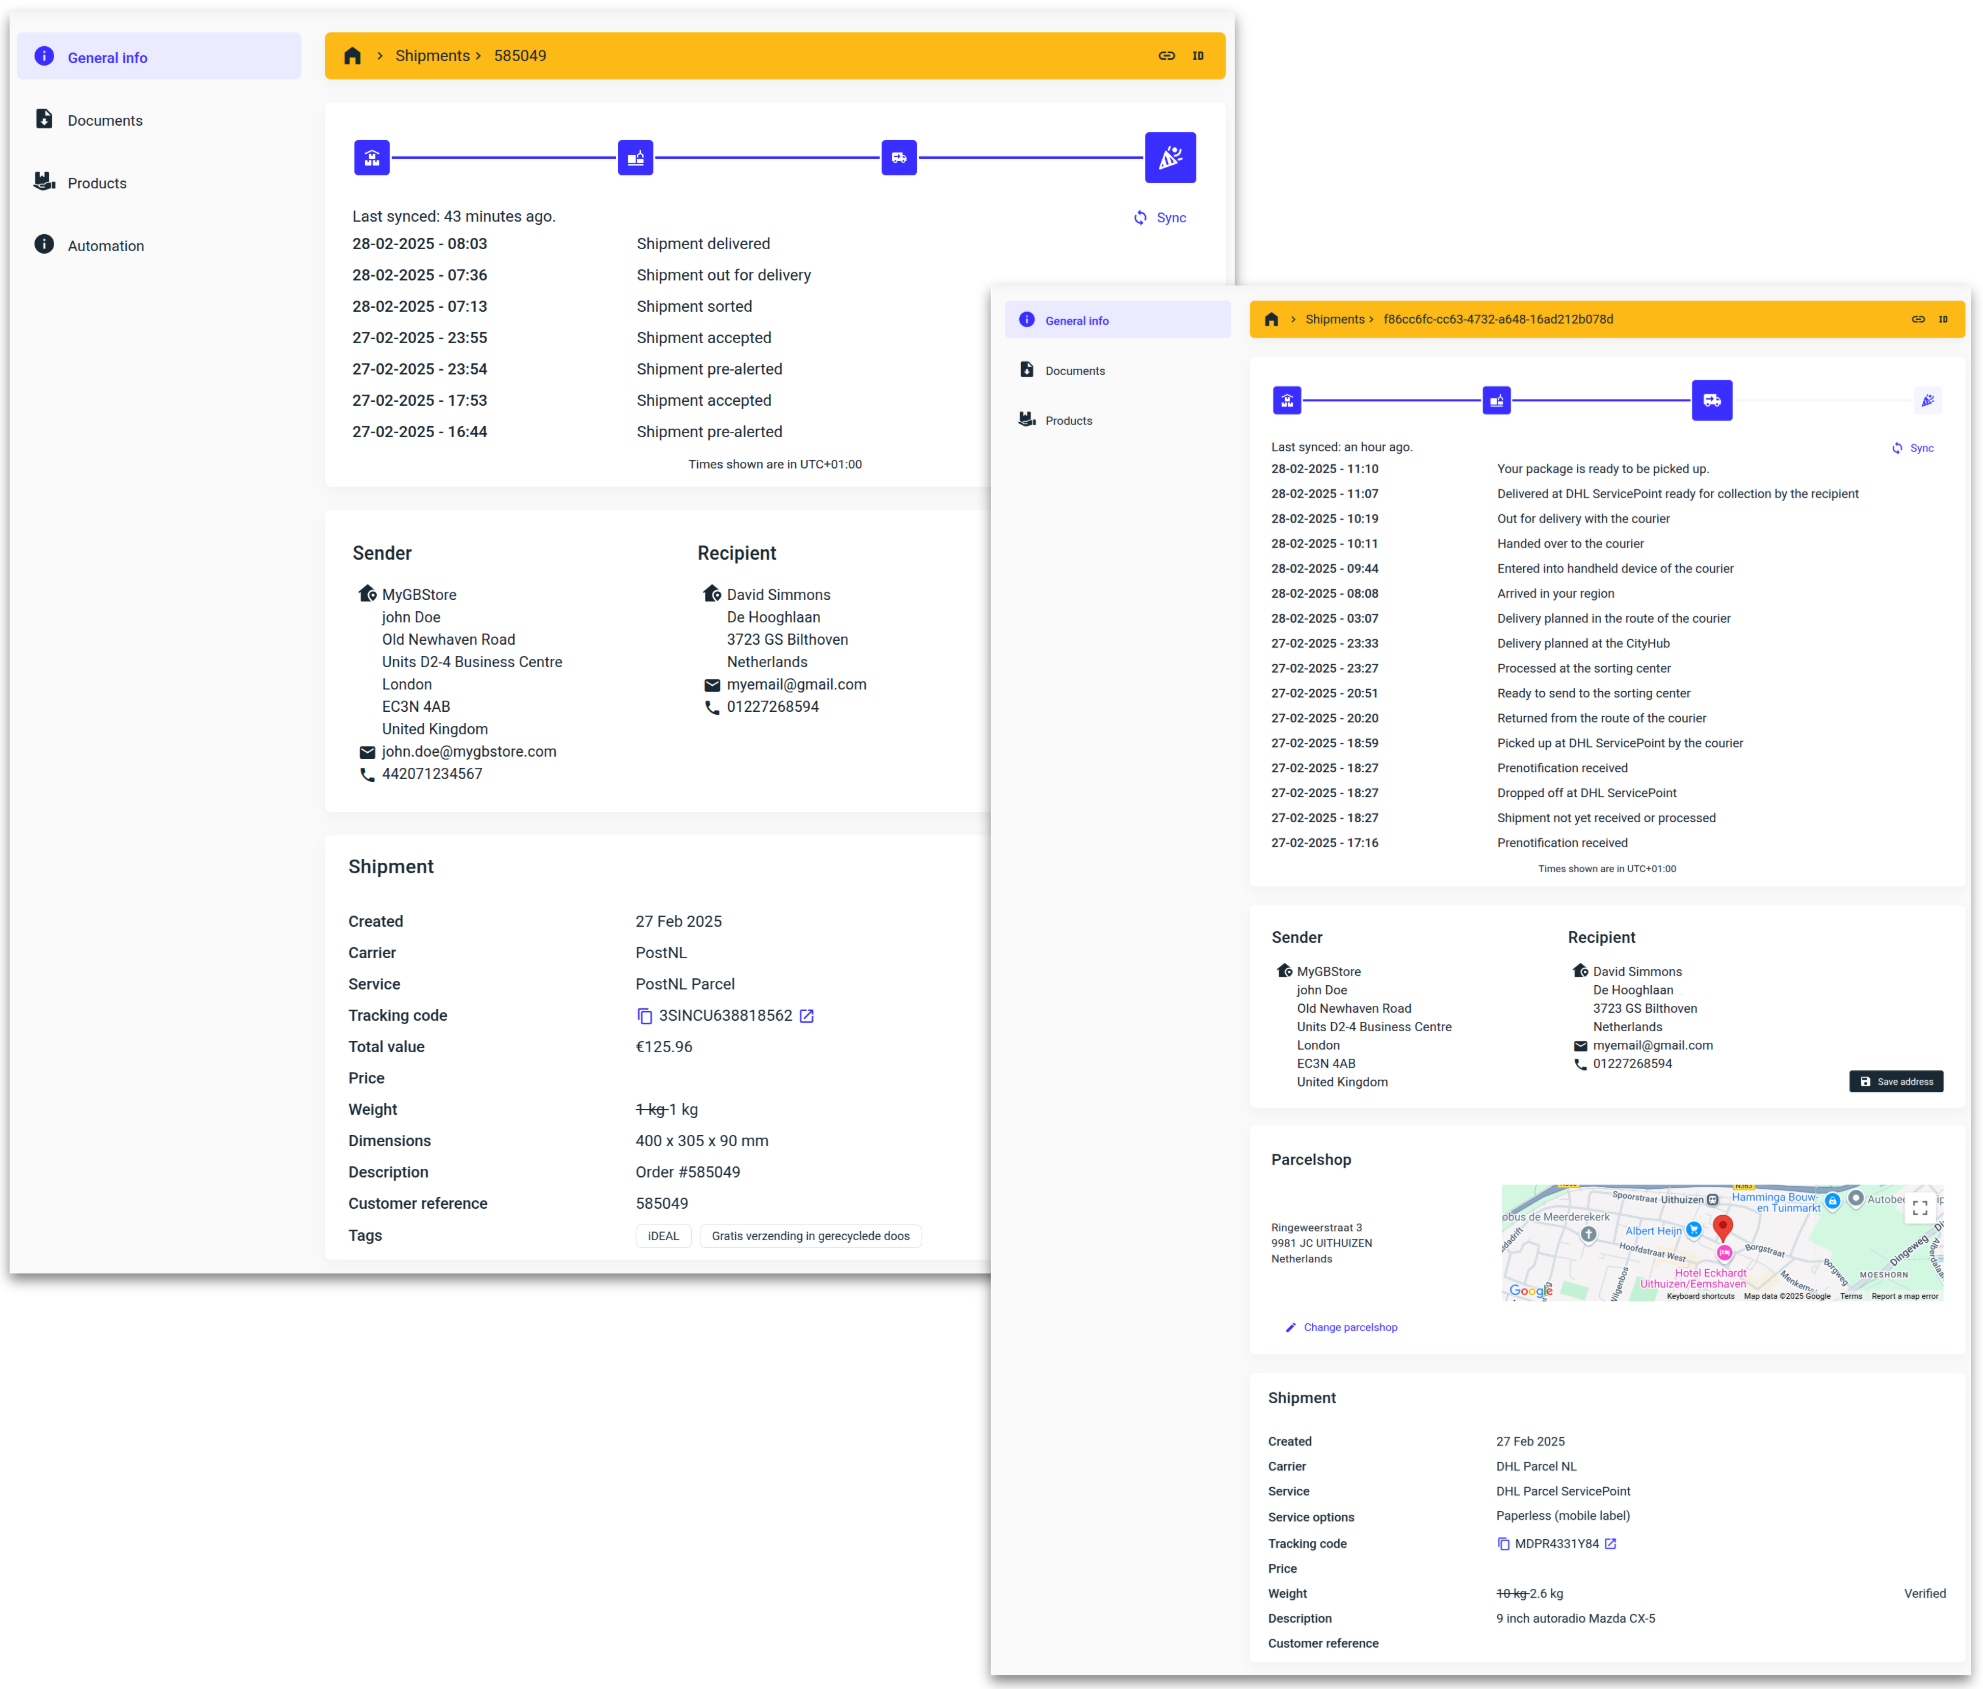
Every shipment created using MyParcel.com has a tracking card available. These tracking cards display detailed tracking status events, hold all documentation generated for the shipment, provide access to the carrier's tracking website, and contain all the relevant information for the shipment.
Clicking on any shipment will open up its tracking card.
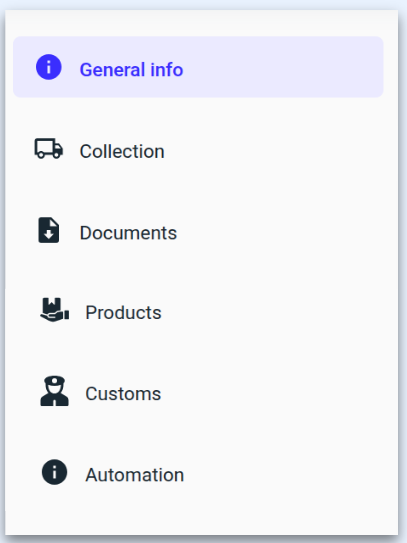
Each tracking card can have up to six tabs on the left-hand side.
General Info
View the raw data from the carrier, including both physical and data scans.
Sender and recipient details.
The shipment service, tracking number and a link to the carrier's tracking page.
Weight and dimensions of the shipment, along with a verification by the carrier, where available.
Deliveries to parcel shops will include the shop address and map.
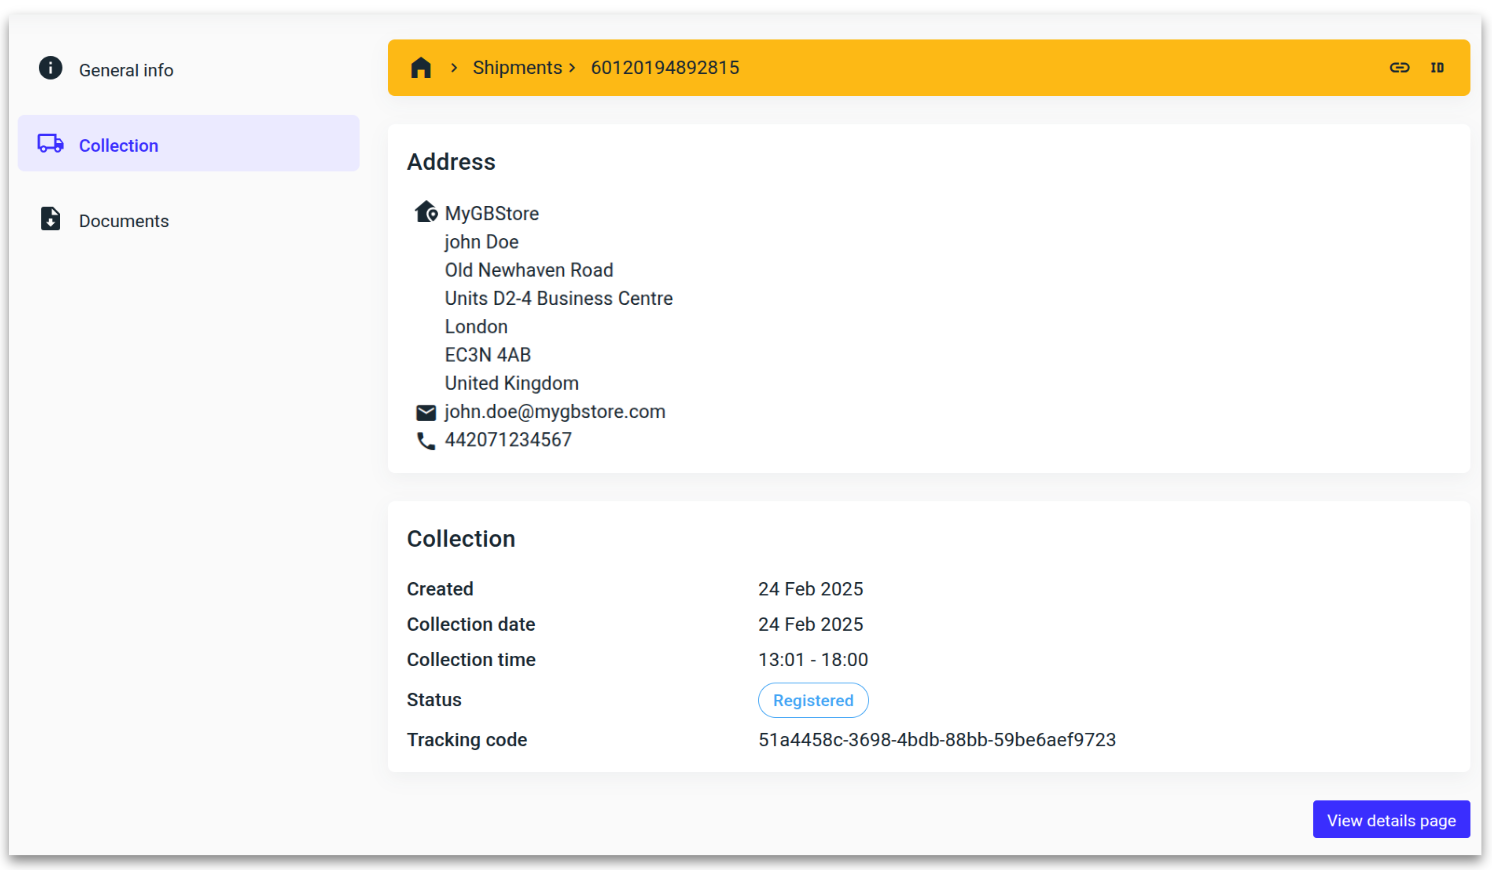
Collections
If a shipment has been assigned to a collection, it will be shown here.
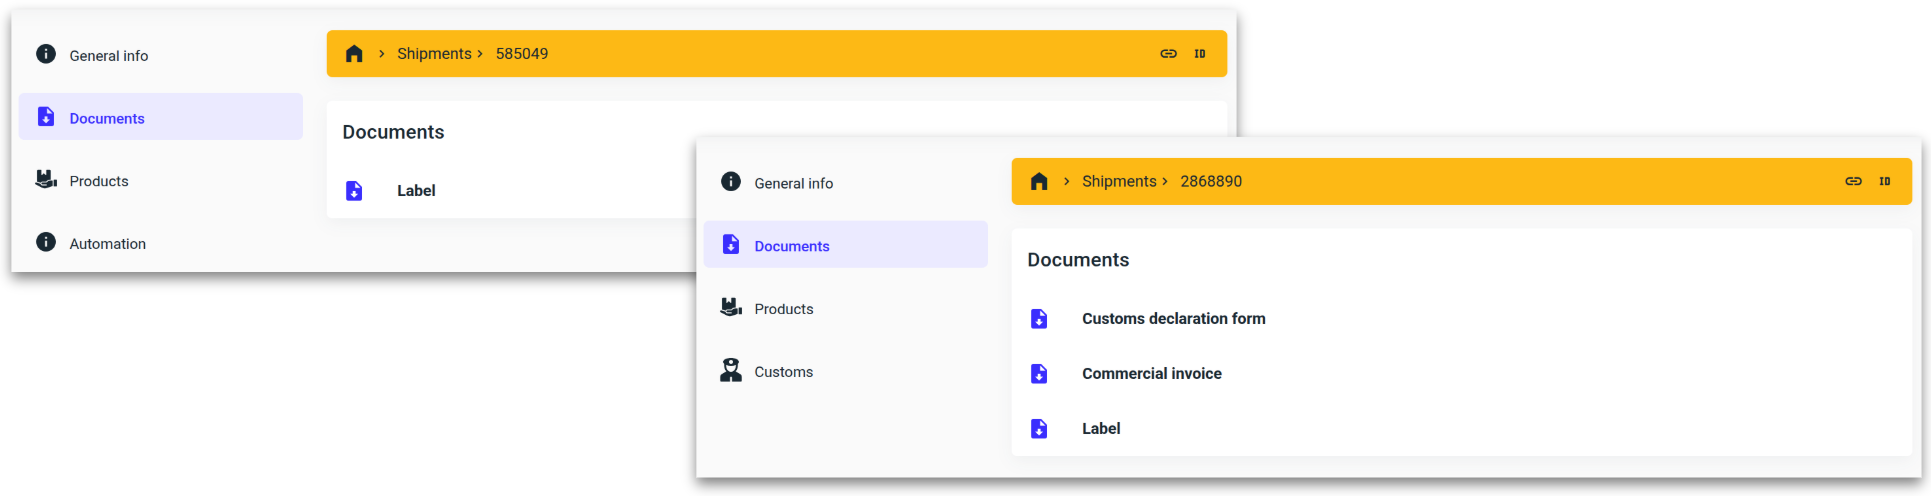
Documents
Labes, commercial invoice & the customs declaration form.
The downloadable commercial invoice and the customs declaration form are disabled if the carrier's electronic trade document (ETD) is activated.
Products
Products are always populated from the webshops and marketplaces.
Products can be added via the .csv file or when manually creating a shipment.

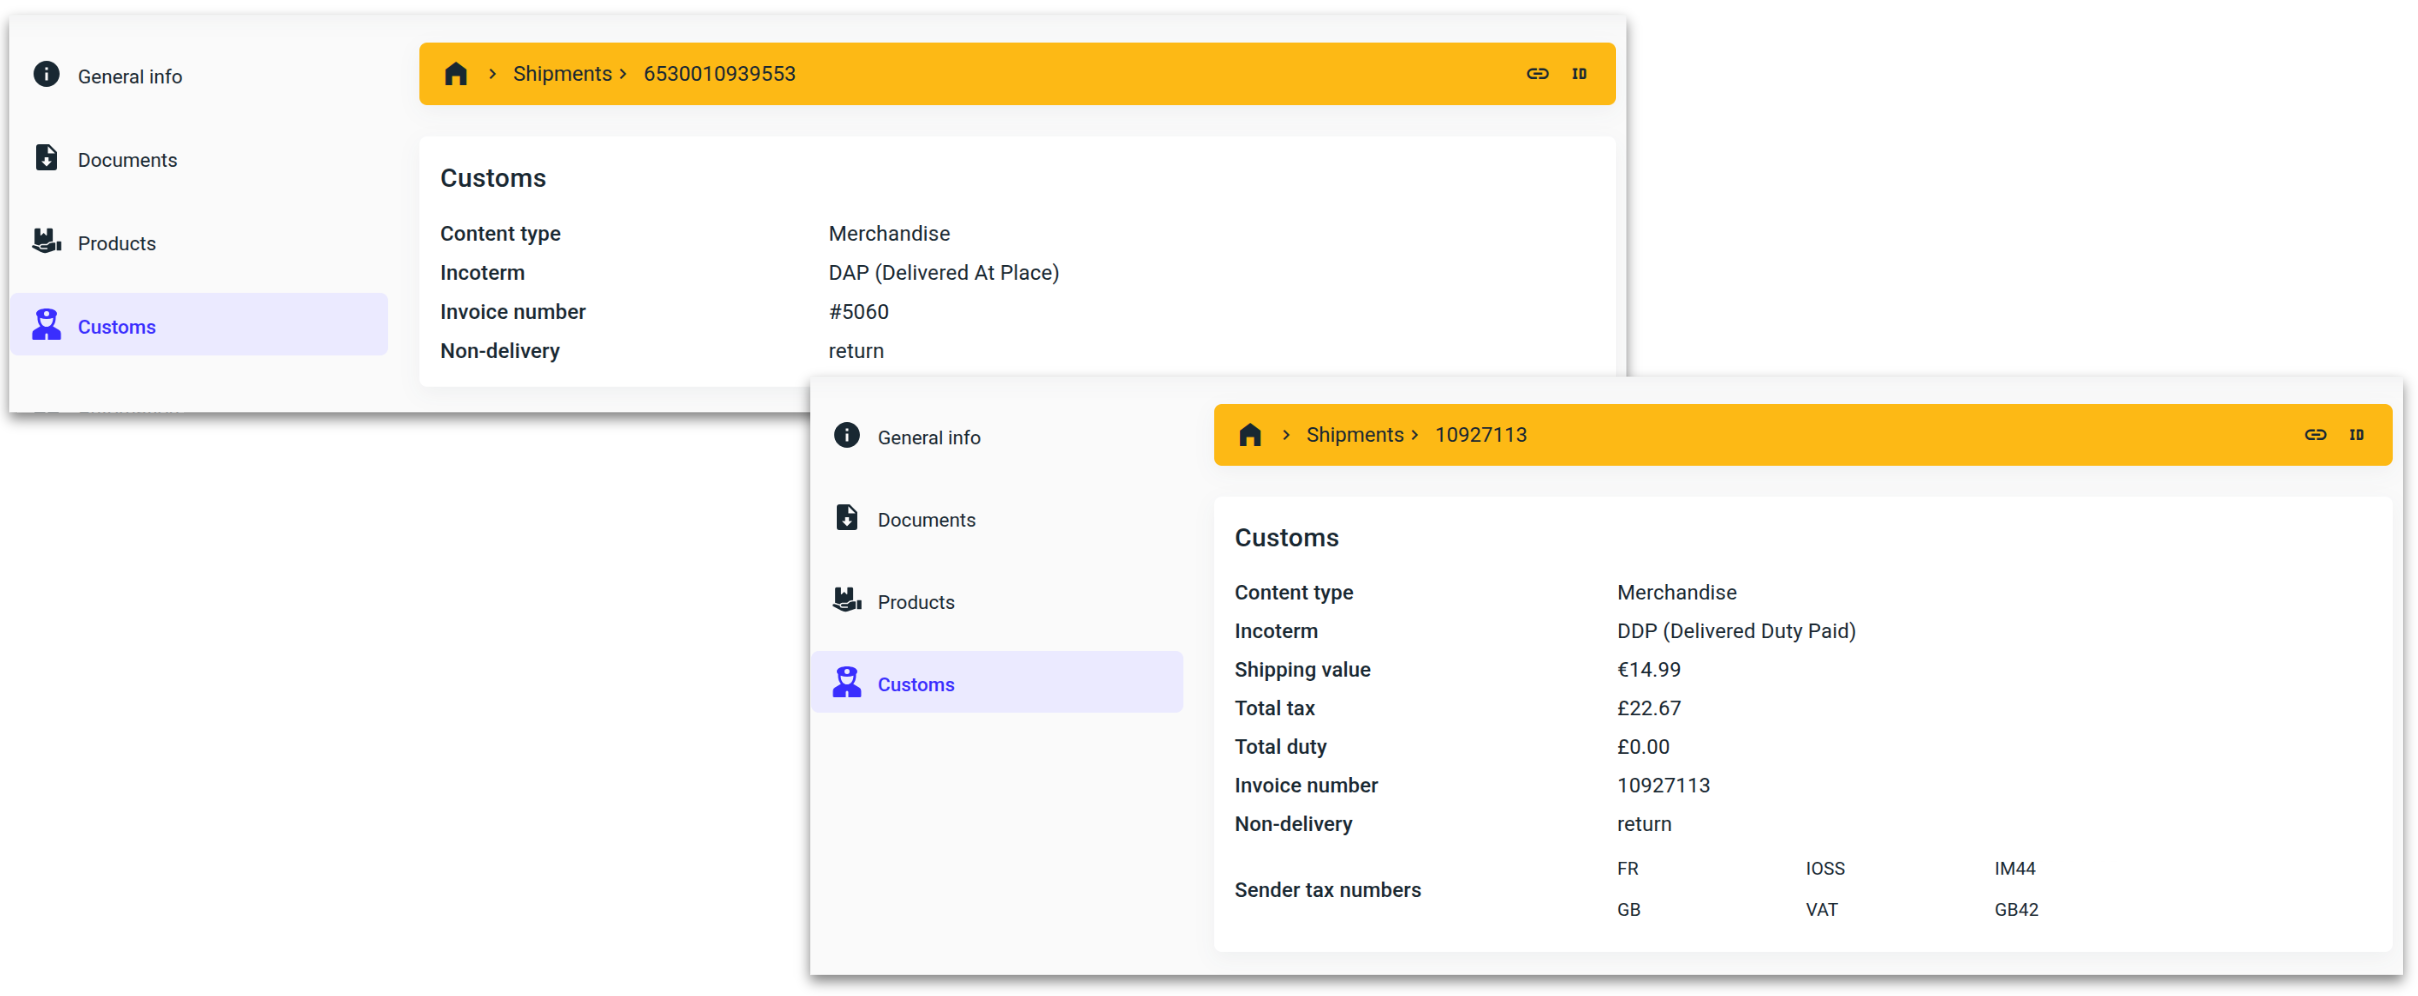
Customs
This section displays the terms of the shipment delivery.
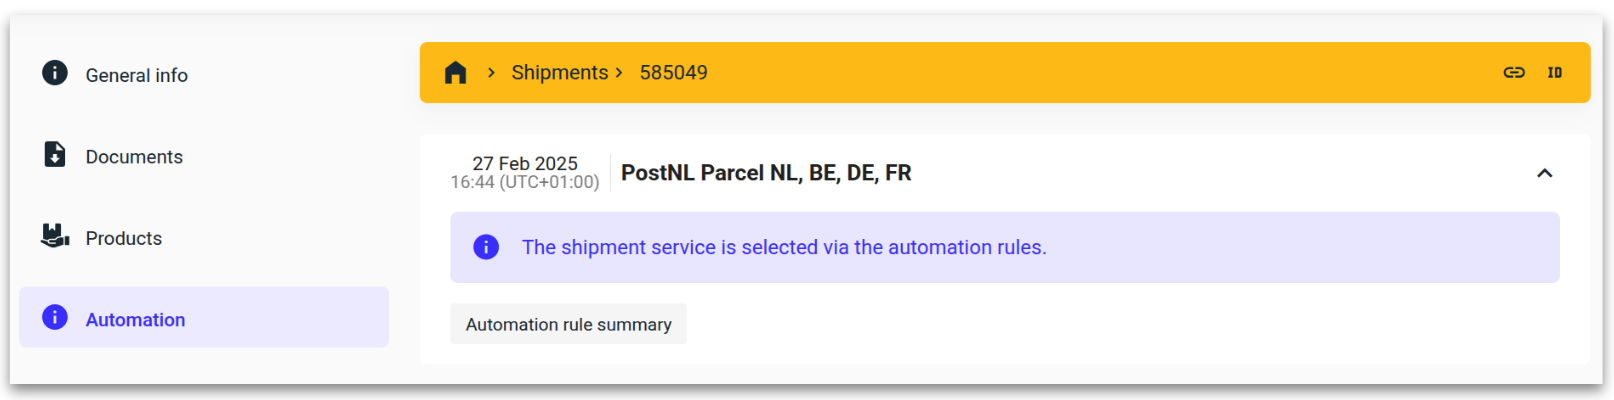
Automation
The shiping rule triggered by the shipment will be displayed here.
Track & trace emails
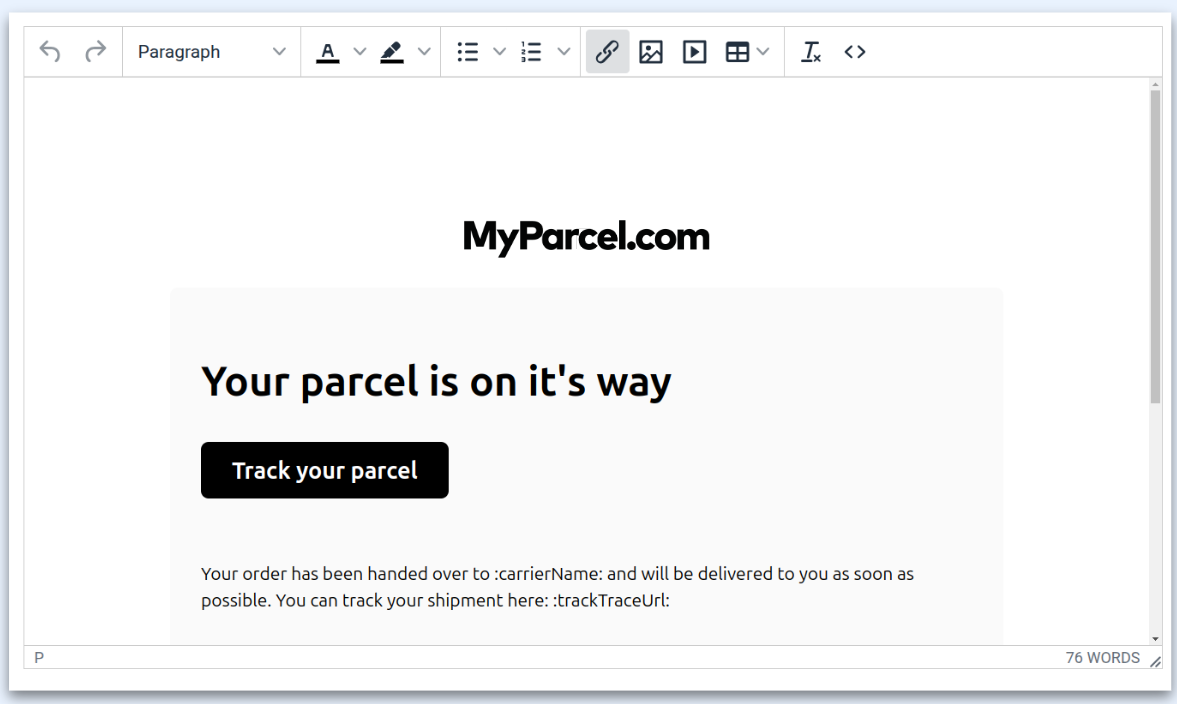
Create your own branded emails.
Track & Trace emails are sent out automatically once a shipment has been registered with the carrier.
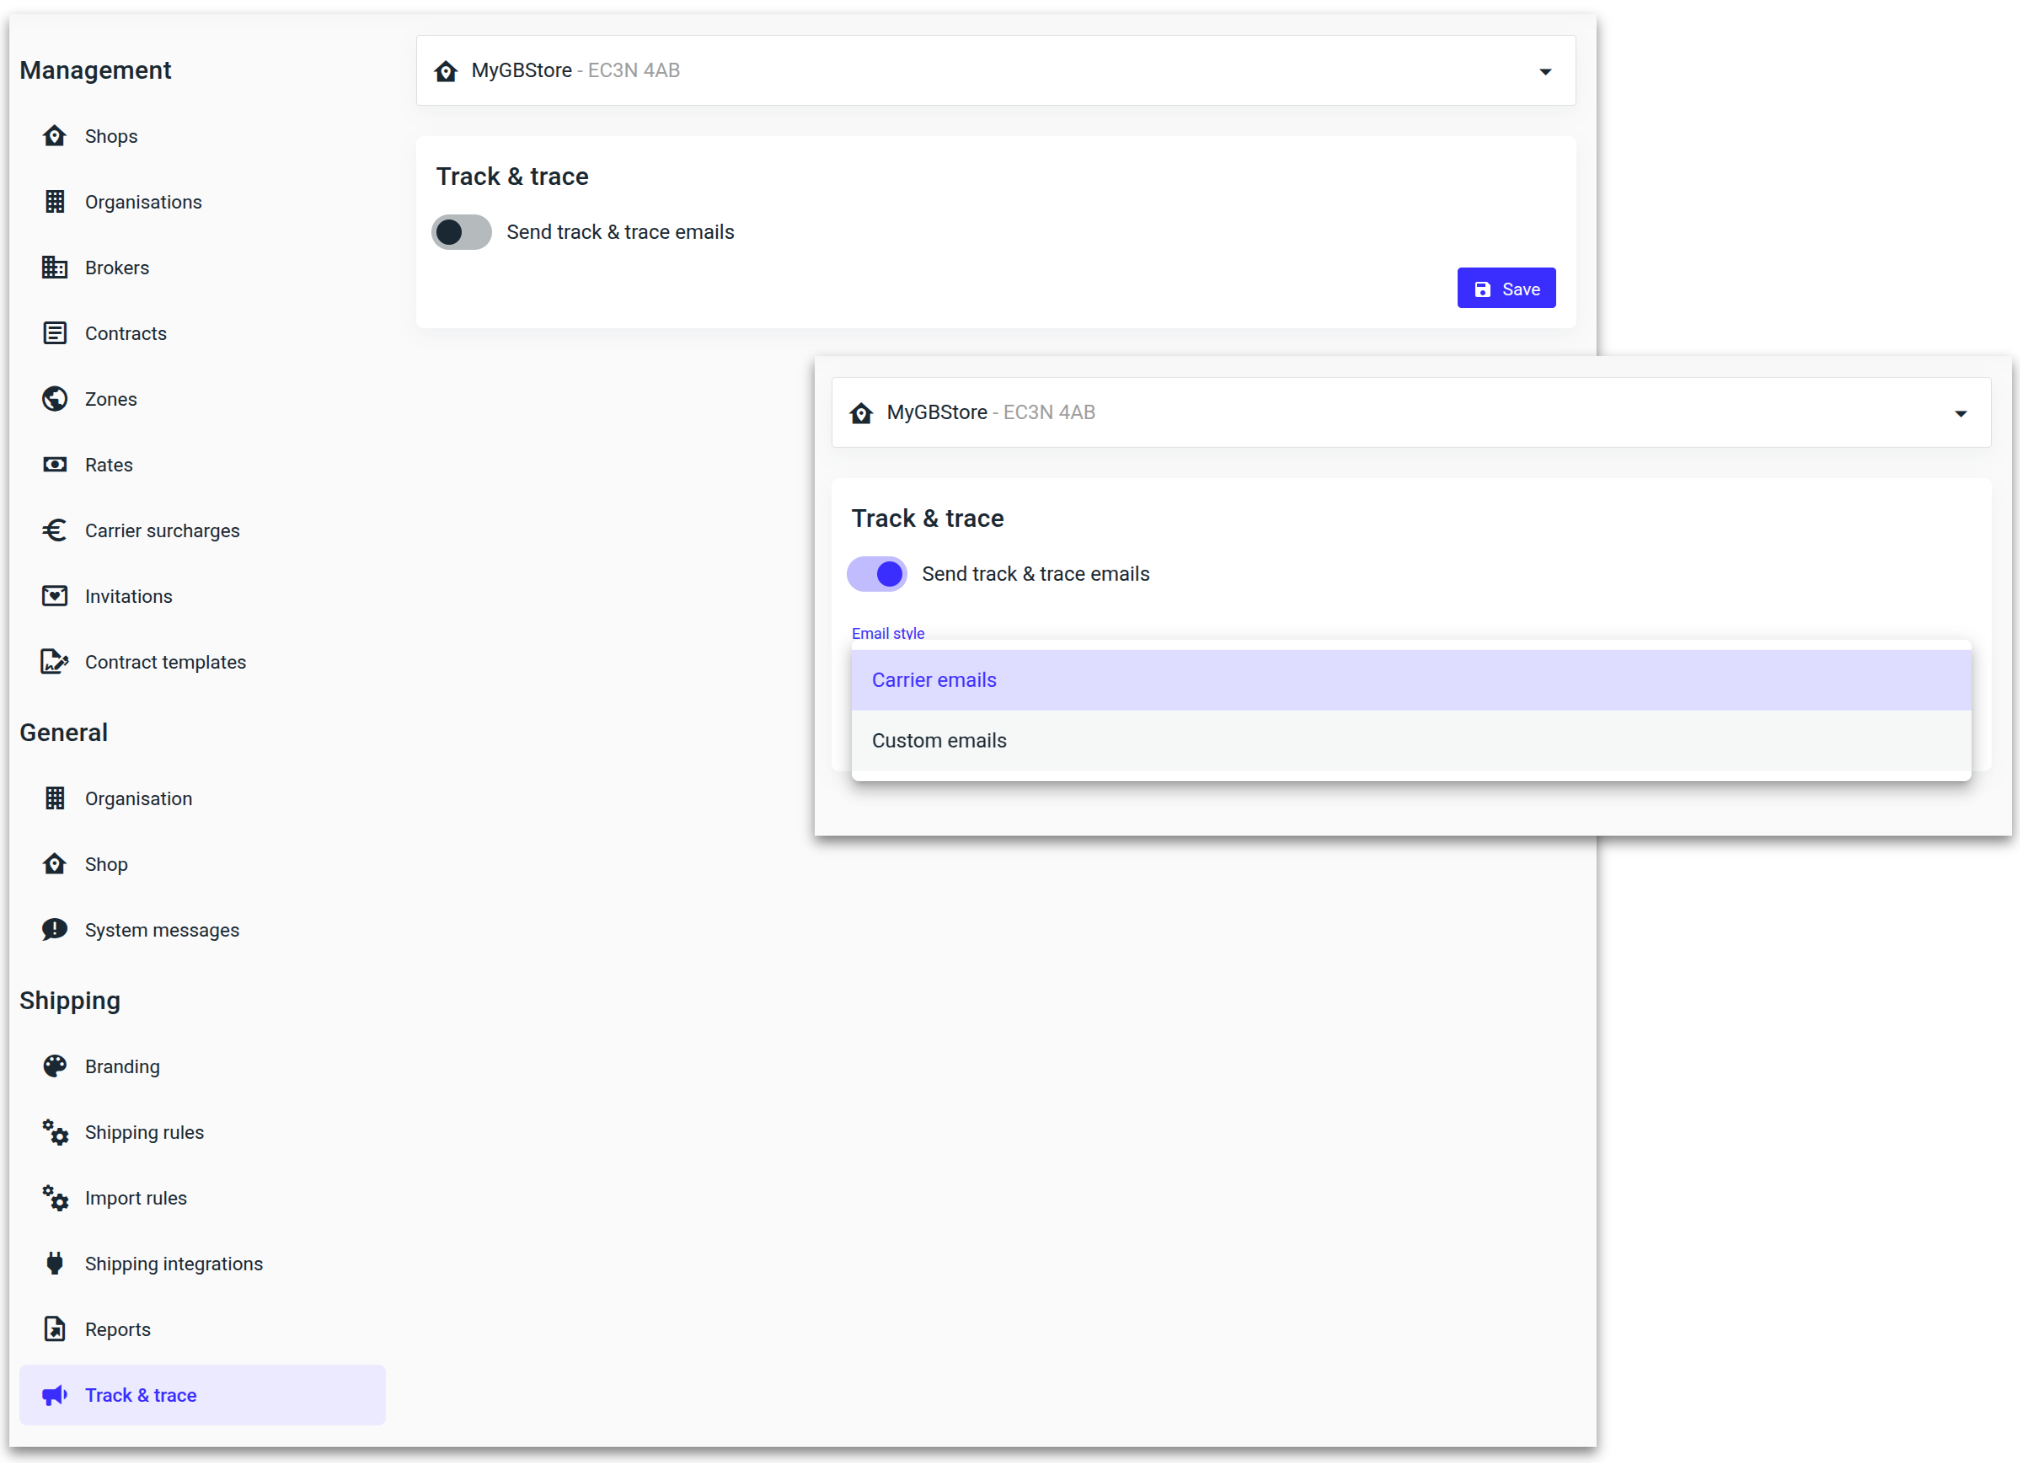
Navigate to ‘Track & trace’ in the settings menu, activate the ‘Send track & trace emails’ toggle, and then select ‘Custom emails.’
The Track and trace page is split into 3 sections.
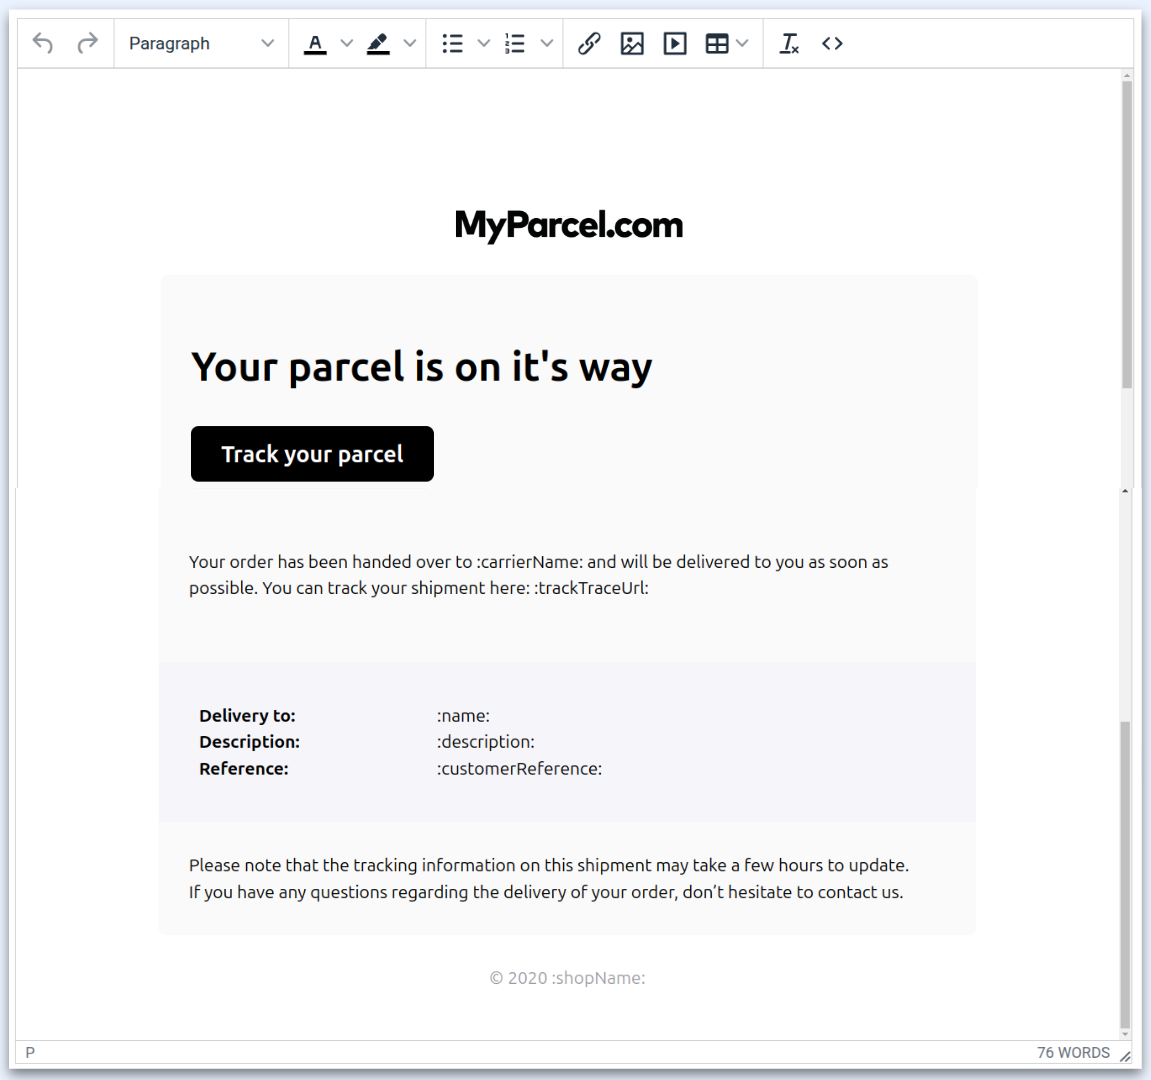
Track & trace: Edit the subject and use the toolbar to format the body of the email - or even use HTML to match the style of your website.
Shop logo: Here, you can upload a full-resolution image - supported formats include JPG, JPEG, SVG, and PNG.
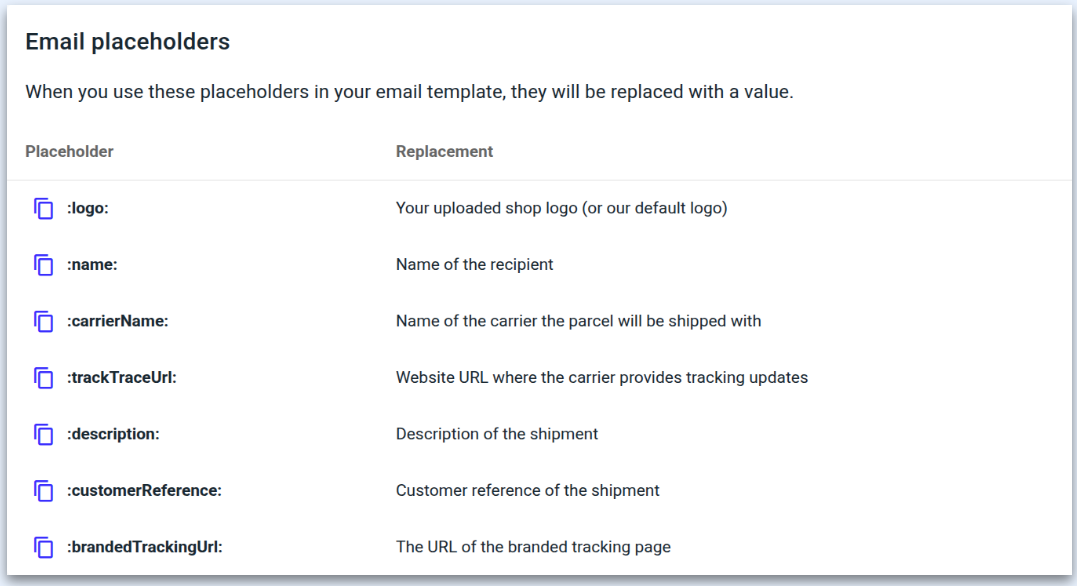
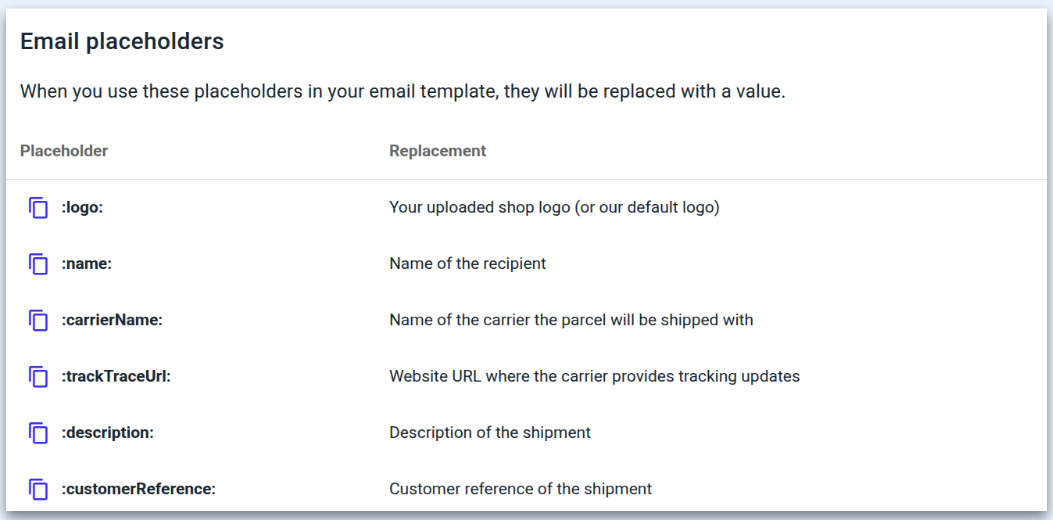
Email placeholders: Predefined placeholders to give your customers detailed information about the shipment.
ℹ️ The Track & Trace template comes pre-filled with helpful placeholders to get you started quickly.
Upload a logo, toggle on ‘Send a preview', and then click 'Save.’
A preview email will now be sent to the user's email address.
Clicking ‘Restore to default’ will reset the email template back to its original default settings.

Placeholders
Provide a clearer tracking experience to your customers with the Branded tracking page.
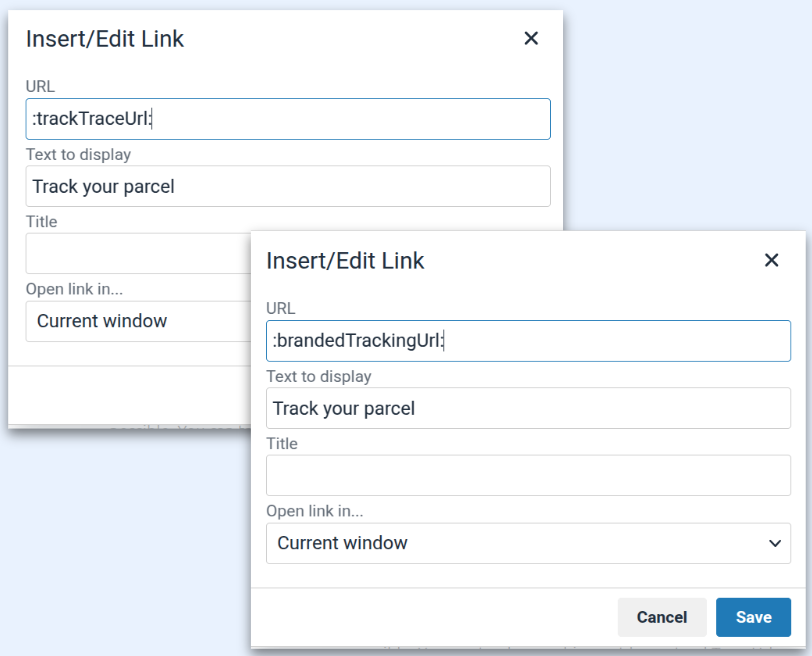
At the bottom of the Email placeholders section, copy the :brandedTrackingUrl: placeholder.
Select ‘Track your parcel’ and then click the link icon in the toolbar.
In the URL field, paste over :trackTraceUrl: with the :brandedTrackingUrl: placeholder and click ‘Save.’
Branded tracking page
Enhance brand recognition with the MyParcel.com Branded Tracking Page, providing customers with a personalised experience for tracking their shipments instead of redirecting them to a carrier's tracking page.
Setting up the branded tracking page is a straightforward process that can be completed in just a few simple steps.
After configuring the branded tracking page, you must insert the :brandedTrackingUrl: placeholder into the tracking email.
Navigate to the settings menu and under Shipping select “Branding.”
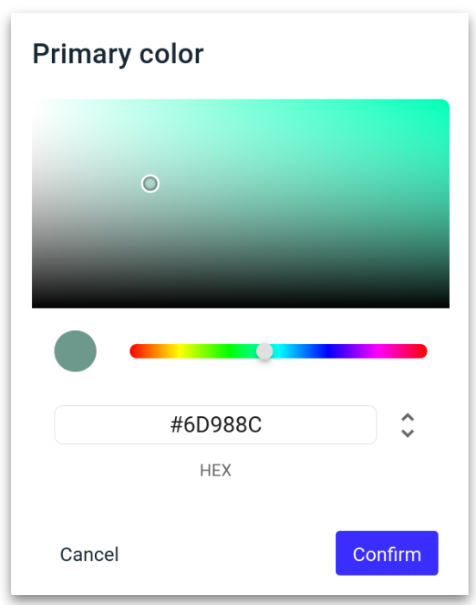
The preview will showcase real-time changes using HEX, RGB, HSL, or the slider, allowing you to precisely match your company's colours.
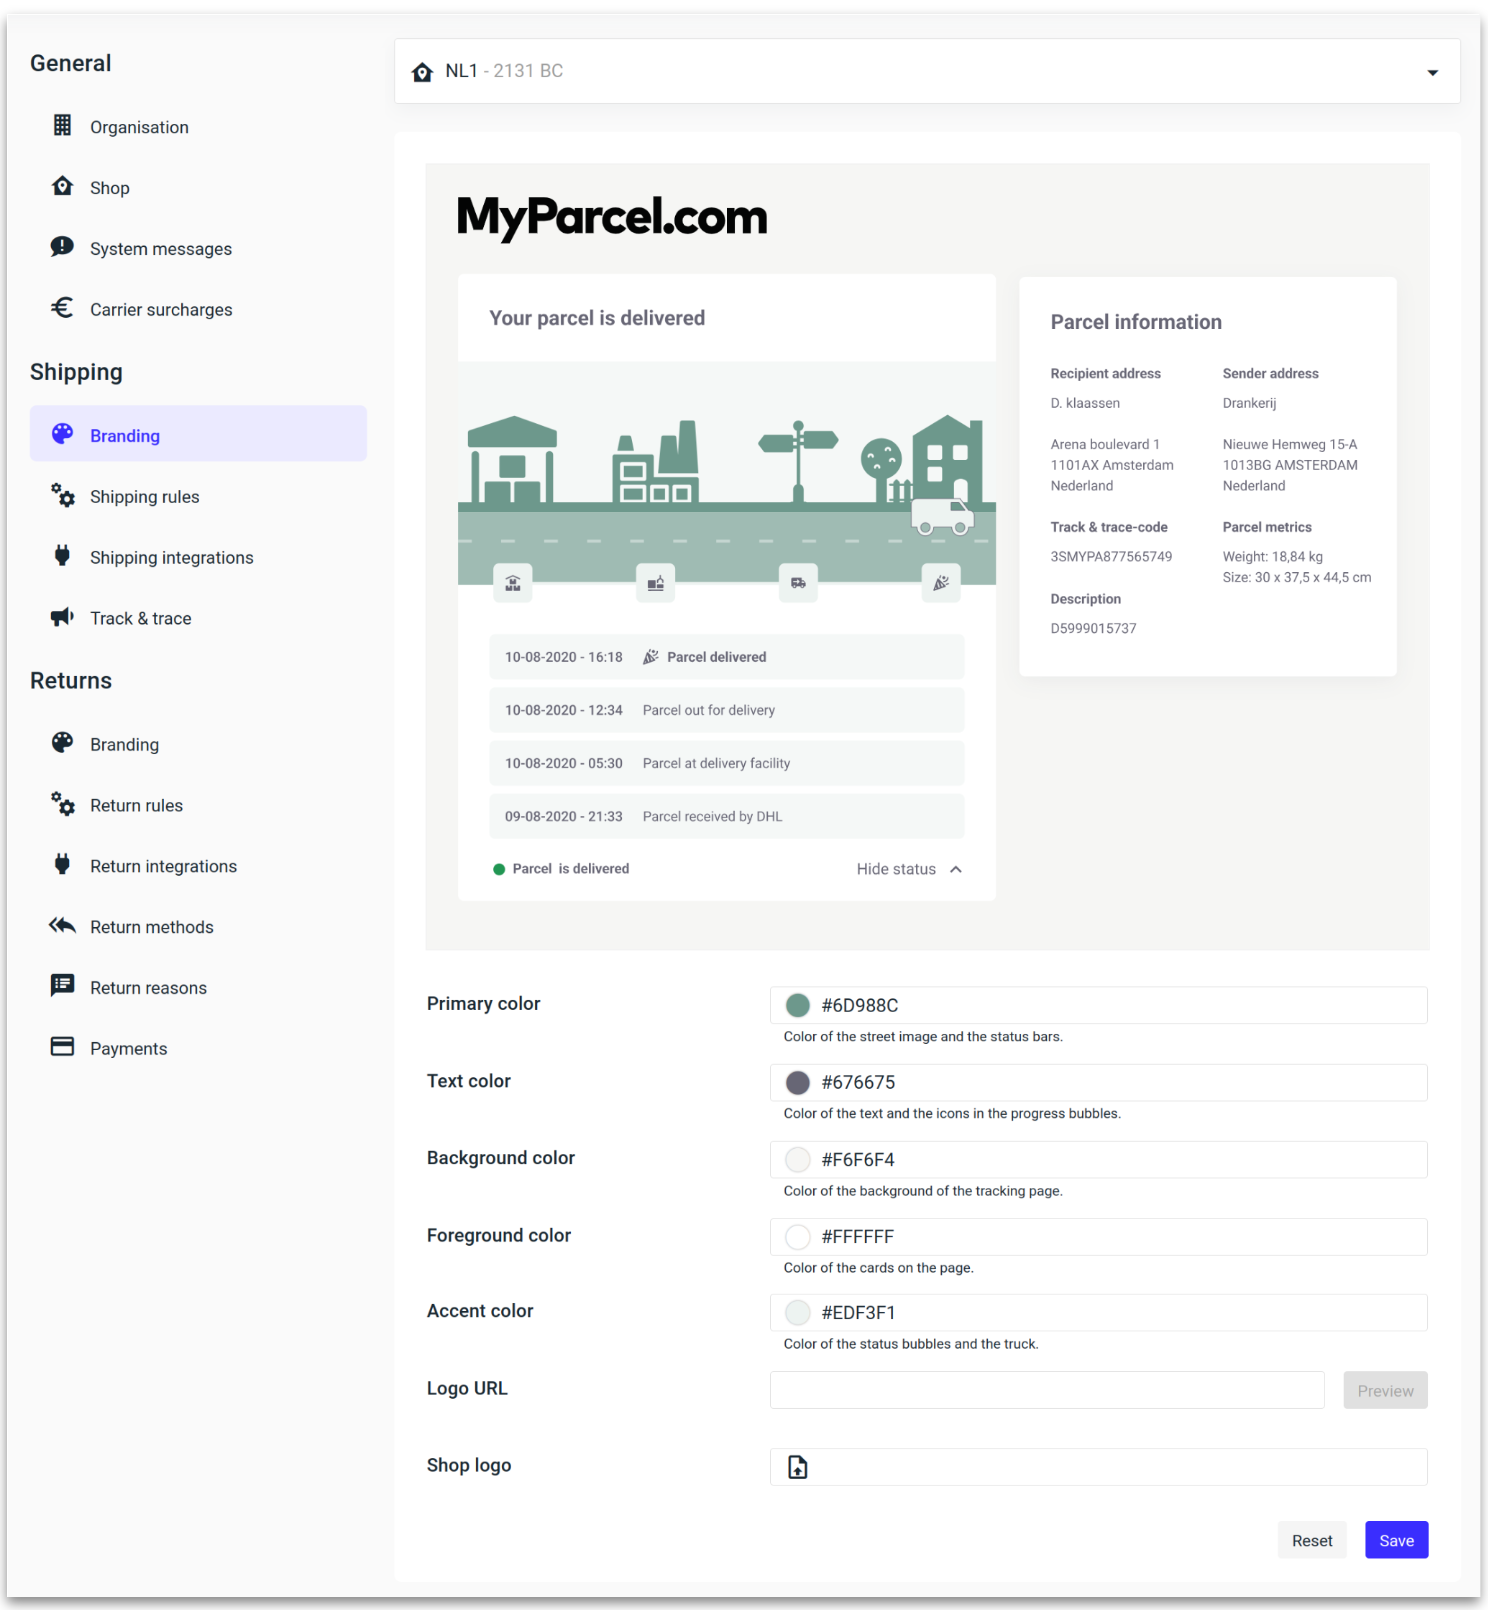
To customise the colours, click on any of the colour fields to access the palette, and click “Confirm” once your preferred colour has been selected.
Colour field guide
Primary colour: Colour of the street image and the tracking status bars.
Text colour: Colour of the text and outline of the van.
Background colour: Background colour.
Foreground colour: Colour of the cards on top of the background.
Accent colour: Colour of the milestone statuses and van.
Logo URL: Utilise a URL link to attach your logo.
Shop logo: If you do not have a URL for your logo, you can upload the logo directly.