.png)
Warehouse Manifests
A Warehouse manifest is a document that lists all of the items that are being shipped; the shipper uses this document to track the items within the manifest and the re receiver uses this document to verify that all of the items have been received.
Warehouse manifests
Warehouse manifests are ideal for 3PLs who either directly inject into the carriers network or have structural collections arranged.
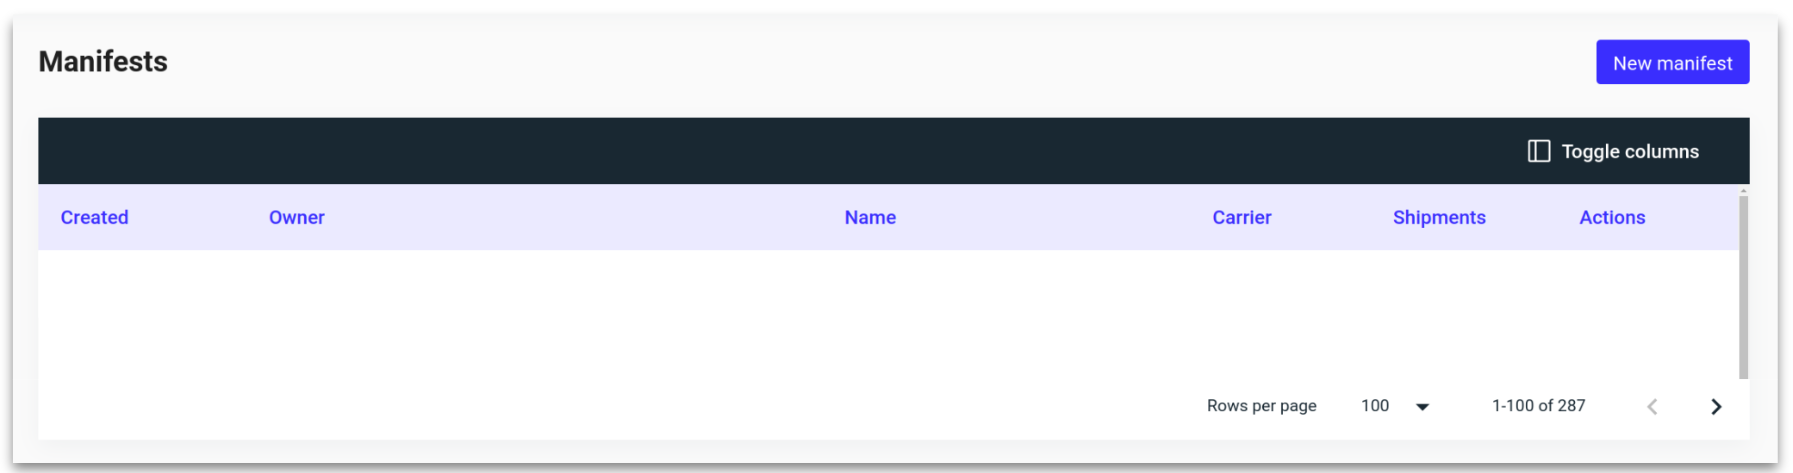
Navigate to ‘Manifests’ at the top of the MyParcel.com portal.
Once on the Manifests page click the “New manifest” button towards the top right of the page.
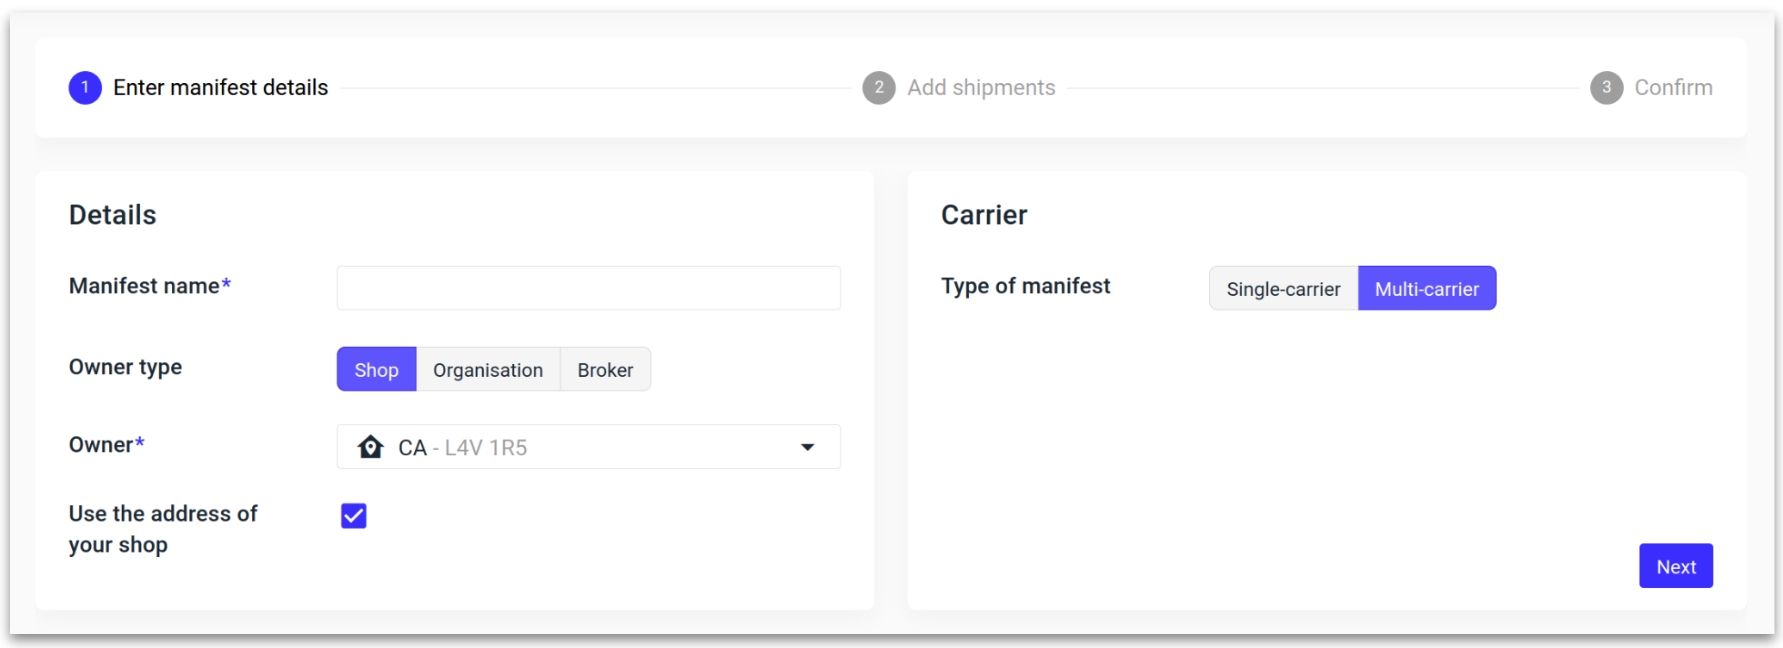
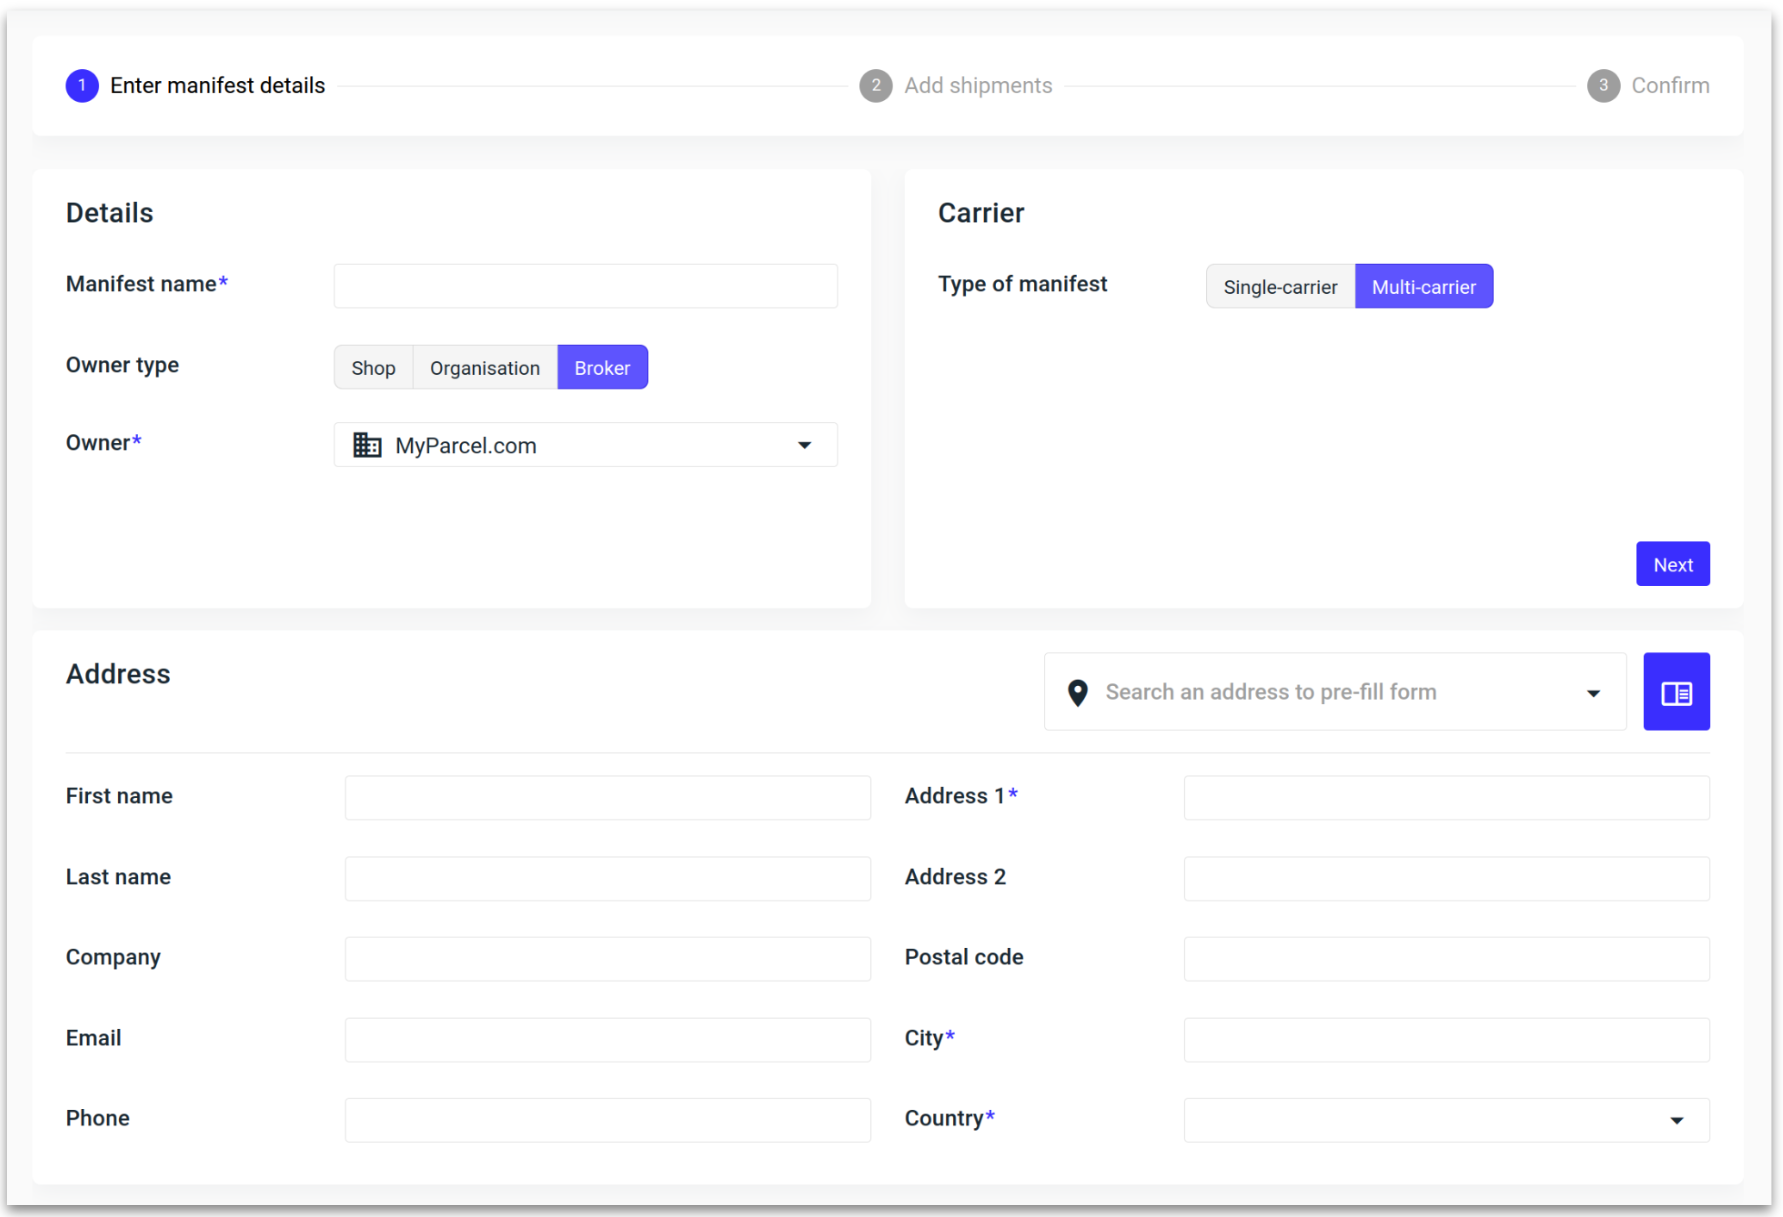
Set the requirements for the manifest, folowed by clicking “Next.”
Manifest name
Owner type:
Shop: Shipments from one shop only.
Organisations: Shipments for all shops under an organisation.
Broker: All shipments created.
Type of manifest
Single carrier: All shipments belong to the same carrier.
Multi carrier: Shipments from multiple carriers can be added to a single manifest.
When selecting either ‘Organisation’ or ‘Broker’ as the owner type, a shipping address is required - use either the address suggestion or address book to quickly populate the form.
4a. Barcode scanner: The barcode scanner can be activated by clicking on the black barcode icon.
Once activated you can start scanning shipment barcodes. The scanned barcodes will appear in the overview.
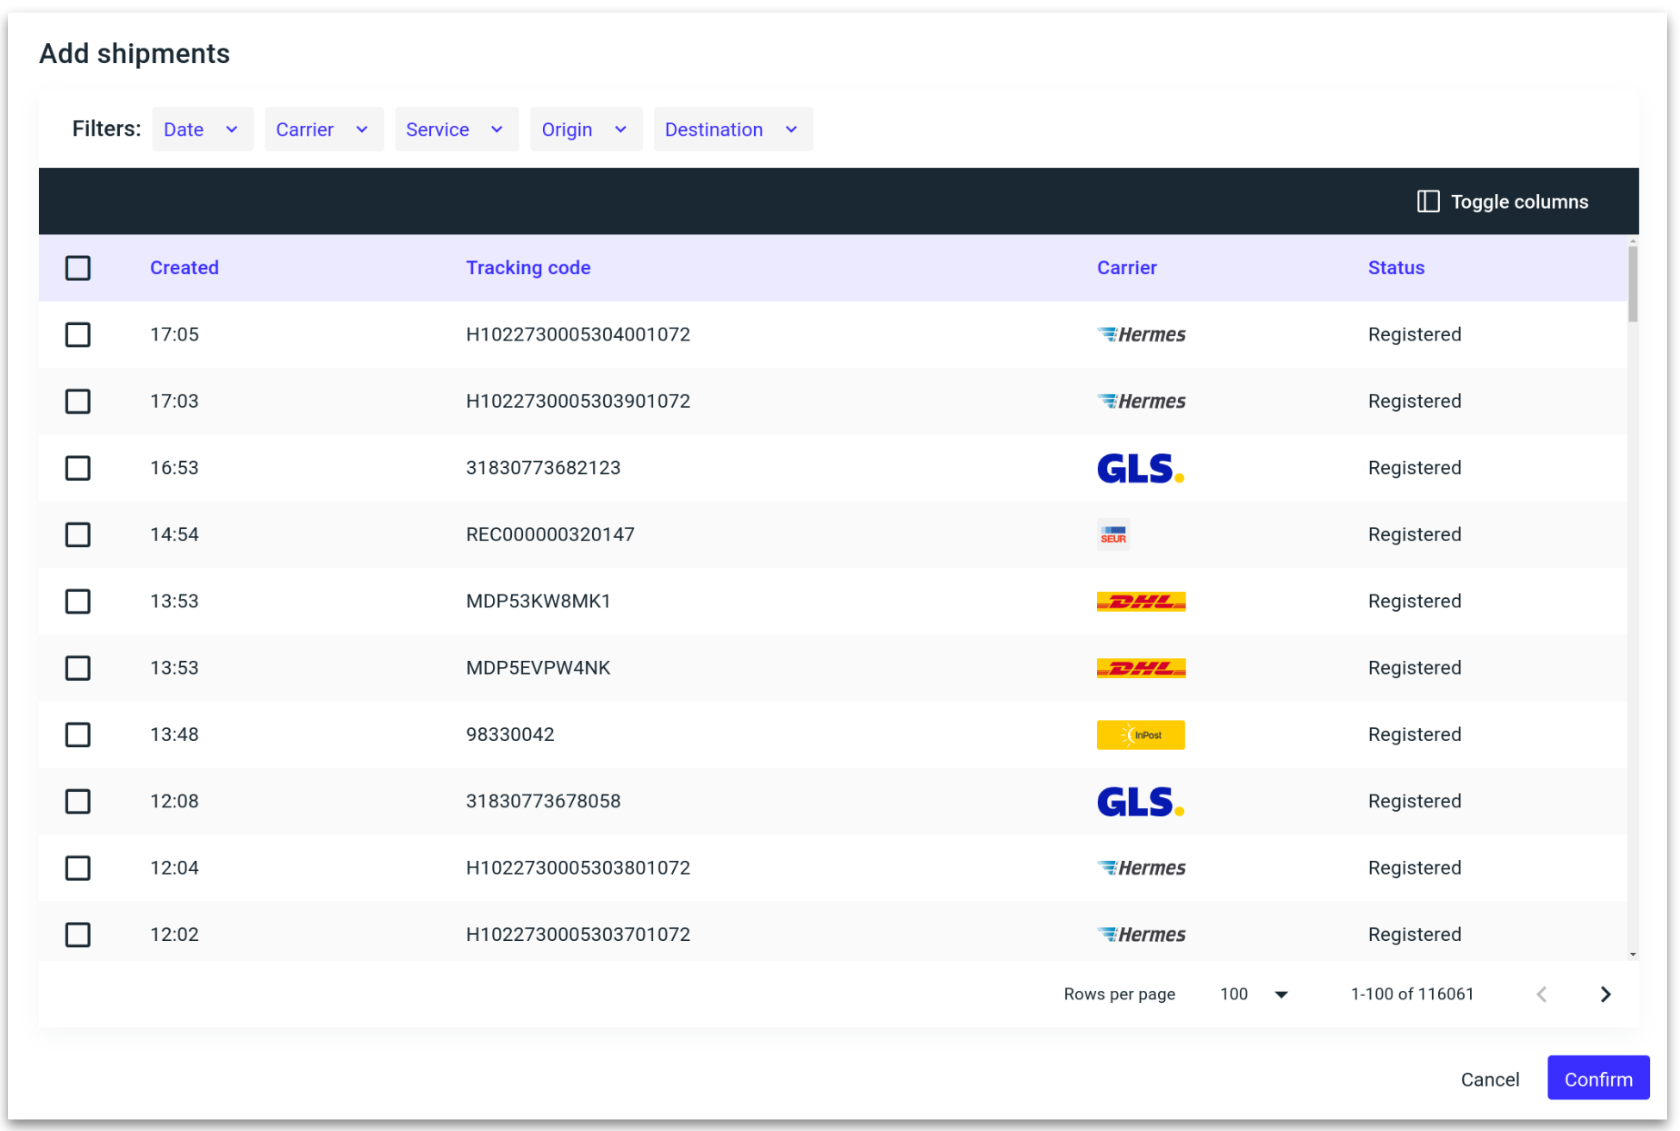
4b. Manual select: Select shipments from a list by clicking the “Add shipments” button.
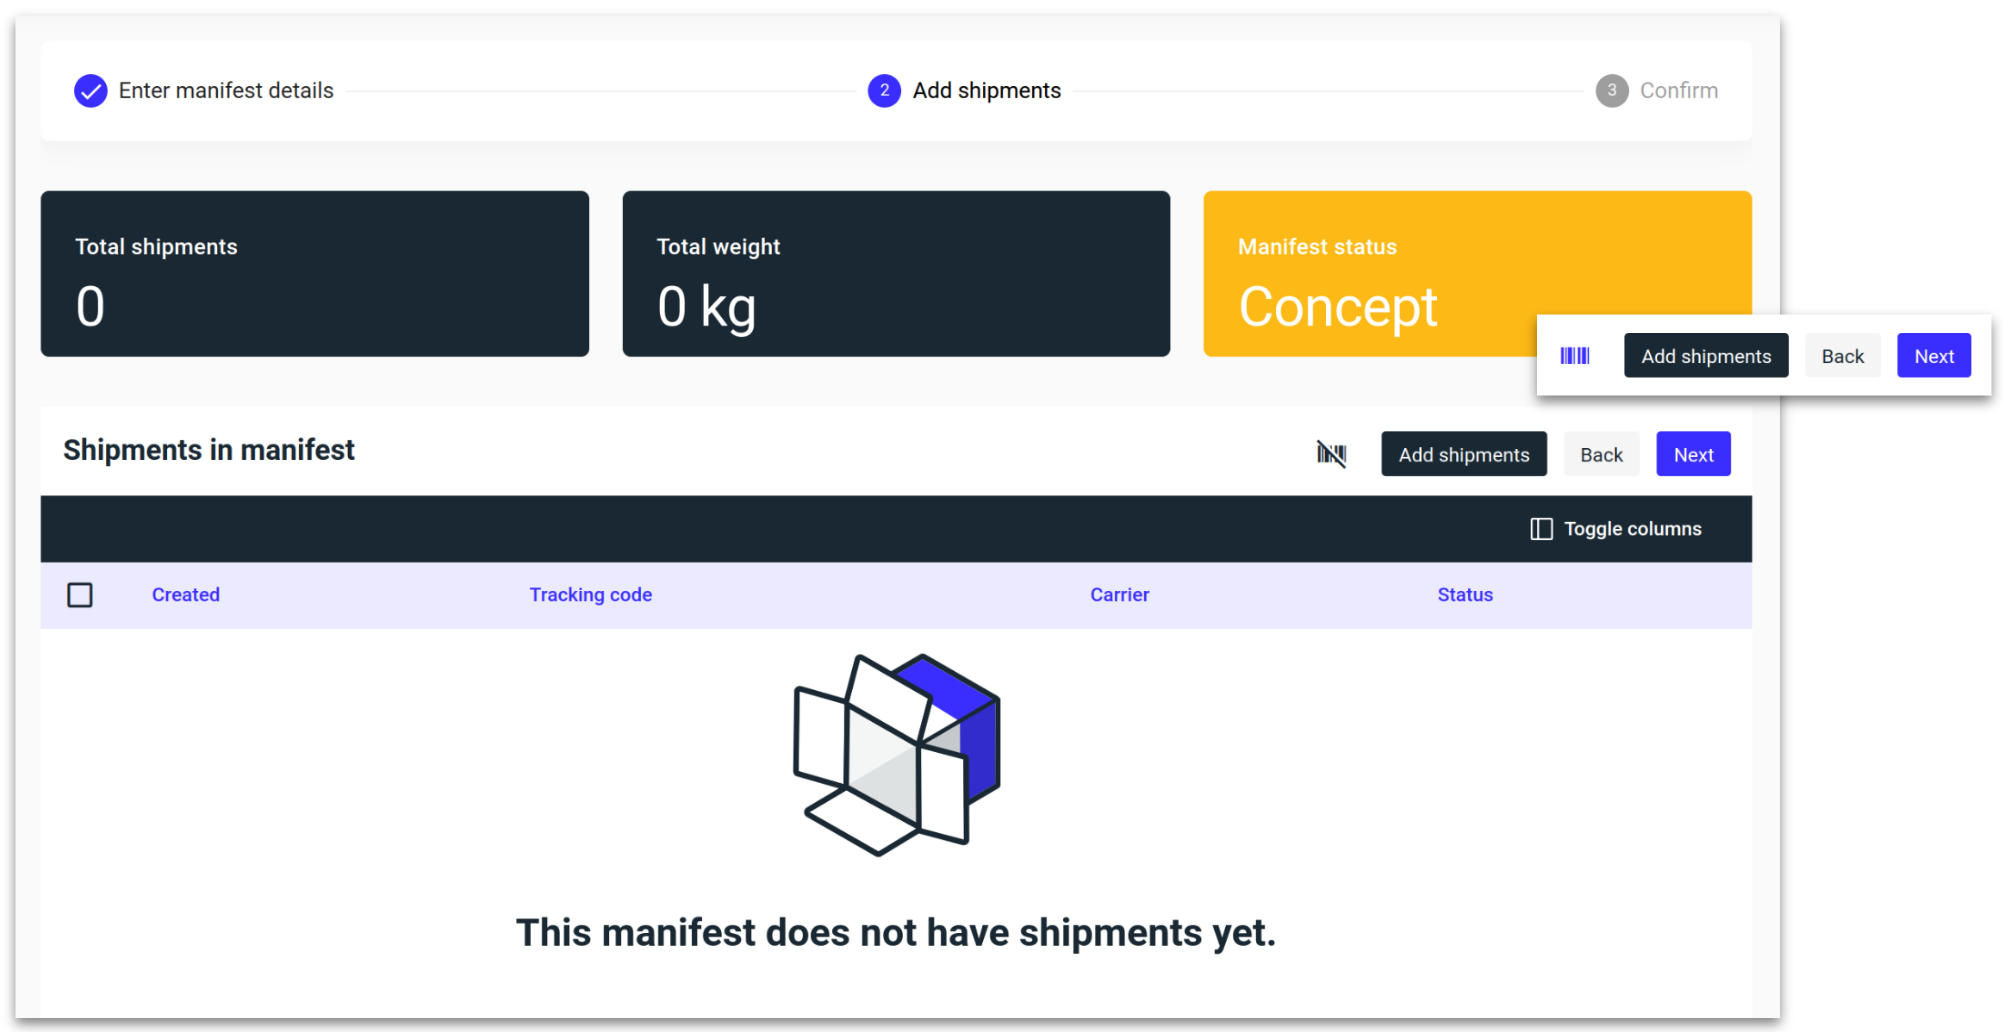
When adding shipments manually a window will pop up with all available shipments that can be added to your manifest. Select the required shipments and then click “Confirm.”
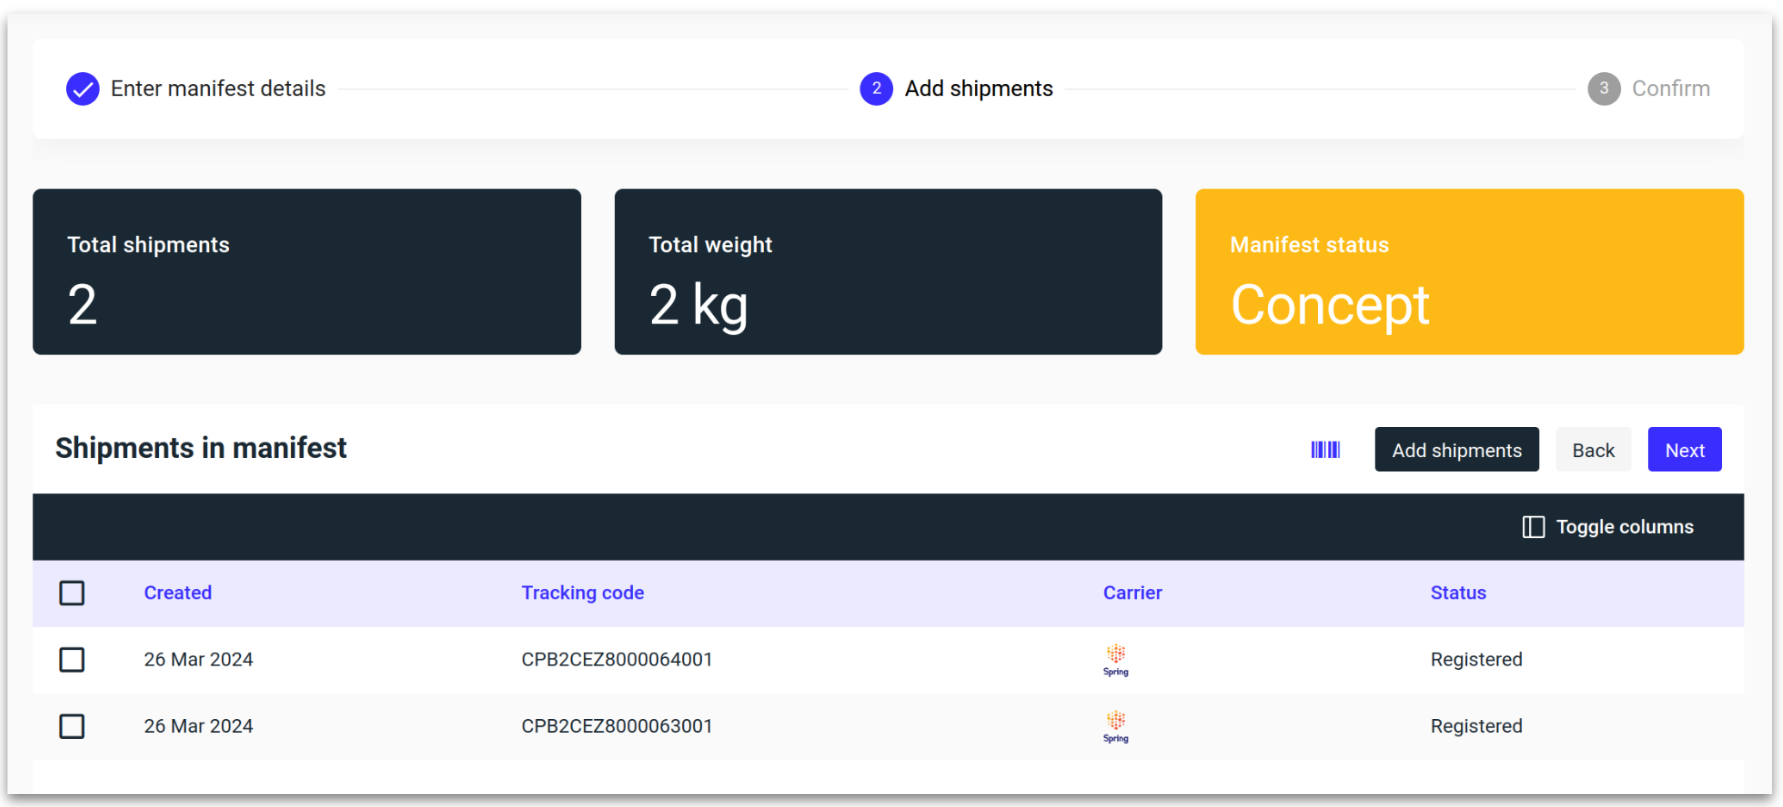
The total number of shipments you have selected and the total weight of the selection will be displayed at the top of the page.
Click “Next.”
Confirm the details and then click “Save.”
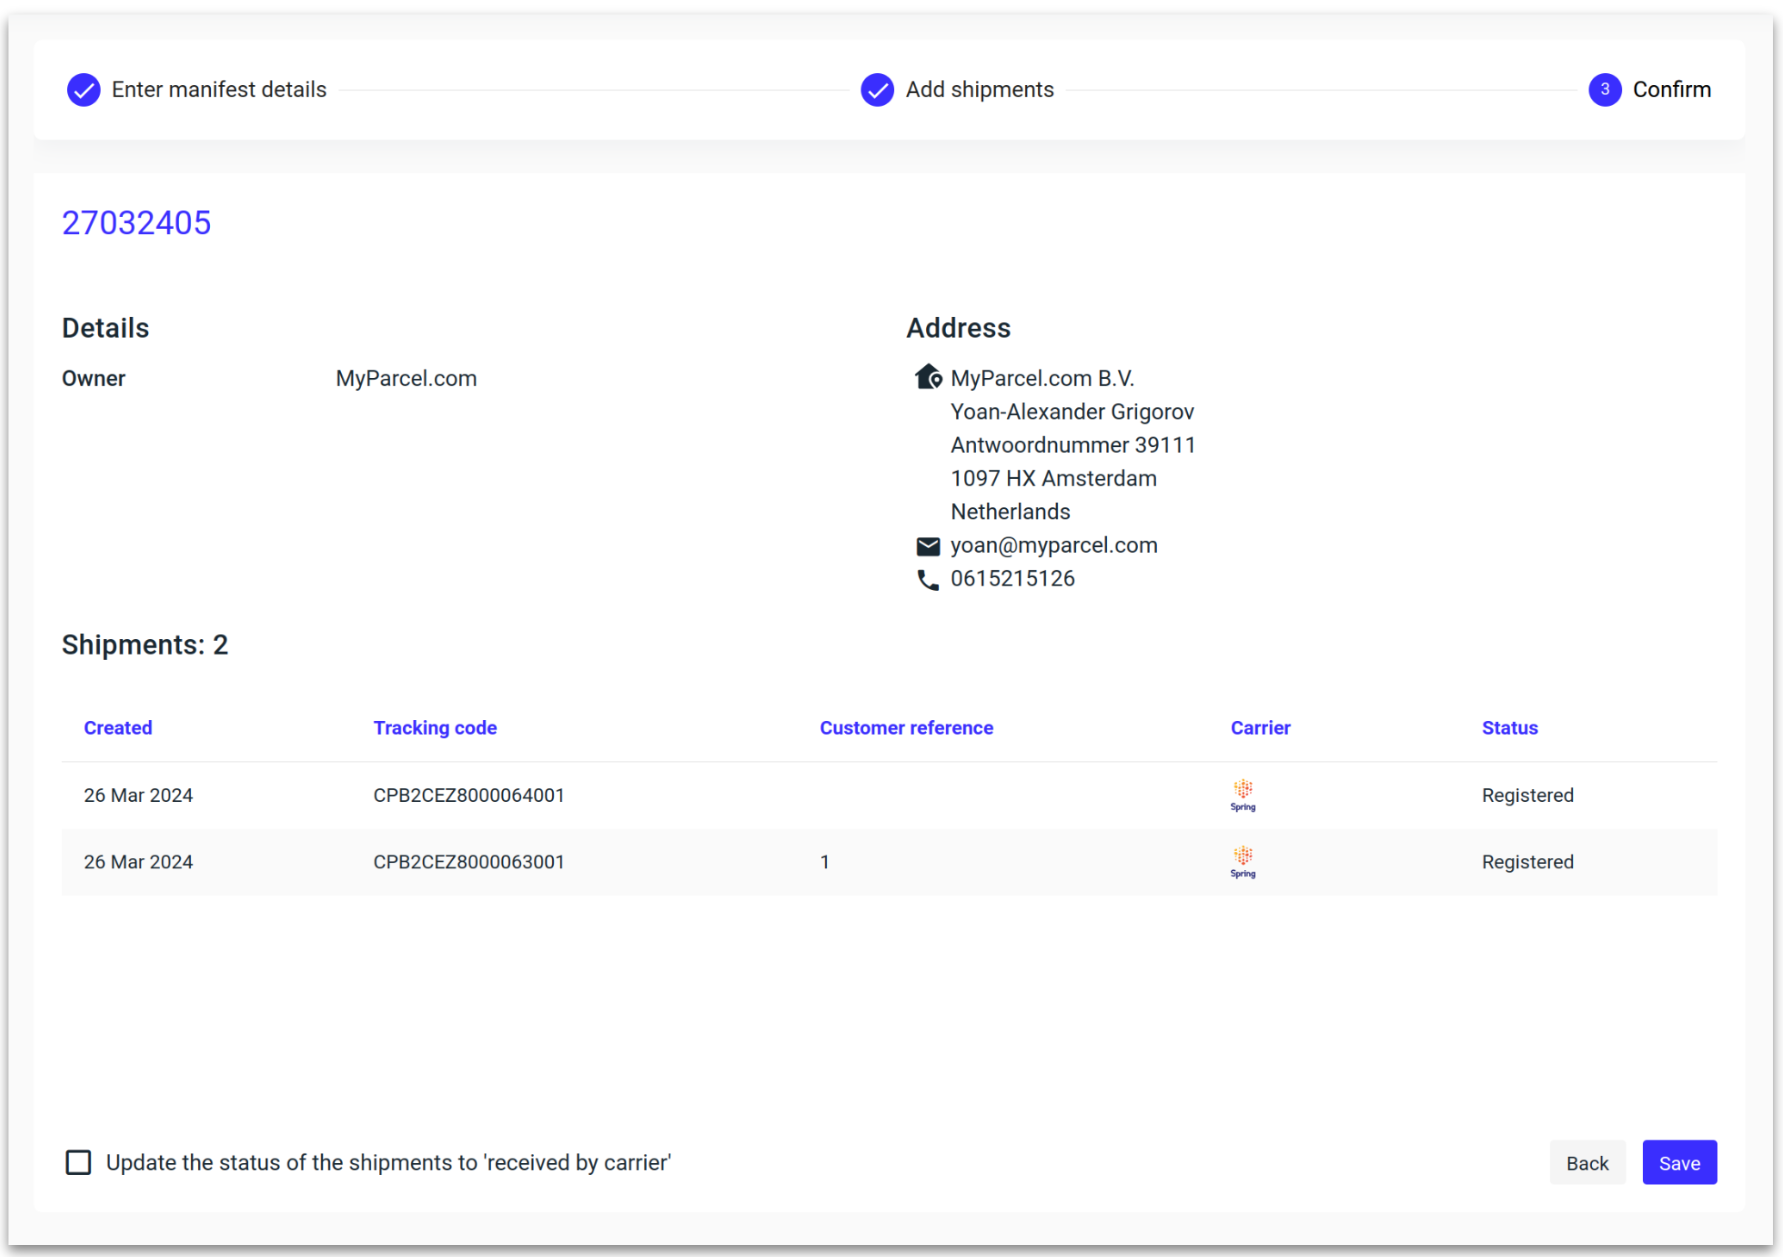
'Update the status of the shipment to ‘received by carrier’ provides additional visibility to a shipment that has entered the network of a 3PL prior to being handed over to the respective carrier.

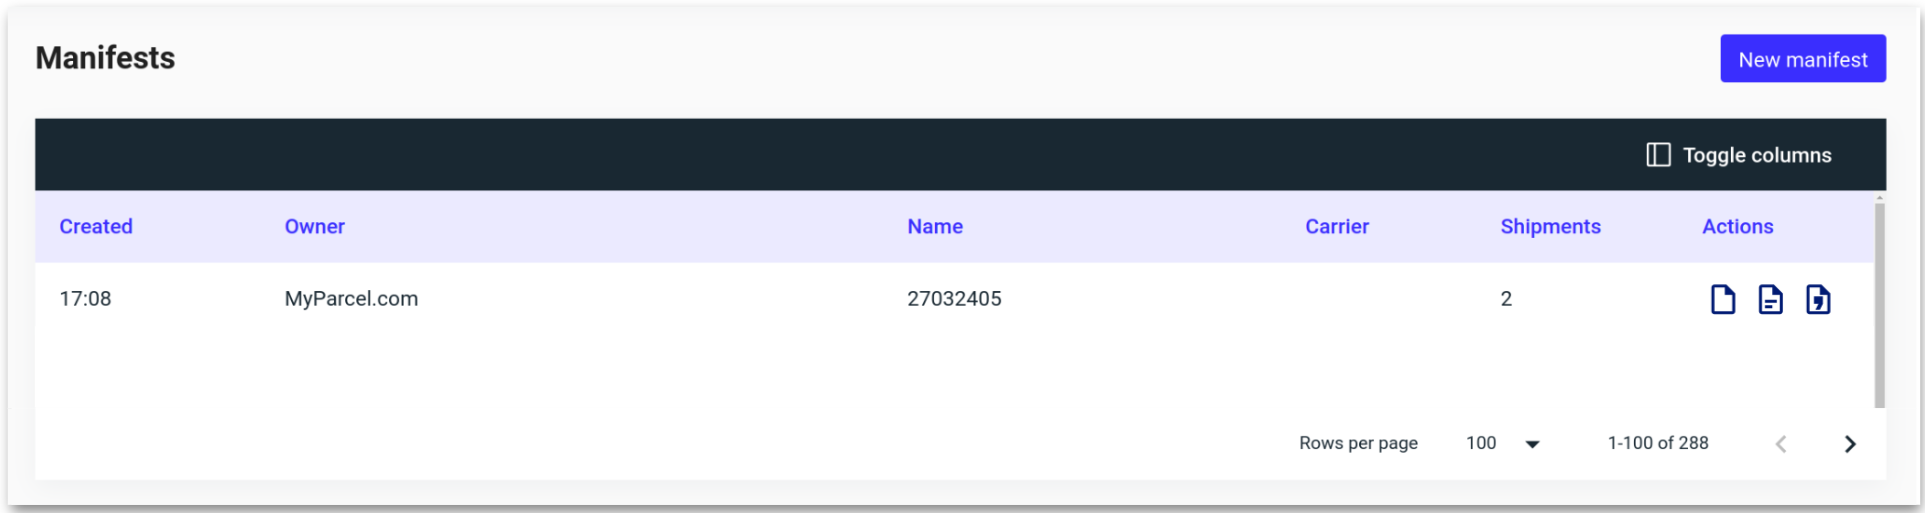
After saving you will now be redirected to the manifest overview where you can download your manifest.
You can export 3 different types of manifests using the Action icons towards the right-hand side of the page.
Summarised PDF.
Itemised PDF.
Itemised CSV - Includes all product information.